Shop and storage barn

/ Shop and storage barn #1  

hayden

Elite Member
Joined
Sep 23, 2000
Messages
2,743
Location
VT
Tractor
Kubota L5740 cab + FEL, KX121, KX080, Deere 6120M
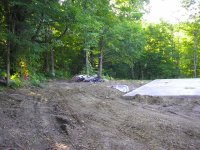
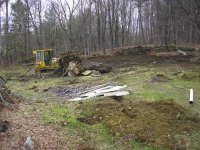
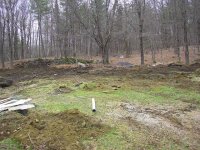
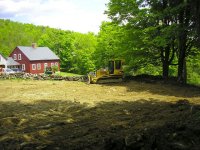
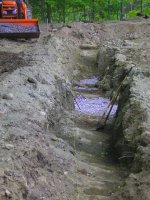
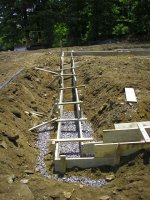
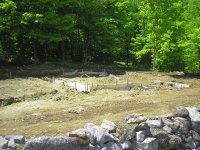
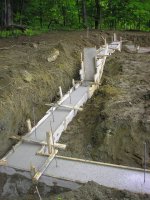
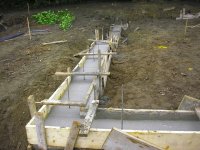
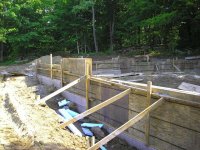
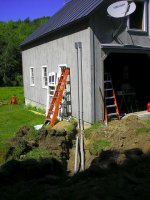
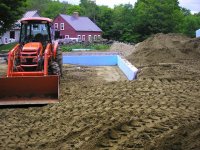
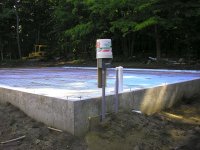
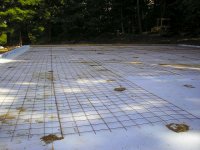
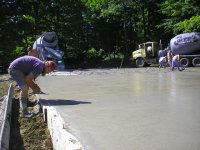
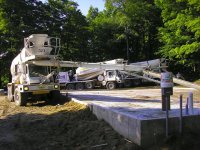
This summer I'm building a work shop and storage barn. The total structure will be 48' x 60', split into a 36' x 48' work shop and 4 garage stalls for cars, implements, etc. taking up the remaining 24' x 48'. I've started on the site work and the first steps have been to clear a bunch of larger rocks/stones, and remove a couple of trees.

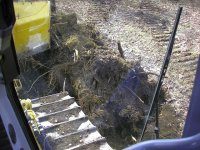
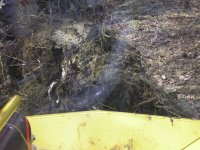
The first picture is one example of a tree stump and one of these big rocks. The dozer gives some perspective to the size of these things. By the way, I'm loving this dozer. That stump is from a tree that I just pushed over. You just dig in a bit ahead of the stump and push and lift and over she goes. I cut up the branches and logs and used the tractor and grapple to stack the logs and branches for later splitting and chipping.

That rock is a real mother. I'd say it's 6' x 3' x 3'. The dozer plowed it out of the ground to where you see it in the picture. I later shoved the stump off the edge of and area where I'm bringing up the grade and then pushed the rock over to create a solid side to the backfill area. That's where I'm putting all the giant rocks, and there are plenty of them.

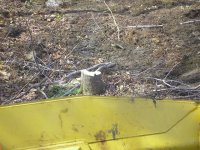
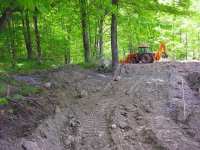
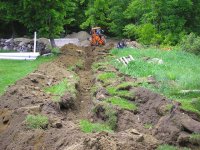
Next was digging out the other stumps The first two I dug out with the backhoe until I remembered how easily that tree had come down, so I switched to the dozer. In the pictures I drive up to each stump, then dig it out. These are not huge, but they are maples and are in the ground hard. One was about 8"-9" in diameter and the other was about a foot. The smaller came out in a single pass, and the larger took a couple of side cuts then it poped right out.

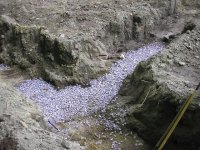
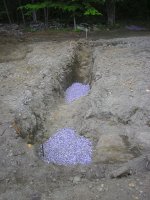
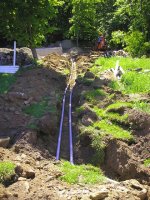
I've got lots of ledge and have loosened and removed a few rocks the size of sofas, but some of it's in real hard. We'll see how the building elevations work out, but there is at least one chunk I'll have to drill and break out if it's solid ledge. Do far I can't detected any movement.
 

Attachments

  • PCH_2008-04-27-0013.JPG
    PCH_2008-04-27-0013.JPG
    124.4 KB · Views: 514
  • PCH_2008-04-27-0016.JPG
    PCH_2008-04-27-0016.JPG
    106.7 KB · Views: 371
  • PCH_2008-04-27-0012.JPG
    PCH_2008-04-27-0012.JPG
    122.8 KB · Views: 405
  • PCH_2008-04-27-0019.JPG
    PCH_2008-04-27-0019.JPG
    111 KB · Views: 424
  • PCH_2008-04-27-0018.JPG
    PCH_2008-04-27-0018.JPG
    115.1 KB · Views: 430
  • PCH_2008-04-27-0017.JPG
    PCH_2008-04-27-0017.JPG
    91.2 KB · Views: 335
/ Shop and storage barn #2  
Have you chosen a type of barn you are building? Pole? Steel? Manufacturer? Keep us updated on your project throughout the summer...and of course...pictures! I need a 48'x60'!!!
 
/ Shop and storage barn
  • Thread Starter
#3  
I think it will be frost walls with a slab poured on top. We've discussed a floating slab, but I feel better with frost walls, especially with all the ledge. From there is will be a stick framed building, barn board exterior, insulated and heated, with a standing seam roof. I haven't decide on how to do the heat, but it will probably be baseboard HW.
 
/ Shop and storage barn #4  
That site prep looks like a lot of fun, especially with the dozer.
I am also interested to see what kind of building you'll put up, and what it will look like.
 
/ Shop and storage barn
  • Thread Starter
#5  
More progress has been made. Here are some pictures of the site graded out and ready to dig the trenches for the footings and frost walls.
 

Attachments

  • PCH_2008-05-27-0012.JPG
    PCH_2008-05-27-0012.JPG
    116.8 KB · Views: 298
  • PCH_2008-05-27-0013.JPG
    PCH_2008-05-27-0013.JPG
    101.2 KB · Views: 349
  • PCH_2008-05-27-0014.JPG
    PCH_2008-05-27-0014.JPG
    118.1 KB · Views: 250
  • PCH_2008-05-27-0015.JPG
    PCH_2008-05-27-0015.JPG
    129 KB · Views: 344
/ Shop and storage barn
  • Thread Starter
#6  
Here are the trenches. They look terrible because of all the ledge. Everything has been dug down to solid rock and the foundation guys will certainly earn their pay forming this up. The crushed stone is to fill the divots where I over-dug and where there was clay that I dug out. The corner pins were all set with a surveying instrument. It's the first time I've used one and so far I'm very impressed by what you can do with one. I measured out the pins (including the diagonal) with a steel tape once I was done with everything and it was all nuts-on.
 

Attachments

  • PCH_2008-05-27-0026.JPG
    PCH_2008-05-27-0026.JPG
    121.5 KB · Views: 242
  • PCH_2008-05-27-0025.JPG
    PCH_2008-05-27-0025.JPG
    93.7 KB · Views: 255
  • PCH_2008-05-27-0024.JPG
    PCH_2008-05-27-0024.JPG
    87 KB · Views: 297
/ Shop and storage barn
  • Thread Starter
#7  
Today the foundation guys showed up - at least for a little while - and formed up some of the footings. It's real ugly stepping up and over all the ledge, but this is the last time anyone will see it...
 

Attachments

  • PCH_2008-06-02-0045.JPG
    PCH_2008-06-02-0045.JPG
    98.1 KB · Views: 313
  • PCH_2008-06-02-0046.JPG
    PCH_2008-06-02-0046.JPG
    110.5 KB · Views: 268
  • PCH_2008-06-02-0047.JPG
    PCH_2008-06-02-0047.JPG
    107.7 KB · Views: 299
  • PCH_2008-06-02-0049.JPG
    PCH_2008-06-02-0049.JPG
    114 KB · Views: 218
/ Shop and storage barn
  • Thread Starter
#8  
The first set of footings got poured today. You can see from all the up and down how much ledge they had to work around. The area that's formed and poured is for the 36' x 48' shop. The next section which will hopefully get formed and poured tomorrow will be for the attached 24' x 48' garage bays for misc vehicles, boats, and tractor implements.
 

Attachments

  • PCH_2008-06-03-0072.JPG
    PCH_2008-06-03-0072.JPG
    95.6 KB · Views: 317
  • PCH_2008-06-03-0070.JPG
    PCH_2008-06-03-0070.JPG
    86.8 KB · Views: 257
  • PCH_2008-06-03-0069.JPG
    PCH_2008-06-03-0069.JPG
    103.9 KB · Views: 250
  • PCH_2008-06-03-0059.JPG
    PCH_2008-06-03-0059.JPG
    92.8 KB · Views: 232
/ Shop and storage barn
  • Thread Starter
#9  
Here's a quick progress update on the shop/garage.


First is the final pour for the frost walls.

The next is the power and low-voltage conduit. The first shot shows the path marked out on the grass, then the trench. I tried for 24" and go tit in most places, but not quite all. Then we have the conduit.

One 2" conduit is for AC - one circuit carrying power out to the shop, and another bringing generator power back to the Solar power system. I decided to relocate the generator to the garage to get the noise further away from the house.

The second conduit is for misc low voltage items like phone, ethernet, alarm system, generator control, etc. These have to be separate from the AC both for code and to prevent noise in the low voltage signals.
 

Attachments

  • PCH_2008-06-10-0094.JPG
    PCH_2008-06-10-0094.JPG
    103.4 KB · Views: 276
  • PCH_2008-06-11-0096.JPG
    PCH_2008-06-11-0096.JPG
    126.8 KB · Views: 227
  • PCH_2008-06-11-0098.JPG
    PCH_2008-06-11-0098.JPG
    130.2 KB · Views: 210
  • PCH_2008-06-12-0100.JPG
    PCH_2008-06-12-0100.JPG
    132 KB · Views: 239
  • PCH_2008-06-12-0101.JPG
    PCH_2008-06-12-0101.JPG
    81.1 KB · Views: 315
/ Shop and storage barn
  • Thread Starter
#10  
This set shows the process of backfilling the foundation in prep for pouring the slab. First, the inside of the frost walls are insulated, then we backfilled with a foot of compacted sand plus filling in the trenches around the footings. It took two days with 3-4 people working non-stop. One shuttling sand in the tractor, one or two spreading, and the last on the compactor.

Over those two days we moved and compacted about 270 yrds of sand. Thats 540 trips with the tractor!
 

Attachments

  • PCH_2008-06-12-0105.JPG
    PCH_2008-06-12-0105.JPG
    68.7 KB · Views: 266
  • PCH_2008-06-12-0108.JPG
    PCH_2008-06-12-0108.JPG
    95.6 KB · Views: 235
  • PCH_2008-06-17-0129.JPG
    PCH_2008-06-17-0129.JPG
    113.5 KB · Views: 206
  • PCH_2008-06-17-0132.JPG
    PCH_2008-06-17-0132.JPG
    71.4 KB · Views: 194
  • PCH_2008-06-19-0141.JPG
    PCH_2008-06-19-0141.JPG
    100.2 KB · Views: 257
  • PCH_2008-06-17-0137.JPG
    PCH_2008-06-17-0137.JPG
    113.5 KB · Views: 256
  • PCH_2008-06-17-0135.JPG
    PCH_2008-06-17-0135.JPG
    117.4 KB · Views: 165
  • PCH_2008-06-17-0134.JPG
    PCH_2008-06-17-0134.JPG
    88.7 KB · Views: 222
  • PCH_2008-06-19-0145.JPG
    PCH_2008-06-19-0145.JPG
    97.3 KB · Views: 262
/ Shop and storage barn
  • Thread Starter
#11  
The final step is a layer of insulation over the sand and wire mesh to reinforce the slab.

It looks like a giant swimming pool.

That's my temporary power panel under the bucket.
 

Attachments

  • PCH_2008-07-01-0146.JPG
    PCH_2008-07-01-0146.JPG
    80.1 KB · Views: 296
  • PCH_2008-07-01-0148.JPG
    PCH_2008-07-01-0148.JPG
    80.5 KB · Views: 258
/ Shop and storage barn
  • Thread Starter
#12  
Wednesday was slab-pour day. At one point we had 4 cement trucks dancing around each other.
 

Attachments

  • PCH_2008-07-02-0164.JPG
    PCH_2008-07-02-0164.JPG
    84.1 KB · Views: 255
  • PCH_2008-07-02-0160.JPG
    PCH_2008-07-02-0160.JPG
    104.2 KB · Views: 241
  • PCH_2008-07-02-0158.JPG
    PCH_2008-07-02-0158.JPG
    102.1 KB · Views: 226
/ Shop and storage barn
  • Thread Starter
#13  
Yesterday the first delivery of materials arrived, including the two steel beams that will enable a clear span in the shop. You can see the finished slab, and check out those beams!
 

Attachments

  • PCH_2008-07-03-0178.JPG
    PCH_2008-07-03-0178.JPG
    93.9 KB · Views: 271
  • PCH_2008-07-04-0187.JPG
    PCH_2008-07-04-0187.JPG
    111.1 KB · Views: 249
  • PCH_2008-07-04-0188.JPG
    PCH_2008-07-04-0188.JPG
    115.3 KB · Views: 246
  • PCH_2008-07-04-0189.JPG
    PCH_2008-07-04-0189.JPG
    103 KB · Views: 275
/ Shop and storage barn
  • Thread Starter
#14  
After all the work getting the foundation and slab in I concluded that I needed to remove another maple tree. I was hoping to save it, but as part of the grading and trenching I had already cut a number of big roots, and I'll never be able to get the grade right around that side of the building. So, this morning, out it came.

The first picture shows the grade around the building and the offending tree. It's the one with the trash pile at it's base. I think you can see how the grade slopes towards the foundation and is at or above the foundation top. My goal is to have the finished grade 1 foot below the slab top, so it needs to come down a good foot.

The next picture shows the tree on the ground and me starting to limb it. I put a choker around the tree and used the tractor and winch to be sure the tree didn't inadvertently fall onto the new slab since that's the way it was leaning. The fall was a bulls-eye. Axe men stand aside - there's a new kid in town :D .

And here's the space with the tree removed. Now there's room to cut down the grade and not leave a tree that will be dead in 5 years and REALLY hard to remove without damage. Tomorrow I'll fire up the dozer and have at the stump and grade.
 

Attachments

  • PCH_2008-07-04-0185.JPG
    PCH_2008-07-04-0185.JPG
    118 KB · Views: 226
  • PCH_2008-07-04-0182.JPG
    PCH_2008-07-04-0182.JPG
    98.8 KB · Views: 211
  • PCH_2008-07-01-0155.JPG
    PCH_2008-07-01-0155.JPG
    120 KB · Views: 214
/ Shop and storage barn #15  
Looking great Peter! Thanks for sharing all the photos as the project evolves. I will be looking forward to seeing the building go up.

MarkV
 
/ Shop and storage barn #16  
Great project Peter. That is going to be awesome...so much space! You will have to buy more toys. By the way...very nice property you have there.
 
/ Shop and storage barn
  • Thread Starter
#17  
Thanks, I'm really looking forward to seeing it go up too:D . I go back and forth on the size. Sometimes I look at it and it seems really excessive, and other times I wonder how I'm going to fit everything. The garage bays will fill up real fast. There's a boat, utility trailer, dozer, truck, gator, and field mower all competing for the 4 garage bays, plus one will be partially consumed by the generator. The shop will house all the other tractor implements, tractor, and whatever is being worked on at the time. I think it will fill up real fast.

I'll be fixing the grade on that one side today, then switch attention back to the solar power project.
 
/ Shop and storage barn #18  
WOW!!! Like everything you do, this is looking awesome. I'm looking forward to your updates just because I know that with you building it, there's going to be some interesting workmanship involved.

The foundation is a piece of beauty that I bet most people don't have a clue how complicated and dificult it was to get just right. Very nice!!!

Eddie
 
/ Shop and storage barn
  • Thread Starter
#19  
Thanks, Eddie, but I can only take credit for small parts of the work. I'm fortunate to have found an excellent builder so I use him for everything. The foundation crew was really good too.
 
/ Shop and storage barn
  • Thread Starter
#20  
Well, that took longer than I expected. Today's project was to remove the maple stump and cut down the grade on the west side of the shop. The removed material then needed to be used on the north-east corner to build up a roadway that wraps around the building.

Here are pictures of the stump up close and in context. I didn't measure it and am too lazy to go out now and measure it, but I'd guess it's 20" where I cut it. You can see how the ground slopes down from the stump base towards the foundation - not good for drainage.

The third picture shows the corner that needs to be built up. Everything should be up at the level of that small pile covering the electrical conduit
 

Attachments

  • PCH_2008-07-05-0190.JPG
    PCH_2008-07-05-0190.JPG
    107.2 KB · Views: 203
  • PCH_2008-07-05-0192.JPG
    PCH_2008-07-05-0192.JPG
    103.1 KB · Views: 197
  • PCH_2008-07-05-0195.JPG
    PCH_2008-07-05-0195.JPG
    136.7 KB · Views: 198
 
Top