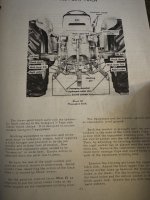
Looking at the trans/draulic oil, someone has let it set out in the weather. Rainwater will enter into the transmission around the shifter. If you park it inside, or under the lean-to pictured it should pretty much eliminate that problem.
If you tried starting it in that cold spell we had a few weeks back, both the engine oil and trans/draulic oil was pretty thick, it really drags them down. Water in the transmission oil didn't help. That oil is made by design to absorb water and keep it suspended in itself, so the water won't go to the bottom and freeze solid and possibly do damage to internal parts.
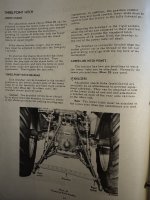
Seeing it's that contaminated, it will probably take several oil changes (with the least amount used to make everything function) to completely purge the system of water. I'd use the least expensive hydraulic oil you can find to do that. You'll have to cycle all loader functions quite a few times to get cleaner oil in them, 3 pt. too. I would help if you drained the loader hoses to remove at least that much. Whether it's resting on the ground or safely blocked up. Resting on the ground would be best and safest and relieve pressure on all loader functions.
I looked up the hydraulic/transmission capacity and looks to be 8 to 14 gallons depending on the setup. Front mounted pump takes more. If that is the case, I'm thinking 5 gallons per purge flush may be enough. But guess that is yet to be determined.
You'll want to change the hydraulic filter too. I looked the filter up through Case/IH, and they aren't cheap @ $56 a pop. However, I found a Baldwin filter for $19 at All
State tractor parts.
Baldwin® Transmission Filter Element fits International 424 444 392532R91 fits White fits Oliver fits Minneapolis Moline fits Gleaner For that price I'd probably get 2. I'd probably change before adding the first round of flush oil, then once completed install the second filter. It's not going to be a cheap fix, but not as bad as it could be, between using OEM, and aftermarket oils & filters. It's a good bet the filter is made by Baldwin or Wix for Case/IH anyway. The "Premium" Trans/Draulic oils from TSC, or Rural King should be good enough. I've been using both in my Farmall 656 for over 20 years with no issues.
The filing's in the oil is more than likely 50 years worth of grinding gears going from forward to reverse, or just cramming it in gear from the get-go. Seems loader tractors are the worst for this as PO's have got the clutch hot and may have warped the clutch disk a bit, or just simply don't let the transmission spin down before trying to put in gear. These aren't synchronized transmissions, just simple straight gear transmissions. So you need to let it come to a complete stop before changing directions or let the transmission spin down. If your magnet will stick to the pan, you could always get a couple of the rectangular magnets they sell at Harbor Freight, or other place and put in the bottom of the pan to collect any filing's that may get flushed out later. I do that on my smaller IH tractors I've gone through and found such filing's, just for peace of mind.
Hard to say on the popping. It could be moisture causing a miss fire jumping across internally, or externally. You'll find when it has been cold like we've had a few weeks ago, then warms up quicker that the metal and other parts of the tractor they will go through what I call the "Spring sweats", especially when the humidity is high. Moisture will condense on the metal parts and parts like the distributor cap transferring to cold through the metal parts. This can happen inside or outside. One of the things you look for when checking oil and coolant levels. If it ran fine that last time you used it, there's a good chance moisture is the culprit. You can simply wipe it off, but something like starter fluid, carb./brake cleaner, spray rubbing alcohol can speed the process, just be sure to let it set for a bit, and completely dry.
Looks like I got carried away with my explanations again, so I'll stop for now.