My NX6010

   / My NX6010
  • Thread Starter
#81  
Coors will be fine!

Coors Light won our neighborhood cheap garage beer shootout several years ago.

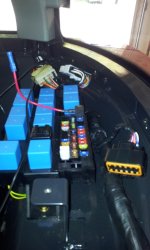
Today I installed 2 LED flood lights in four hours. Four hours.

The easy part is removing the stock lights and tugging out the wiring harness and stock rubber grommet. Then instead of what I first tried, grab the multi-hole bit and drill out the mounting bracket to 1/2." Then instead of like me, don't try to install the whole light at once. No, take the LED mounting bracket off and grind the rear nubs down by 1/4" to get the clearance for mounting. Hit it with black paint and look at it dry for an appropriate amount of time. Then mount just the bracket and shim it with 8 washers to space it down. You can try lesser amounts like I did, but it turns out that 8 washer shims is the magic number.

Next, fiddle around with loosening and tightening the slide mount on the LED light itself. The LED light can only be mounted off-center. After that find the longest 5mm ball-end allen you have and in a very fiddly fashion, install the four bolts that hold the mount to the LED light.

Whatever you do, don't install compatible with the stock wiring harness electrical connectors on the bench. Instead, wing the stock rubber grommet partially covered by the rear window and slip your LED's wiring through the big, grommetless hole. Only after running the wiring through the grommetless hole should you then crimp on compatible with stock electrical connectors. While your there, connect the lLEd lights up to the stock wiring harness.

Now find your own appropriate sized grommet and slice it open so you can get it on the LED lights wiring. While holding open the stupid window that covers the hole, just so, fight your grommet into place.

You'll be done in an hour. 2 hours if you have a beer.

10523915_10202695277082589_2631886395537015623_n.jpg
 
   / My NX6010 #82  
Can't wait till you get it dirty!
 
   / My NX6010 #83  
10500310_10202583764734850_8340042166765226340_n.jpg


where did you get the piggy back fuse? Never saw one before. Neat!
 
   / My NX6010 #85  
Amazon brings me many things but these things can be found in auto parts stores.

I'd not seen one either until Eric clued me in. The low-profile mini add-a-fuse in Eric's photo is harder to find than the standard profile, but slightly more compact, as it sits about 2 mm lower. I needed the lower profile so my fuse tray cover would fit over it after I wired my back-up monitor and camera. Couldn't find it at two retailers locally, so ordered on eBay from Funbient in CA $5.99 incl. shipping, and it arrived USPS in three days. :shocked: I'd post a link, but I don't know if TBN's Terms of Service permit links to eBay.
 
   / My NX6010
  • Thread Starter
#86  
Today I was distracted by other things but I did get out my 5" cut-off wheel to cut down the right front work light bracket that is too wide to hold the standard LED light bracket. In preparation of sparks and Kioti paint, I taped everything up including a 1/4" board on the front widscreen in case I slipped with the grinder. It all went well. Tomorrow, weather permitting, I'll install the final 36w LED light (for a total of 180w of "Let there be light!" goodness surrounding the cab) and get back to work sizing hoses.

10354233_10202702983155236_1135506939704889292_n.jpg
 
   / My NX6010 #87  
Eric, great progress on the LED lights. They'll be able to see you working at night from the International Space Station. ;)

While we're talking about the NX-series fuse box, do you know what orange connector in the lower right of the attached pic is for? I'm guessing it's for the Kioti wiring harness for the 7-pin trailer kit.

Also, if you decide to relocate your back-up camera monitor from the door handle, here's how mine looks mounted to the dash/cowling with the original mount that came with it.


Monitor mount pic.jpg

I was doing some road grading yesterday with a 7' box blade, and it was nice to be able to keep my eyes straight ahead at the same time I watched both the material in the BB and the track of the right side of the BB when grading to the edge of the road. When grading in reverse, I didn't have to twist around to see where I'm going. Very slick.

I did end up rerouting the monitor cable through the dedicated chase under the floor mat after I was able to pull the left interior fender cover. Much better installation than what I'd previously planned, which was to route it in a molded recess of the floor mat.
 

Attachments

  • Connector pic.jpg.jpg
    Connector pic.jpg.jpg
    114.4 KB · Views: 335
Last edited:
   / My NX6010
  • Thread Starter
#88  
Eric, great progress on the LED lights. They'll be able to see you working at night from the International Space Station. ;)

While we're talking about the NX-series fuse box, do you know what orange connector in the lower right of the attached pic is for? I'm guessing it's for the Kioti wiring harness for the 7-pin trailer kit.


Also, if you decide to relocate your back-up camera monitor from the door handle, here's how mine looks mounted to the dash/cowling with the original mount that came with it.


View attachment 386194

I was doing some road grading yesterday with a 7' box blade, and it was nice to be able to keep my eyes straight ahead at the same time I watched both the material in the BB and the track of the right side of the BB when grading to the edge of the road. When grading in reverse, I didn't have to twist around to see where I'm going. Very slick.

I did end up rerouting the monitor cable through the dedicated chase under the floor mat after I was able to pull the left interior fender cover. Much better installation than what I'd previously planned, which was to route it in a molded recess of the floor mat.

I don't see the attached photo. Under advanced, select and upload, then post. :)

Good job on routing the cable. Far safer there. FWIW, I did not want to obscure my forward view. For that reason I mounted the monitor on the right side door.

Edit: I see that you edited the attachment. As I recall from the service manual, the orange plug is the diagnostic plug. Only special connector and special software can use it. The seven (round) pin trailer connector plugs right into an unused plug behind your washer fluid reservoir without any additional fuses or relays needed (although I have not tested mine to see if it works, I did get a 7 pin to 7 blade adaptor from Hopkins though).
 
Last edited:
   / My NX6010 #89  
<snip>

While we're talking about the NX-series fuse box, do you know what orange connector in the lower right of the attached pic is for? I'm guessing it's for the Kioti wiring harness for the 7-pin trailer kit.

It might be for diagnostic use with a code reader?
 
   / My NX6010 #90  
[snip]
The seven (round) pin trailer connector plugs right into an unused plug behind your washer fluid reservoir without any additional fuses or relays needed (although I have not tested mine to see if it works, I did get a 7 pin to 7 blade adaptor from Hopkins though).

Thanks. I'll have to put a test light on my plug. I'm wondering if one of the pins (e.g. maybe at 6:30 o'clock) could be a back-up light circuit. If so, hooking up the auto-switch feature (blue wire) from the monitor would be easy. A wireless camera on the FEL could be Vid 1; switching to Vid 2 would be automatic upon back-up.
 
   / My NX6010 #91  
<snip>

While we're talking about the NX-series fuse box, do you know what orange connector in the lower right of the attached pic is for? I'm guessing it's for the Kioti wiring harness for the 7-pin trailer kit.

It might be for diagnostic use with a code reader?

Thanks, CM. Looks like you nailed it. :thumbsup:
 
   / My NX6010
  • Thread Starter
#92  
Thanks. I'll have to put a test light on my plug. I'm wondering if one of the pins (e.g. maybe at 6:30 o'clock) could be a back-up light circuit. If so, hooking up the auto-switch feature (blue wire) from the monitor would be easy. A wireless camera on the FEL could be Vid 1; switching to Vid 2 would be automatic upon back-up.

The backup light circuit uses the one open relay socket in your fuse box to the immediate right (as you sit in the tractor) of the black flasher. It also needs the switch installed (a thing i have not done yet).
 
   / My NX6010 #93  
The backup light circuit uses the one open relay socket in your fuse box to the immediate right (as you sit in the tractor) of the black flasher. It also needs the switch installed (a thing i have not done yet).

Ah yes, I remember seeing that open relay socket, and the relay diagram on the underside of the relay/fuse compartment cover, when I had things apart last weekend. Everything's buttoned back up, but as I recall, the relay diagram said something like "Back-up/Beacon." Does that sound right? I'd wondered when I saw that whether the optional beacon that mounts at or on the bracket for the Slo Mo Vehicle sign is intended to operate only when backing up. I concluded probably not, but don't know.

I may want to add the beacon. Wish I could find an information source online for Kioti accessory kits, or even a brochure. The Kioti website doesn't appear to have that info. Maybe I'm not looking in the right place.
 
   / My NX6010 #94  
With all the cameras,lights and such, on those tractors, you guys could add a remote control and never have to leave the house. Or is that next?
 
   / My NX6010 #95  
do you have room for a bottle/can cooler in there?
 
   / My NX6010 #96  
With all the cameras,lights and such, on those tractors, you guys could add a remote control and never have to leave the house. Or is that next?

Hee, hee, Eric's the one really tricking out his new tractor, as he's planning on working it pretty hard in a real estate development project. No doubt all his modifications will pay off for him quickly, especially working at night. As for me, I'm just enjoying adding a few modest accessories here and there. After freezing and baking my hiney off for 20 years on my little workhorse open-station B2150, I'm thoroughly enjoyed the comforts of HVAC, stereo/NOAA weather radio (gotta keep an ear tuned for those tornado threats), full suspension seat, tilt steering wheel, and those all important cup holders for my hot and cold beverages. :) My wife actually insisted I get the new tractor after I came in with mild frostbite last winter. Call me crazy, but I'm actually looking forward to the first big snow storm this winter. No way would I give that up to sit in the house and run the tractor by remote control. :laughing:
 
   / My NX6010 #97  
do you have room for a bottle/can cooler in there?

Great idea. :thumbsup: But no, I'd have to give up the space behind the seat where I have the tool bag! Maybe Eric can figure out how to fit one in.
 
   / My NX6010
  • Thread Starter
#98  
Great idea. :thumbsup: But no, I'd have to give up the space behind the seat where I have the tool bag! Maybe Eric can figure out how to fit one in.

I only left myself one unused 12v power point behind the access panel on the right side and that is destined to be used on an air seat. I'd get the airseat right now, but I have a bad back and the Grammer distributer can completely customize a seat with harder or softer foam, low, mid, high back, mechanical, air or take it completely out lumbar support and so forth. In other words, I plan to drag the entire tractor over to them as comfortable seating is something I fret over.

All to say that I didn't think I'd need a bottle can cooler/heater thingy because I already have a solution:

41yMFhnolLL.jpg


Today, tractor wise was a miscellany day. I finished fiddling around with the front lights, and bolted the cab cap back down. The front lights are far more generous with the spacing than the rear lights. I do not know why. I also chased off to the metal shop for bracket material, ordered some hard lines which I don't know if I'll use, but at least I can show a hard line shop and say, make it 12" longer with a 66 degree bend at the end. I also hooked up to the power beyond, so hopefully the slow hydro leak will now stop. I plan to try to do a light test of all my lights tonight when it gets very dark.

10603646_10202708617176083_8584924542454362883_n.j  pg


Edit: I made a short video of the result of upgrading the lights. My video doesn't do it justice. I'm pleased with the result.

 
Last edited:
   / My NX6010
  • Thread Starter
#99  
This evening I basically fiddled around fabbing a bracket that holds the 3rd function quick disconnects on the loader bearing. Originally, I planned to weld it on, but welding would have required removing the four existing hoses and their related hardware. After awhile I talked myself down and decided that bolting the bracket on with stainless locking hardware was good enough. The part is now baking away at 185 degrees all night to harden the Kioti charcoal-colored paint.

10616424_10202714811570939_4441073054319558980_n.jpg
 
   / My NX6010
  • Thread Starter
#100  
I plan to mount my 3rd function disconnects below and inboard of the 1st and 2nd function disconnects. If Kioti mounted their stock quick disconnect plate just one inch higher, it would be much easier to add an additional set of quick disconnects without the need to off-set them.

10577173_10202719234921520_3499072136332636533_n.jpg
 

Tractor & Equipment Auctions

2019 GALYEAN EQUIPMENT CO. 150BBL STEEL (A58214)
2019 GALYEAN...
2019 CHEVROLET SILVERADO CREW CAB TRUCK (A59823)
2019 CHEVROLET...
CATERPILLAR 72" HANG-ON WHEEL LOADER FORKS (A60429)
CATERPILLAR 72"...
2015 Ford Fusion Sedan (A59231)
2015 Ford Fusion...
2023 FORD F-150 XL CREW CAB TRUCK (A59823)
2023 FORD F-150 XL...
2012 JACK COUNTY 130 BBL STEEL (A58214)
2012 JACK COUNTY...
 
Top