Educate me on beefing up the FEL bucket to add hooks

   / Educate me on beefing up the FEL bucket to add hooks
  • Thread Starter
#21  
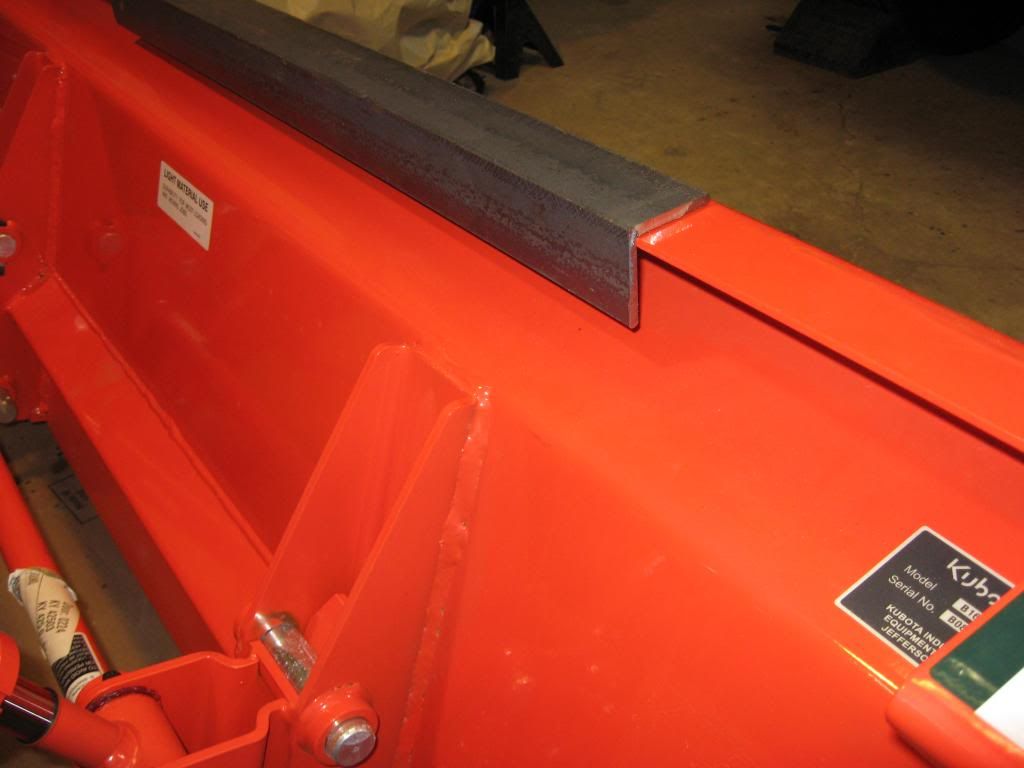
I would put the angle on the front of the bucket. Reason being, when the chain, or wire rope choker wraps over the heel of the angle less chance on bending it. If the toe of the angle iron is out front it will bend in time. I think I'd run the angle iron out all the way to the edge of the bucket.

OK, that makes sense. I started thinking about the D ring too. If I put the angle on the front, I could weld the D ring to the front vertical section of the angle in the center of the bucket so I could use that for rope or S hook straps.
 
   / Educate me on beefing up the FEL bucket to add hooks #22  
Putting angle on the front, like in the second picture, won't give you much additional strength. Even if you completely face welded them together. You put it on the back side to make a tube. The idea is to put the width in line with the direction of pull, and then put something at a 90 degree angle to keep it from twisting. Think I-beam or angle iron.
Don't poo poo the bolt on hooks just because you have a welder. They are used because they don't weaken the area they are mounted to. If you are worried about them loosening, spot weld the nut.
 
   / Educate me on beefing up the FEL bucket to add hooks #23  
Putting angle on the front, like in the second picture, won't give you much additional strength. Even if you completely face welded them together. You put it on the back side to make a tube.


Thats what I would do as well and was my first thought when I saw the pictures. I would overhang the angle too past your hooks a decent distance if you dont plan on going all the way to spread out the weight/ twisting forces. The angle on the front of the lip could still tear and peel up the rounded bend, at least if the angle is on the backside its helping out the front lip by spreading the stress out.

Ps- the bucket looks pretty stout, if it were me I would think you could just gusset the top lip to the bucket top in the area of the hook placement, but that my opinion.
 
   / Educate me on beefing up the FEL bucket to add hooks #24  
Putting angle on the front, like in the second picture, won't give you much additional strength. Even if you completely face welded them together. You put it on the back side to make a tube. The idea is to put the width in line with the direction of pull, and then put something at a 90 degree angle to keep it from twisting. Think I-beam or angle iron.

Thats what I would do as well and was my first thought when I saw the pictures.
You two have a really good point. I wonder about using two pieces of angle iron one front and back. But the back one would have to be structural angle where one leg is longer than the other. That way he could get a weld down on the back of the bucket. Or weld a piece of flatbar to the toe of the angle iron so the flatbar could be welded to the back of the bucket. Make your own C-channel with one long leg.
 
   / Educate me on beefing up the FEL bucket to add hooks #25  
I welded some 3/8 stock on top and underside lip of my bucket, then welded on the hooks and a 2-5/16 ball.
 

Attachments

  • 0327111410.jpg
    0327111410.jpg
    688.6 KB · Views: 740
   / Educate me on beefing up the FEL bucket to add hooks #26  
I think that someone has already said this, but keep in mind that this is a tractor that will lift 1065lbs at the pivot and 730lbs at just under 20inches out. Just how strong does it need to be? It's not like we are talking about an M model here. I know that it needs to be done right, but I would be considering the actual capacity of the loader for what really needs to be done. ;)

just my :2cents:
 
   / Educate me on beefing up the FEL bucket to add hooks #27  
Not wanting to hijack the thread here but wanted to know how you like the piranha toothbar?
 
   / Educate me on beefing up the FEL bucket to add hooks #28  
I think that someone has already said this, but keep in mind that this is a tractor that will lift 1065lbs at the pivot and 730lbs at just under 20inches out. Just how strong does it need to be? It's not like we are talking about an M model here. I know that it needs to be done right, but I would be considering the actual capacity of the loader for what really needs to be done. ;)

just my :2cents:
^^^^^^^^^^^^^^^
What he said! Great point Brian.
 
   / Educate me on beefing up the FEL bucket to add hooks #29  
That's why I didn't get too carried away with my bracing. Welding the flat bar between the rear lip and the back of the bucket formed a box section of steel, and that's strong enough for anything I'll do with it.

Most of us over-build things, I've been doing it for so long now that I have to tell myself "You really aren't building a bridge here.."

I find that the Kubota buckets are built pretty strongly to begin with.

Sean
 
   / Educate me on beefing up the FEL bucket to add hooks
  • Thread Starter
#30  
Not wanting to hijack the thread here but wanted to know how you like the piranha toothbar?

I haven't had a chance to wring it out yet but based on all the reviews I could find all the users love them. The edge on the teeth are really sharp so if I build up enough speed, I could probably mow the lawn with it!
 
   / Educate me on beefing up the FEL bucket to add hooks #31  
I want to stitch/skip weld the angle to the bucket so I don't warp anything.

I'm not an expert, but I suspect that you don't absolutely need to do a full seam weld all the way around the angle. That being said, if you did want to fully weld it up, backstepping would be one approach to use. When you backstep, you skip ahead 6" or so, then weld backwards toward your previous bead. This gives the beginning of your current bead extra time to cool down while you finish the bead and then set up the next bead. Backstepping is probably more effective with stick welding, where you have to chip slag and brush the weld before tying in another bead. With MIG, you could finish the bead and immediately go on to the next 6" section. Still, it'd probably make some difference.
 
   / Educate me on beefing up the FEL bucket to add hooks #32  
I welded some 3/8 stock on top and underside lip of my bucket, then welded on the hooks and a 2-5/16 ball.

That's exactly what I did, except I welded on a 2" receiver tube instead of a ball. With the ball on top of the bucket, I couldn't get it under the coupler of my trailer. I use a ball mount with 6" or so of drop. Also, the 2" receiver tube leaves the mounting location open for other uses, should they arise.

I considered using angle iron, but the profile of my bucket didn't leave an obvious place to put it, except across the front, and I kind of liked the curved profile of the top lip better than the sharp profile of angle iron. If my little tractor can bend a piece of 3/8" flat stock (plus 1/8" of bucket metal), I'll eat my hat.
 
   / Educate me on beefing up the FEL bucket to add hooks
  • Thread Starter
#33  
That's why I didn't get too carried away with my bracing. Welding the flat bar between the rear lip and the back of the bucket formed a box section of steel, and that's strong enough for anything I'll do with it.

Most of us over-build things, I've been doing it for so long now that I have to tell myself "You really aren't building a bridge here.."

I find that the Kubota buckets are built pretty strongly to begin with.

Sean

That's my problem, I always tend to overbuild everything. Based on what everyone has suggested I'm going with a 3X3 piece of angle mounted on the back of the lip like this. (this is a piece of 2X2 that I put there just to show what I'm talking about)

IMG_5234_zps112c8115.jpg


I just went out and measured again. The top flat portion of the 3X3 will stop about 1/4 inch or so before the radius of the bucket lip downturn starts so I'll have enough space to run some beads. The back/lower leg of the 3X3 will hit the back of the bucket about half way between the lower radius and the back edge of the top lip. A bunch of weld beads along there will hold that together and make a box. The flat top of the 3X3 will give me a good surface to weld the hooks on to.

I appreciate all the input!
 
   / Educate me on beefing up the FEL bucket to add hooks #34  
Here's a pic of the "hooks" I've used on two tractors. This is the bucket of the B7500 I had. The L3200 sports very similar angles. They work nice because all you need to do is drape the chain into the slots and they hold it at any link. If using a longer than needed chain, it's simple to drop the excess into the slots to keep ut out of the way

View attachment 301056

Great Idea. Wish I had thought about that before I welded hooks on.
 
   / Educate me on beefing up the FEL bucket to add hooks #35  
I'm not an expert, but I suspect that you don't absolutely need to do a full seam weld all the way around the angle. That being said, if you did want to fully weld it up, backstepping would be one approach to use. When you backstep, you skip ahead 6" or so, then weld backwards toward your previous bead. This gives the beginning of your current bead extra time to cool down while you finish the bead and then set up the next bead. Backstepping is probably more effective with stick welding, where you have to chip slag and brush the weld before tying in another bead. With MIG, you could finish the bead and immediately go on to the next 6" section. Still, it'd probably make some difference.
I'm not an expert either. But I've run a few beads in my life. I'm a big believer in back stepping, and skipping around. I'm not to bad with heat shrinking material around after it has warped, but back stepping and skipping around a lot can eliminate some warpage.
 

Attachments

  • Back step welds.jpg
    Back step welds.jpg
    36.9 KB · Views: 428
  • Back step 2.JPG
    Back step 2.JPG
    15.2 KB · Views: 347
   / Educate me on beefing up the FEL bucket to add hooks
  • Thread Starter
#36  
I'm not an expert either. But I've run a few beads in my life. I'm a big believer in back stepping, and skipping around. I'm not to bad with heat shrinking material around after it has warped, but back stepping and skipping around a lot can eliminate some warpage.

When I first started welding I learned that the hard way. My first project was a welding cart. I welded a piece of 1/8 sheet steel to some 1/2"X1" steel tubing to make a platform for the welder. I welded a solid bead all the way around the seam between the sheet and the tubing without stopping. The welds have held up great, the only problem was the bowing of the tubing from all the heat. It wasn't much but it was enough to teach me to slow down and think before I weld!
 
   / Educate me on beefing up the FEL bucket to add hooks #37  
That's my problem, I always tend to overbuild everything. Based on what everyone has suggested I'm going with a 3X3 piece of angle mounted on the back of the lip like this. (this is a piece of 2X2 that I put there just to show what I'm talking about)

IMG_5234_zps112c8115.jpg


I just went out and measured again. The top flat portion of the 3X3 will stop about 1/4 inch or so before the radius of the bucket lip downturn starts so I'll have enough space to run some beads. The back/lower leg of the 3X3 will hit the back of the bucket about half way between the lower radius and the back edge of the top lip. A bunch of weld beads along there will hold that together and make a box. The flat top of the 3X3 will give me a good surface to weld the hooks on to.

I appreciate all the input!

By the time you get 'er welded in and painted, it should look pretty good. Hel* for strong, too!

I see you have the ATI-style quick attach bucket.. that's on my wish list for build projects, but it's down the list a ways.

Sean
 
   / Educate me on beefing up the FEL bucket to add hooks
  • Thread Starter
#38  
By the time you get 'er welded in and painted, it should look pretty good. Hel* for strong, too!

I see you have the ATI-style quick attach bucket.. that's on my wish list for build projects, but it's down the list a ways.

Sean

That's actually a Kubota quick attach. Got it from Barlow's like that.
 
   / Educate me on beefing up the FEL bucket to add hooks #39  
When I first started welding I learned that the hard way. My first project was a welding cart. I welded a piece of 1/8 sheet steel to some 1/2"X1" steel tubing to make a platform for the welder. I welded a solid bead all the way around the seam between the sheet and the tubing without stopping. The welds have held up great, the only problem was the bowing of the tubing from all the heat. It wasn't much but it was enough to teach me to slow down and think before I weld!

I've always found square & round tube, and pipe to be very reactive to heat. Here are some different techniques to correct warpage after welding. Sometimes you're better off to preheat before welding.;)
 

Attachments

  • weld 2.jpg
    weld 2.jpg
    9.8 KB · Views: 294
  • weld 2 1st.JPG
    weld 2 1st.JPG
    9.6 KB · Views: 236
  • weld 2 2nd.JPG
    weld 2 2nd.JPG
    9.8 KB · Views: 260
  • Pipe 2.JPG
    Pipe 2.JPG
    41.6 KB · Views: 329
   / Educate me on beefing up the FEL bucket to add hooks
  • Thread Starter
#40  
I've always found square & round tube, and pipe to be very reactive to heat. Here are some different techniques to correct warpage after welding. Sometimes you're better off to preheat before welding.;)

Thanks Carl! I found a good video on Youtube last night where preheating was discussed and demonstrated. Definitely something I'm going to keep in mind when I weld.
 

Marketplace Items

500BBL SKIDDED FRAC TANK (A58214)
500BBL SKIDDED...
2015 Ford F350 XL (A57148)
2015 Ford F350 XL...
FOUR WAY BLADE SKID STEER ATTACHMENT (A58214)
FOUR WAY BLADE...
2021 Kubota RTV-X1140 4x4 Diesel Utility Cart (A59228)
2021 Kubota...
light tower (A56857)
2006 TRAIL KING ADVANTAGE PLUS RGN/DETACH TRAILER (A58375)
2006 TRAIL KING...
 
Top