L3400 3-point hitch adjustment

/ L3400 3-point hitch adjustment #1  

Chilly807

Elite Member
Joined
Sep 13, 2009
Messages
3,272
Location
Nova Scotia
Tractor
Kubota L3400DT
After putting up with a "jerky" 3 point hitch for two and a half years I've finally decided I'll find out for myself if it can be adjusted to make it smooth. I've seen some videos that show really rough movement, and some that are really quite good, so there's obviously something that can be done about it.

Whether that will require a different valve, or simply adjusting the one I already have is what I'm looking to determine.

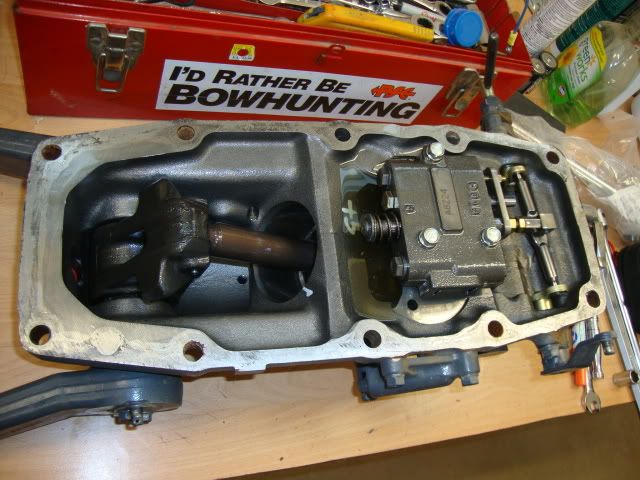
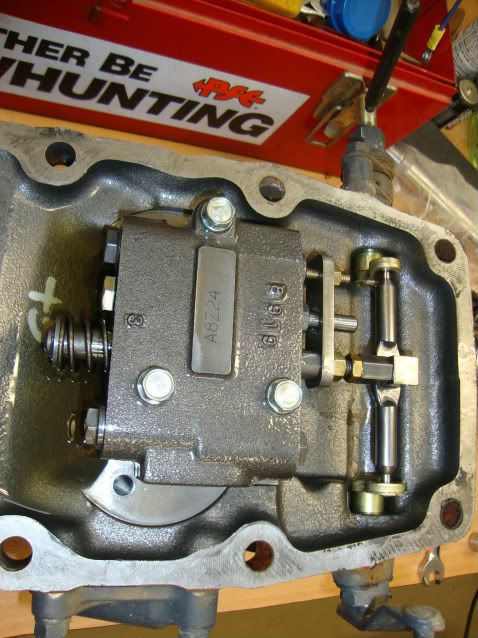
Mine is one of the later L3400's, built in 2009 with a serial number of 85831. It's supposed to have position control valve (PCV) part number YR908-00102, which was installed in L3400's with a serial number greater than 72622 according to the latest data I have to work from.

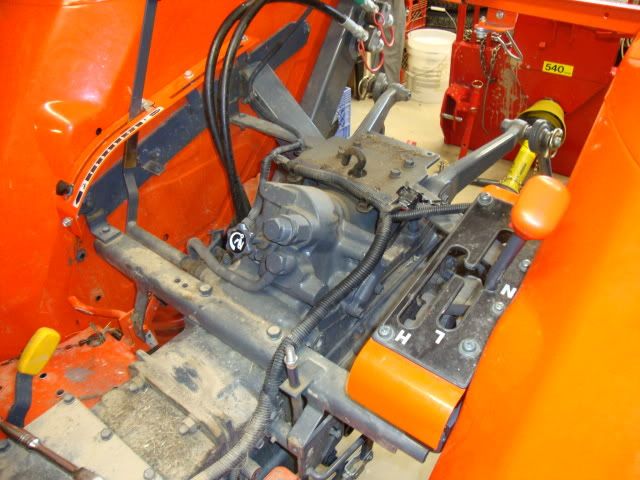
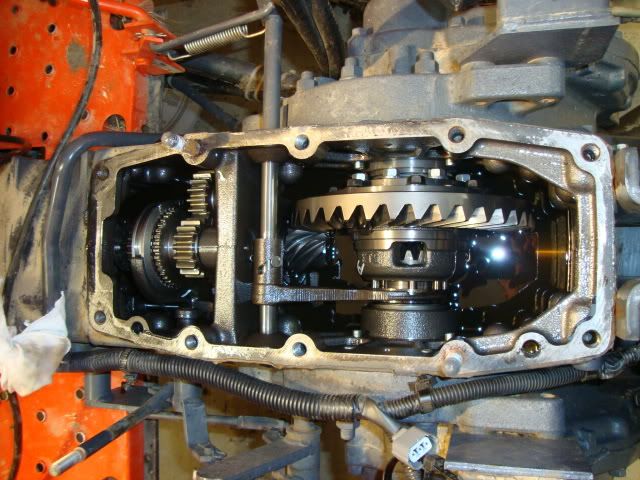
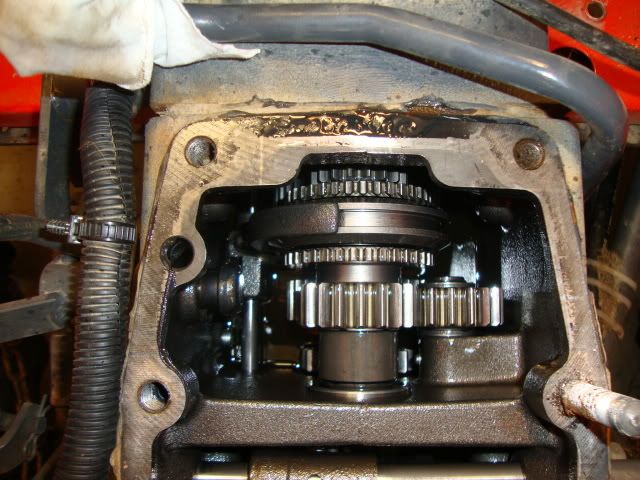
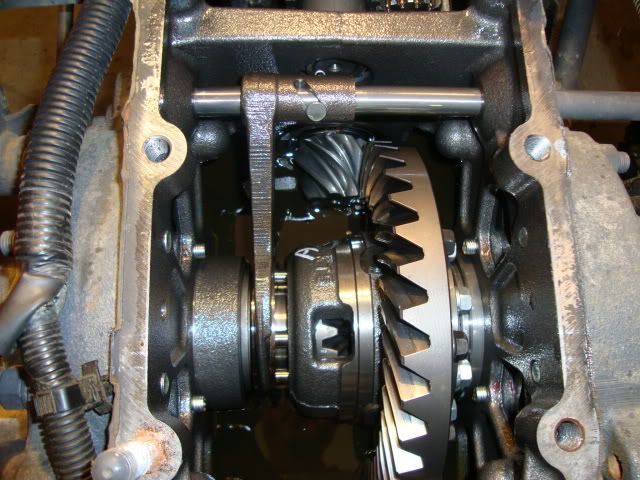
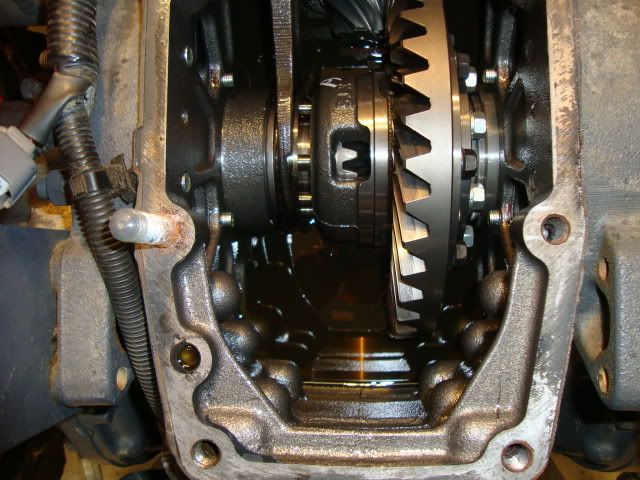
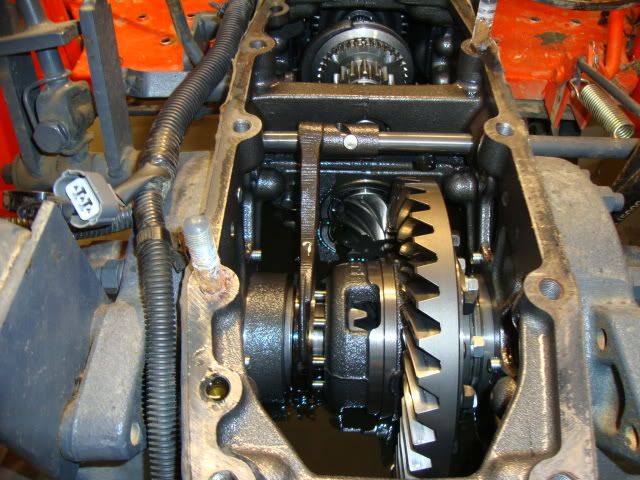
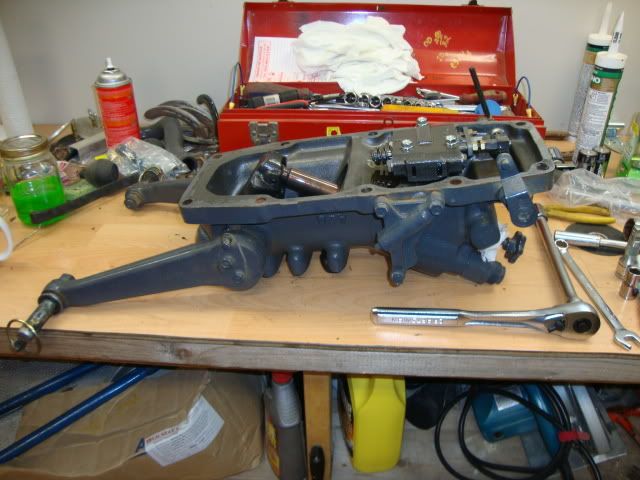
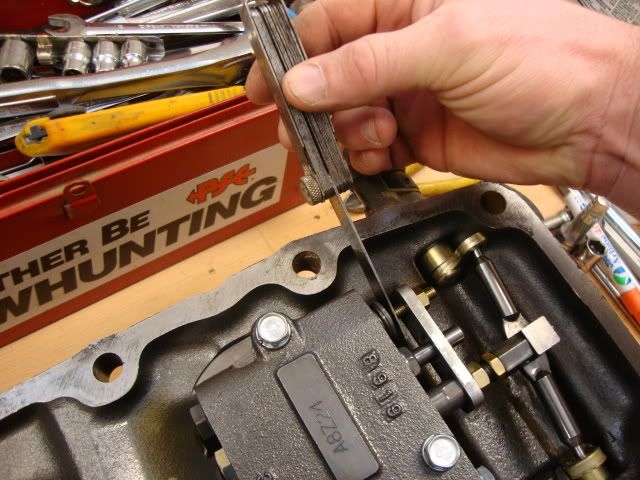
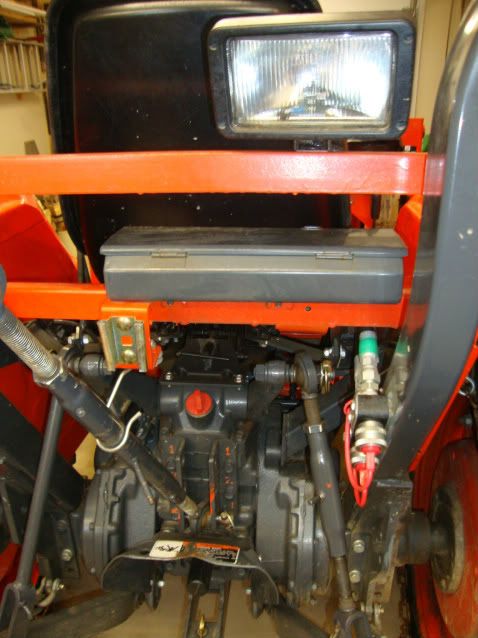
This morning was dis-assembly, since the PCV is located under the top transmission case everything above it has to be removed.

DSC01414.jpg

DSC01413.jpg

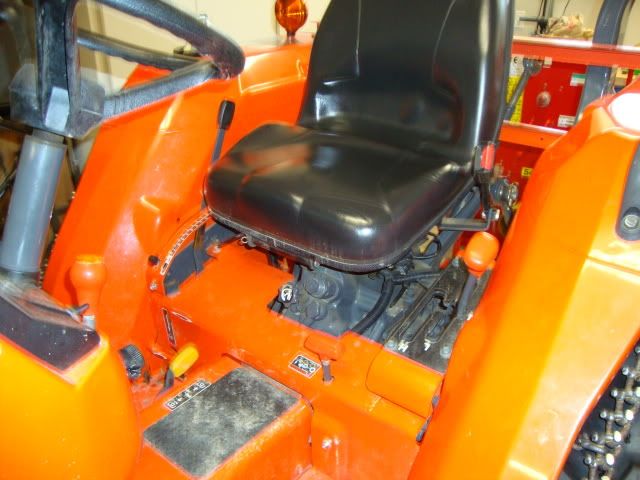
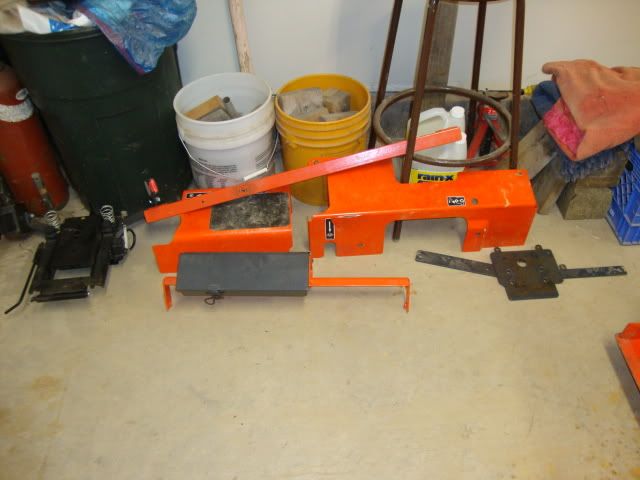
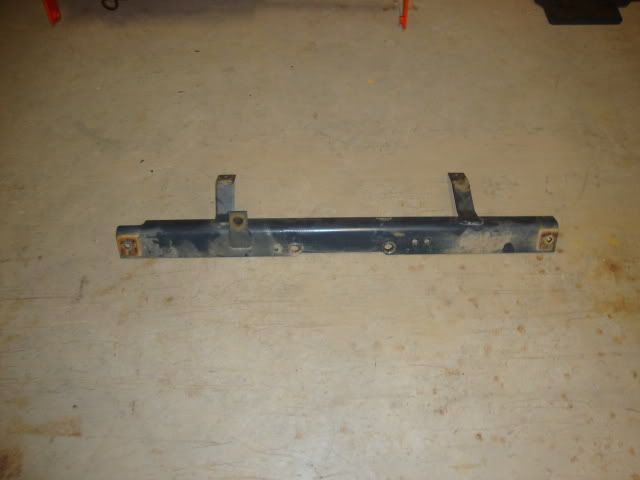
The seat comes off easily by pulling the hairpin on the right side and sliding out the pivot pin, then I removed the two steel covers over the transmission and rear axle, using a 12mm socket and wrench.

DSC01415.jpg

DSC01416.jpg

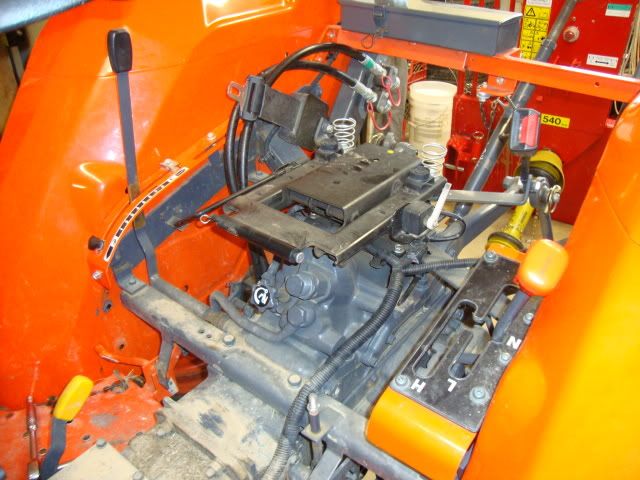
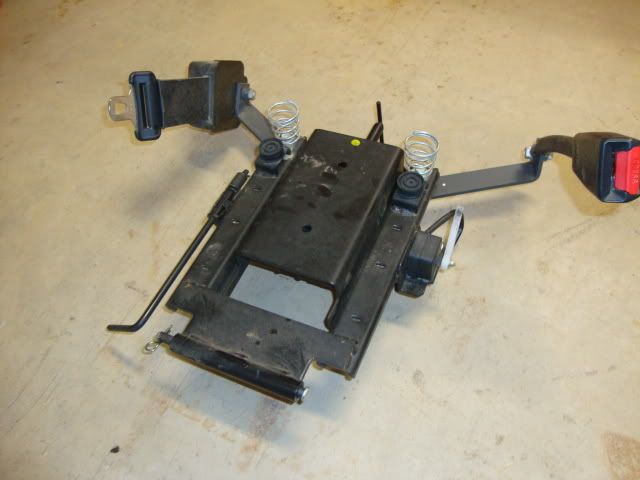
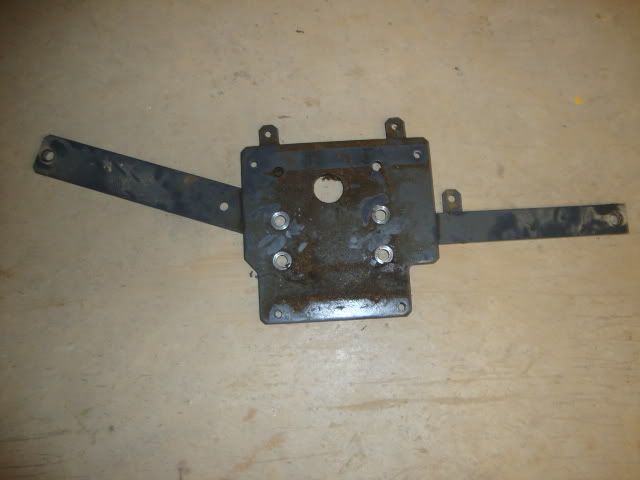
Next came the seat base, it's held in place with 4 bolts, 12mm wrench. I unplugged the seat position switch and left it mounted on the base.

Sean
 
/ L3400 3-point hitch adjustment
  • Thread Starter
#2  
DSC01417.jpg

DSC01418.jpg

DSC01419.jpg

Next is the sub-plate that the seat base mounts on, it's held on by 4 larger bolts and two smaller ones out on the "wings" at each fender. 14mm and 12 mm wrenches. In case you're wondering about how you get the plate over the hook-shaped transmission breather tube, the tube is rubber !

DSC01420.jpg

I removed the tool box strut from between the fenders, as well as the angle iron I have my rear work light attached to. Makes for easier access to lift out the transmission cover, which is NOT light, about 40-50 lbs with the upper lift arms attached.

DSC01421.jpg

Next you remove the cross strut in the front of the cover. As far as I can see, all it does is stiffen the front of the fenders and gives the 4wd engaging rod a hole to locate it. You need a 17 mm socket to remove the two center bolts, which also hold down the trans cover front. They are TIGHT, as are all of the bolts holding this thing together. I suspect Kubota requires it's employees to pass strength tests, because all the bolts were a lot tighter than they really needed to be :laughing:

Sean
 
/ L3400 3-point hitch adjustment
  • Thread Starter
#3  
The wiring harness is definitely in the way, I marked and unplugged as much as I could, the only tricky ones are two very similar connectors under the right side, be sure you mark which is which. The clips have "christmas tree" fasteners on them, you squeeze them together to get the clips released from the brackets.

DSC01422.jpg

The feedback rod is easily removed, it has two cotter pins which you'll need to replace when you're finished.

The lower lift arms are easily unhooked, they have linch pins holding the vertical links in place on the top arms.

DSC01423.jpg

You'll need to remove the position control lever guide to get it off the shaft that goes into the PCV. Three bolts (12mm head) and it comes out.

There is a split pin holding the bottom of the lever in place on the adjustment shaft, you will need a small drift punch to remove that. Mine was quite tight and took a fair bit of tapping, but it moved OK once it started. You might be able to leave the whole issue in place and remove it with the cover, but it would be awkward to handle.

DSC01424.jpg

DSC01426.jpg

The hydraulic pipe is held in place at both ends by a banjo fitting with copper washers. You need to remove both ends to get enough movement to get the cover off, and immediately plug the openings to keep dirt out. 26mm socket for the banjo bolts.

You'll lose about a cup of fluid, just what the pipe holds, although I left a bucket under the bottom end to catch any drips.


Sean
 
/ L3400 3-point hitch adjustment
  • Thread Starter
#4  
Ok, get a grip on the edge of your seat ! It's time to remove the top cover. It's held down by 10 bolts (17 mm heads), two of which you already removed to get the cross strut off the front of the cover. I used compressed air to blow any dust away from the cover before removing it. Mine was stuck down pretty good, I ended up using light pressure on a four foot crowbar to break it loose. Be careful where you pry, it's a bad place to break something (expensive). The cover is heavy too, if you're not sure get some reliable help to give you a hand getting it off and steering around the dam* wiring harness.

There IS no gasket under the cover on top of the trans case, Kubota uses an RTV (silicone) sealant here. I plan to use Loctite 515 sealant when I reassemble the last time, it shouldn't leak much simply trying the 3 point.

Here is the view from the ring-side seat, for those of us that were wondering just what the inside of the transmission case looks like.
DSC01427.jpg


DSC01428.jpg


DSC01429.jpg


DSC01430.jpg


DSC01431.jpg


Sean
 
/ L3400 3-point hitch adjustment
  • Thread Starter
#5  
The cover itself has the 3 point valve on the bottom front. I have no idea what the numbers mean, before someone asks. Maybe someone can shed some light on that.

DSC01432.jpg

DSC01436.jpg

DSC01435.jpg


All in all, the whole dis-assembly process took me about an hour and a half, taking my time and taking pictures as I went. The longest part of this is going to be making an adjustment, partially reassembling and trying the hydraulics to see what difference it's made, if any. I'm going to measure what I have to start with so I can go back if necessary, and to see if it's set up the way Kubota recommends in their service manual.

I can understand why the dealers as a whole aren't eager to start trying to fix this, it's time consuming work trying to fix a problem that Kubota corporate won't admit even exists.

Sean
 
/ L3400 3-point hitch adjustment #7  
You are doing great, on the edge of my seat. I got jerky hitch syndrome also, would be great to get resolved...
 
/ L3400 3-point hitch adjustment #8  
Oh man, yes very interested in what you find and I applaud you for tackling this.

James K0UA
 
/ L3400 3-point hitch adjustment
  • Thread Starter
#9  
Thanks for the votes of confidence, I knew there were a few people that would find this interesting..

The job itself is pretty straightforward mechanically, Kubota's done a good job making it easy to get apart, all the fasteners are accessible and no special tools required, at least not yet.

I should be able to get some preliminary measurements and try an adjustment tomorrow, with any luck I'll get a chance to do a test run before work. I really hope an adjustment or two will give the improvement in performance we're all hoping to see. If it truly is a design problem it's going to be hard to cure for most if not all of us.

The thing that gives me hope is that some of us have managed to get their dealers to work on these and have had good results. Most said it was a matter of fine tuning the valves. If the dealer can do it, there's really no reason to think a competent mechanic with some time can't achieve the same results at home.

Sean
 
/ L3400 3-point hitch adjustment #10  
Sean, we are all hoping. Lots of guys have recently reported that the dealers have fixed them but we just don't know for sure what they did and how long and how much trouble it was. My 2nd dealer that I contacted about this 2 weeks ago has not called back yet. But with you we are going to know if it can be fixed with just adjustment, and how much of a PITA it really is..carry on, and Thank You.

James K0UA
 
/ L3400 3-point hitch adjustment #11  
I'll give my dealer a call tomorrow and see if I can get a detailed description on what/how adjustment was performed to my hydro control valve. Not making any promises they will let me know....
 
/ L3400 3-point hitch adjustment #12  
So in this case the "lowering speed knob" does not smooth out the 3-point jerky-ness?
 
/ L3400 3-point hitch adjustment #13  
So in this case the "lowering speed knob" does not smooth out the 3-point jerky-ness?


Nope, they are all smooth as silk going down. The Lowering speed knob is a valve that just adjusts the flow of the return hydraulic oil from the cylinder to the tank. From no fluid flow all the way to maximum fluid flow.
The hitch is a position control type, when raised slowly the hitch goes up in a series of jerky movements instead of smoothly. This has something to do with the position control feedback mechanism that is controlling the valving or something. This is what Sean is trying to find out. Not all units show the same amount of jerkyness, and some after adjustment seem to be very smooth. Hopefully Sean will be able to give us some more knowledge on this in the near future.

James K0UA
 
/ L3400 3-point hitch adjustment #14  
Good photos and info, man! Mine's not too bad, but I'd like to adjust it at some point.

A good member here sent me a pdf file of the valve which should help.:thumbsup:
 
/ L3400 3-point hitch adjustment #15  
Sean, Thanks so much for tackling this and even more for sharing. Maybe you can put this issue to rest and help Kubota learn something about solving problems helping customers. Best of luck to you!

Don't forget to free up your suspension seat while you have it apart, if it's frozen like so many are. -Harvest
 
/ L3400 3-point hitch adjustment
  • Thread Starter
#16  
Ok, I made some initial measurements this morning and the adjustments are definitely not in line with the data I have.

A little bird (or three) told me what the dimensions should be for three of the measurements you use during set-up.

DSC01439.jpg

This should be 47.5 mm (1.87"). Mine is set at 48.5 mm (1.91"). I'm not so concerned about this one just yet, since I think it sets the valve position in relation to the control lever and the feedback rod. There is mention made that if you change this, be sure to also adjust the feedback rod.

DSC01441.jpg

This should be 16 mm (0.630"). You set it at that position by moving the control lever or rod to get a 16 mm measurement, then hold it there while you check another measurement. In effect, the instructions would read, "While maintaining a dimension of 16 mm in location "X", dimension "Y" should be "Z" mm.

I stuck a screwdriver under the feedback link to hold it in place and rotated the control rod to give me 16 mm (0.630")

DSC01442.jpg

DSC01443.jpg

This is where it gets interesting. The dimension here should be 0.1-0.2 mm (0.004-0.008") with a 16mm (0.630") gap between the plate and valve body. Mine measured 1.14 mm (0.045")... almost 10 times what it should be.

I guess you know I'm about to make some changes and see what happens.

Sean
 
/ L3400 3-point hitch adjustment #17  
Great job so far, hope it works out great for your effort. (shoot a hoyt)
 
/ L3400 3-point hitch adjustment #18  
I am on the edge of my seat here to see what happens - seriously.

The crazy thing is I don't even have one of these tractors! With having read the horror stories and watched videos of pretty ugly looking 3pt operation, I have somehow started to feel vested in hoping to see a fix for this...
 
/ L3400 3-point hitch adjustment #19  
...almost 10 times what it should be...
Sean, excellent job, hoping for the best. :thumbsup::thumbsup::thumbsup:

10 friggin' times! Holy Cow... Isn't one of the first things that you read in the Hydraulic Section says:

"IMPORTANT, Set screws and spool joints 1 are adjusted to VERY CLOSE ACCURACY." Is this kubota's best quality? ...and then to say that there is not a problem with their hitches?
 
/ L3400 3-point hitch adjustment #20  
I am having trouble breathing!.. waiting on these results..:licking: Excellent write up and photo's.

James K0UA
 
 
Top