Nice people. I've been there about ten times and never had a problem with their staff.
I had a 66 inch E grapple. They need some re-engineering. The pivot design is poor IMHO and loosens up quickly. (eggs out).
It is quite a bit cheeper than the HD and cost cuts need to come from somewhere.
Unless you really don't like the heavy duty model, I would upgrade to it.
I don't think the additional weight will be a problem on your machine.
I do understand that you have an unusual task to preform and the tine design may trump the poor pivot design.
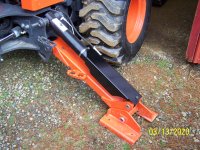
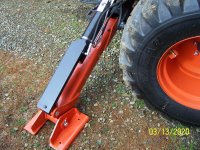
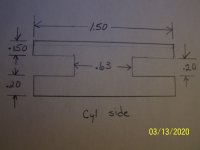
BTW here are the measurements for the "mushroom" that needs to be attached to your outrigger cylinders.
Please forgive my drawing skills. My one and only class was in 1968.:laughing:
The "eggs out" issue that you mention, has been a concern of mine when perusing their design.
There obviously is no provision for greasing, but I believe I may be able to remedy that.
I think I can bore a small hole down through the center of each pivot bolt head, drill a small cross hole in the bolt, and install a zerk fitting in the bolt head, thus allowing that bolt to pivot on a greased surface.
The other thought I have is, before using, bore the pivot bolt hole out larger, and install a bronze (or steel?) bushing.
When/if the bushing wears, just push it out, and install a new one.
I am leaning toward the bushing idea.
The weight difference between the 60" #1 & #2 units is approximately 300 pounds.
I really do not want to deal with that extra weight.
If I have something really nasty/heavy to grab, My hoe is very powerful, so I can use the hoe with thumb instead, and not put unnecessary stress on my loader frame.
I have zero rocks, and really only do need a light duty grapple.
On recommendation from here on TBN, I will also modify the top clam with 2 inside corner angle welded pieces of 3/8 flat plate, to prevent racking/twisting of the grapple top.
I can outdo you by about 7 years.
My last college engineering design/drafting class was in 1961, and I was employed in a completely different field!

")