Par4x4
New member
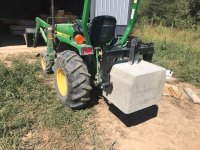
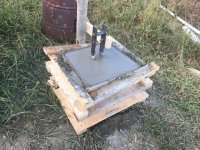
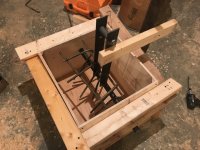
Here you go, let me know if you need any more. the 4x4 steel angle go all the way to the embeded drawbar and fasten in with large bolts, the 2 inch fastens to the drawbar with a long 3/4 inch all thread, and welded to the 2 inch receiver, and then rebar welded at an angle on each side to the drawbar and the side of the 2 inch reciever for side to side stabilization.
James K0UA
This looks like what I need except for the receiver hitch which I don't really need.