I'm enjoying your post and following your method for building your barn. It's different then what I'm used to, which makes it more fun to watch.
Your comment about the negative feedback on metal roofs is new to me. I thought I kept up on most of the posts, but obviouly not.
My experience with metal roofs is only with the traditional panels, never with the hidden fastner stuff.
From what I've seen and in conversation with others, the secret is using quality screws for your fastners. Cheap screws wont last. They rust out and the gaskets shrink and crack.
If you buy the good screws, tighten them properly, you'll have a 30 plus year roof.
When you talk to the guys at Mueller, ask about the screws on the regular roof panels. I think they'll confirm what I've just said.
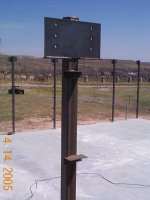
Thanks for posting the photos,
Eddie