Box Scraper techniques for basic box scraper

/ techniques for basic box scraper #1  

WAGIRL

New member
Joined
Jan 31, 2009
Messages
2
Hi,

The photos with fancy box scrapers and big tractors are a bit intimidating, but I can tell that there's a wealth of knowledge here, so I'm going to give it a try.

I have a basic John Deer box scraper: 4 or 5' across, 4 scarifiers (actually 3 'cuz I broke one), only adjustment I can make from the seat is to raise and lower with the 3pt hitch. I can pull it with my little 30-something HP John Deere.

I've only tried to use it a couple times, because the scarifiers make the box immediately dig straight down. Based on what I'm reading here, it sounds like the issue is the angle, right? Would I lengthen or shorten the top bar to get rid of this issue?

I was thinking about trying to use the box scraper this spring to try to 'aerate' my little 2-acre horse pasture. The grass roots have no depth because they're on top of hard pan. Since this is the only pasture I've got, I can't have it out of commission for a year, so radical renovation is out of the question. I'm hoping just to break things up a bit. Will this work?

FYI I do have a harrow, but, without cinder blocks it does nothing (and with cinder blocks, I have to stop every two minutes to put them back on).


Many thanks!
 
/ techniques for basic box scraper #2  
I would like to be the first to welcome you to TBN. You are right that there is a multitude of people here who really know their stuff.

The Basic Box Blade can be quite intimidating, but can also be very rewarding in what it can do for you. What you should do regarding the box digging in is somewhat dependent on what kind of box you have. If your rear blade is fixed in position (It does not move like a flap behind the blade) then you should be able to lengthen the top link to get the box to ride on this blade. the disadvantage of that is that it pulls the scarifiers up also.

If your box has a hinged back blade then drastically shorting the top link will lower the front of the box and make it ride more on the side plates and cause the cutting edge to more easily ride over the dirt. This helps the scarifiers dig in but the box will be less likely to take too big of a bite.

I have a 4 foot roll over box on a 18 hp Yanmar. Experiment and see what works for you. Post a pic of your set up from the side and from the back and someone can help you get the job done.

There is a very interesting thread about the use of a BBB by the king of Boxes, Rob of 3RRL fame.

Mike
 
/ techniques for basic box scraper #3  
You have a few options besides adjusting the top link. If you don't want to dig too deep don't let the 3 pt down all the way. Figure out how far to let it down to get to the ripper depth you're looking for and let the 3 pt hold it there. As far as aerating a horse pasture - The rippers are a little thick for that and are going to tear up the grass and leave big clumps, not really what you want for aerating grass. You'd be better off with a set of straight discs with some weight or an actual aerator (spiked roller). This cuts through the thatch and allows rain and nutrients to get down to the roots without disturbing the root system too much. The rippers will tear up the roots and all, exposing them to air and killing that portion of grass in the process.
 
/ techniques for basic box scraper #4  
Ty the cinder blocks on.
 
/ techniques for basic box scraper #5  
Tip 1. Lower the scarifiers to break up the ground, but don't lower the box all the way down. Just scarifier contact. Cross hatch the area with the scarifiers that way. Then retract them and use the box.

Tip 2. Shorter top link means more digging. Longer top link means less digging.

Tip 3. Start out on level ground and adjust the top link so the front of the box is 1-2" lower than the back. This is for forward dragging and digging.

Tip 4. On level ground raise the front of the box 1-2" higher than the back to smooth out the ground while dragging.

Tip 5. Spend more time on the tractor.

Enjoy!

jb
 
/ techniques for basic box scraper
  • Thread Starter
#6  
Wow, already so much helpful advice! I'll take a picture of my set-up tomorrow. It sounds like my top bar on the 3-point hitch is too short, and that's why it's digging in. I'll play with the options listed here (adjusting top bar, lowering the 3pt hitch part way) to see if I can something that works. Meanwhile (DOH), I'll try tying down the cinderblocks on the harrow as that has 2-3" tines that are a lot narrower than the scarifiers.

Follow-up on adjusting the 3pt hitch. I played with the box scraper for a little while today (before I saw the advice here). How can I adjust the top bar? When the box scraper is on, I can't turn the top bar for the life of me, but, if it's off, I always need to adjust the top bar to whatever works to get it attached to the scraper. Can I just hammer the handles attached to the bar to turn it after I attach the scraoer. (BTW it's a *Rankin* scraper, not a JD. Since it's 'JD green', I guess I just made an assumption. The ONLY thing that it moves on it are the scarifiers; using a pin, I can move them up and down.)

Second item: For a project I was was working on today, I would have loved to have been able to do like Rob showed in one of his pictures, and put my scraper at a side-angle (L-R). Same issue: trying to move the adjuster on the right hitch with the scraper attached.
 
/ techniques for basic box scraper #7  
After you attach the box, try setting it down so that the weight is off the top link. Then crank it up. Set it down a little further and repeat. Same for the angle adjust. Might need something to set it on to do this.
 
/ techniques for basic box scraper #8  
Hi WAGIRL and welcome to TBN.:)
You can certainly do what you wrote in your opening statements with your boxblade.
I don't know if that will good for your horses or not since I don't have any. But nevertheless, you can do it and it should come out pretty good. Just be sure it's heavy enough to penetrate that tough soil you have. You can always add weight if you need it ... be creative. Also, you don't need to have those scarifiers down very much to disturb the soil. I usually set mine only 4" deep to get an even soil disturbance while using the box blade as a poor man's plow. I also use the position control to only let the box down so much. If you need to move some dirt around first, do that also using your position control so you don't dig in too much. Go over it several times and then smooth it out with the rear part of the blade.

The guys have already told you to shorten the top link to make it dig and move soil and to lengthen the top link so the rear blade smooths nicely. It takes a little patience and practice of course, but I'm sure you'll get it soon.

My wife's tractor has manual adjustable top and side links.
To adjust hers, sometimes I place a 4 x 4 on the rear blade and lower the 3 pt to shorten it up. Lower it onto the wood a little at a time so the link is not under pressure. You can also use a pipe wrench to turn that turnbuckle. Do the same for the side link adjustment to tilt the boxblade. Put the wood under the side you want to shorten up.

Does your JD have 2 adjustable side links or just one on the right and a fixed one on the left? You can always get another adjustable turnbuckle for that other side if it only has the one. That will give you some more side to side tilt adjustment.
OK, good luck and keep us posted on how you do.
 
/ techniques for basic box scraper #9  
I put a small (6" to 12") piece of 4x4 lumber in the middle of the BB. I didn't have a photo of it but I drew in where I place it to tilt my BB. I'll lift the box and put it back down slowly... you will see when the slack in the top link happens, when the pressure is released, then you can turn it top link a couple of times before you have to repeat the raising and lower trick again.

Also, ratcheting straps may be easier with the cinder blocks instead of tying them on with rope.
 
/ techniques for basic box scraper #10  
I'm new to box blade use as well, I also have a standard manual adjust system.

I can adjust the top link shorter or longer, this will control the front to back tilt on the box blade. So, with a short top link, the box blade will dig more when I pull. If I want to smooth, then I should lengthen the top link so that the front of the box blade is higher than the rear?

The next adjustment I can make is with the lower links. The links can be adjusted so that one is longer than the other. What would this be used for with the box blade?

The next adjustment I can make is to change the height of my lower links, level, right side lower, or left side lower. This will give a sideways tilt to the box blade. What is this used for?

Do you ever just use the box blade completely level? What's the best setup for smoothing? What about for driveway work, crowning, or ditches?

Does one generally just pull forward with the box blade or alternate between forward/reverse pushing/pulling?

Finally, what about the position/draft controls? Does one pretty much just use position control?
 
Last edited:
/ techniques for basic box scraper #11  
As others have said, to adjust the top link you need to raise or lower the 3pt control slightly and slowly while watching for the link to go slack. I don't advocate turning the link when there is a lot of pressure on it. That is a sure fire way to wear it out quickly or even break it. And there is no need. Just use the hydraulics to help you. It doesn't take muscle, just brains.
 
/ techniques for basic box scraper #12  
Hey Wagirl,

Lots of us are new at this so all questions are fair game. That said, when I first started using this board I was not using the "search" part of the forum. When I got that figured out a whole new world opened up!!! There can be, in some cases, much more info that I can get in conjuction with a posted question. Using them both really expands your chances for both answers and other interesting info.

The folks on this board are among the most helpful people I have ever found...so thanks to all of you!!!!

Paul
 
/ techniques for basic box scraper #13  
pillar, I might be able to answer a couple of the questions?
But I'm sure there is plenty of advise from the other guys that will help too.

I can adjust the top link shorter or longer, this will control the front to back tilt on the box blade. So, with a short top link, the box blade will dig more when I pull. If I want to smooth, then I should lengthen the top link so that the front of the box blade is higher than the rear?
Yes, you are correct on both counts.
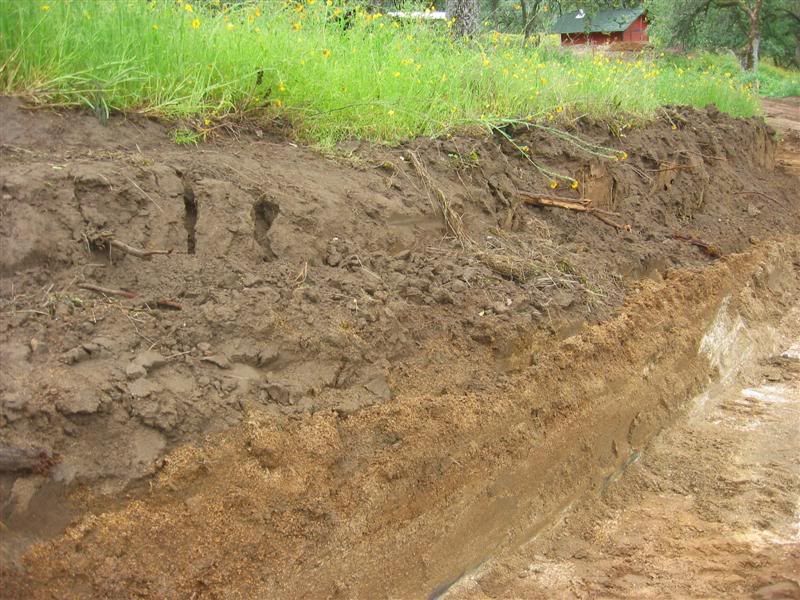
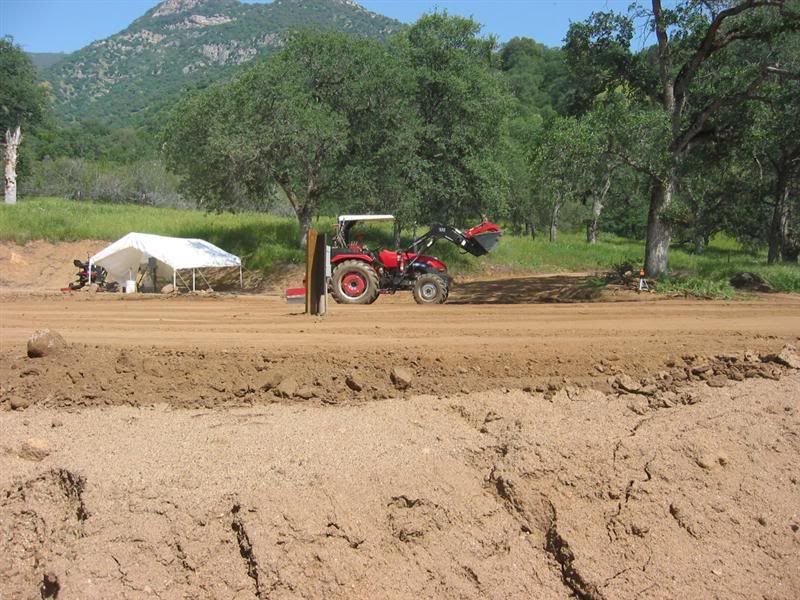
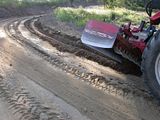
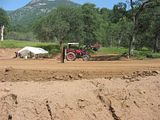
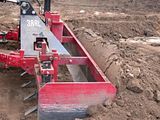
Here are some examples of what you can cut with the box blade.
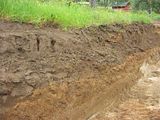
This is a solid DG (decomposed granite) that is harder than heck. I used my scarifiers to break it up and the used both the FEL bucket and box blade to get material out of it. You can clearly see the difference from the top layer of dirt and then the DG.


The next adjustment I can make is with the lower links. The links can be adjusted so that one is longer than the other. What would this be used for with the box blade?
The next adjustment I can make is to change the height of my lower links, level, right side lower, or left side lower. This will give a sideways tilt to the box blade. What is this used for?

Both are really handy features when you want to windrow material from one side to the other, like when crowning your road.
With the box blade, since it "captures" the material, you will want to adjust the side links when doing this. Shorten up the side link where the lower link is longer. That picks up that side of the box blade. That will allow some of the material to escape when using that feature. That is how I crown my road and dig gutters. For crowning your road, one side link is only a couple inches shorter than the other. It's important to use your position control so that the box blade, when lowered to the ground, retains that left to right (or visa versa) tilt. If you lower the 3pt all the way, chance are the box will lie flat on the ground. You want only the lower side to cut until you have the contour you want, then you can set the box blade level and it should follow the newly made contour.
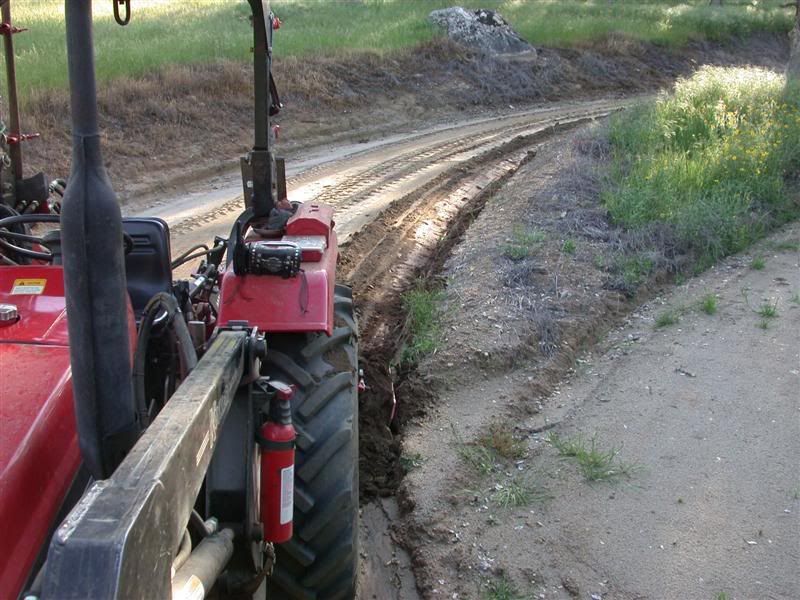
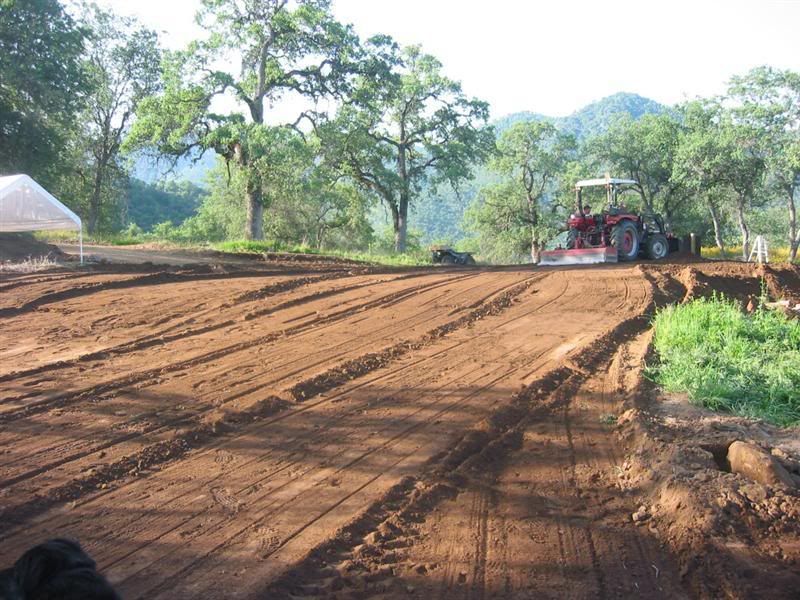
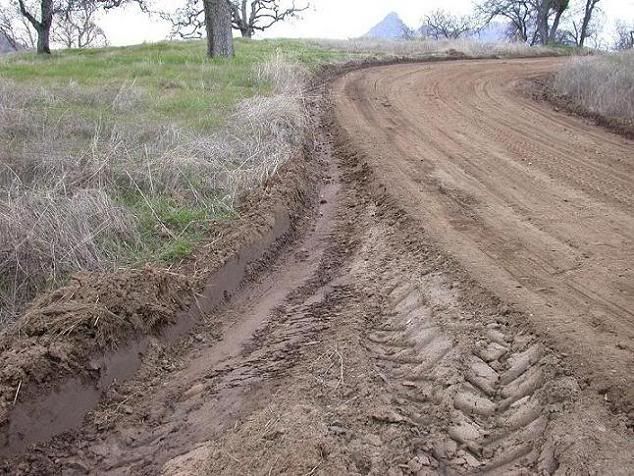
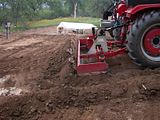
These are some photos I've shared before about gutter cutting and some are new.


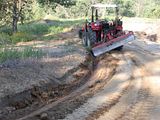
Crowning the road can take many passes because you can't do it all in one pass. Most box blades aren't heavy enough. So you let the lower side cut a little at a time and only 1/3 or 1/2 of your cutting blade is actually contacting the road. If you lowered your rippers on that lower side only (just a little), it would bust up the road a little better and this would work better that way. Then move them back up to smooth. Some guys start on the edge near the gutter and some start near the middle. I start near the middle of the road for my first pass and move to the edge for the second pass. My third pass is again on the edge of the road and by this time, the full width of the tilted blade should be touching and moving material to the middle of the road.
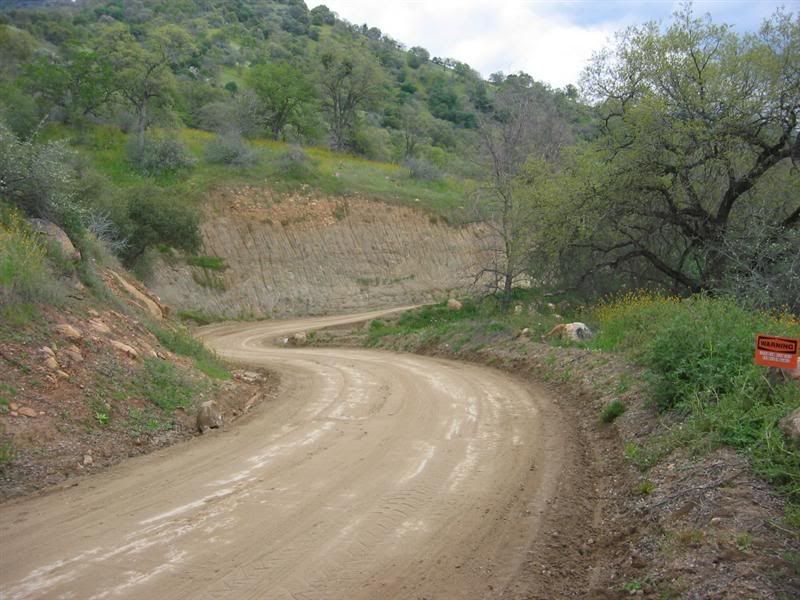
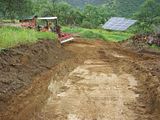
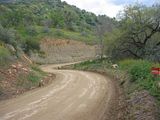
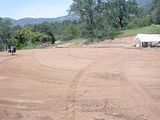
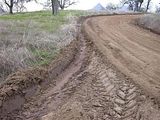
Here are a couple photos of part of my road.
The first one is when the road was first cut and the second one is after I got a nice crown on it several months later in the year.


Do you ever just use the box blade completely level? What's the best setup for smoothing? What about for driveway work, crowning, or ditches?
Yes, you use your boxblade completely level for maintenance purposes. I use it like that once I have my road all fixed up ... ruts and pot holes filled and gutters all cut and it's all been compacted and fairly hard now. That's when I set it completely level so the front blade AND rear blade touch at the same time. Then I drag the road like that to smooth it out flat. Some material will ride along with you in the box but that's OK. I also used this setting when build the pads for my home and barn once they were compacted and hardened.


One thing about smoothing.
That's when you have the top link long and the box blade rides only on the rear blade. I use this feature on soft material or freshly cut soft material. It helps not only to smooth what you've cut, but also compacts it a little. Once the material gets compacted or hardens up, I use the completely "level" setting as described above.


Does one generally just pull forward with the box blade or alternate between forward/reverse pushing/pulling?
Generally most guys pull the box blade forward. But it is made so you can push in reverse too. This is where you have to be really careful not to bend your lower links since our tractor's links are not set up for a lot of stress pushing on them. They already have the "S" shape and without having them beefed up to take the stress, you will pretzel them.

But pushing or bulldozing in reverse is very handy to move the dirt or material you just accumulated inside the box to it's final resting place. For example, say you finish dragging your road and you are left over with a pile of material on the road. Well, you can "feather" it out or leave it a pile. Turn around and push that pile in reverse to off the side of the road or into a corner or wherever.


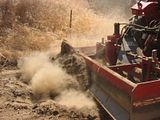
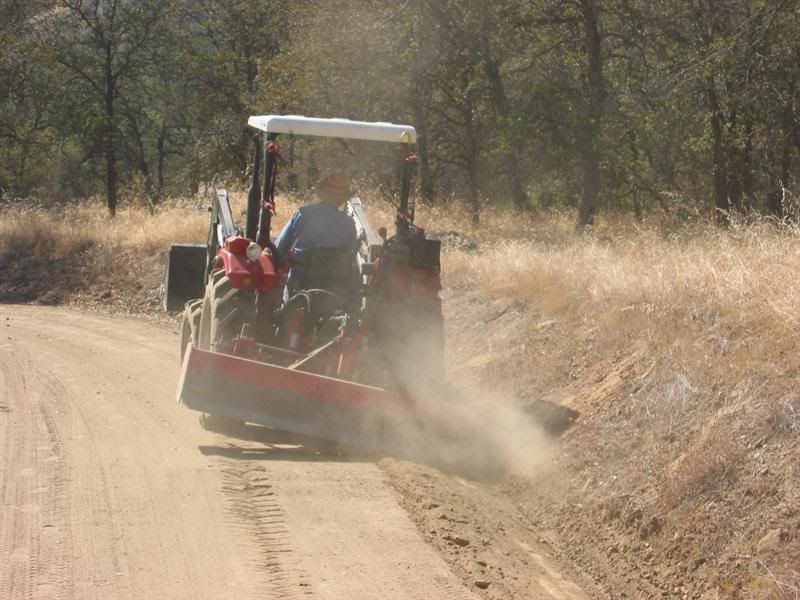
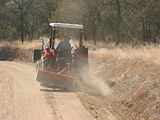
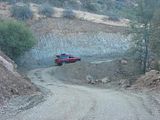
Another example would be say you are cutting gutters by pulling the box blade. What I do is cut my gutters so they exit onto a low area next to the road. Sometimes I can keep driving off the road and curve the gutter out to the field. But sometimes it's a steep drop off. That's when I turn around (reset the side links) and push in reverse continuing the curve of the gutter OFF the road. You get your boxblade behind you and part of it might be in air, but your rear tires ... actually all 4 of them are still on the road and not off the drop off.
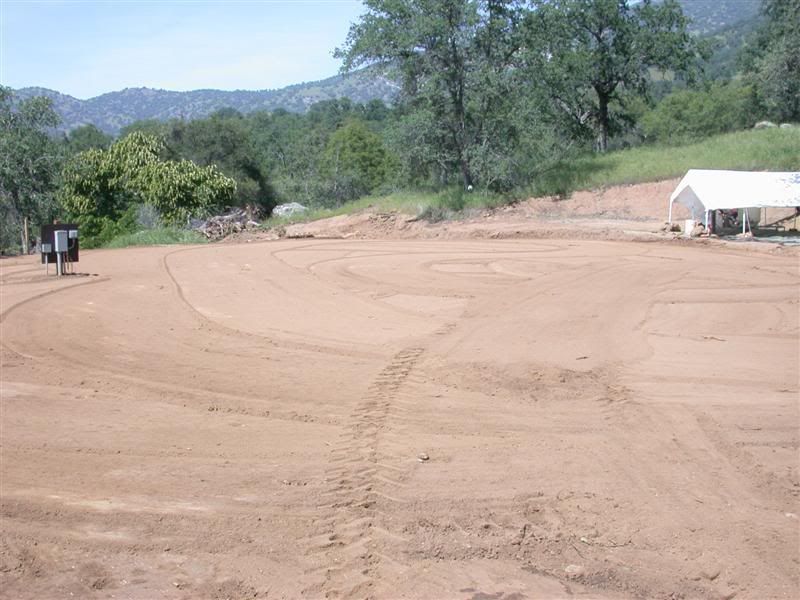
Here you can see where I pushed off the road in reverse.


Finally, what about the position/draft controls? Does one pretty much just use position control?
I use position control when the side links are tilted and also to determine or limit the depth of cut. That means when crowing or cutting gutters. Once I have an established compacted and hardened surface of the road, I let the 3pt all the way down into "float" and let the box drag along the surface in the "level" position. Once you have your crown established, the box blade should follow the contour.

If you don't want it to follow the contour like many of the guys want to do when "establishing" a surface, that's when you make it cut, tilt it, use the rippers etc. I know some of these photos were on that thread that Mike pointed out, but some are different ones.
I hope they help.
Rob-
 
/ techniques for basic box scraper #14  
3RRL: Thanks very much, excellent information. I will hopefully be trying it out soon.
 
/ techniques for basic box scraper #15  
Does anyone have a drawing to build a box scraper. or even a rough plan would do,
 
/ techniques for basic box scraper #16  
thread titled "Box Scraper in Kubota Orange" - he just made one - has pictures of it finished but he may could help you with how he did it.


Marketplace Items

UNUSED WOLVERINE 8' FORK EXTENSIONS (A62131)
UNUSED WOLVERINE...
1999 Chevrolet Step Van Food Truck (A61568)
1999 Chevrolet...
2016 Chevrolet Silverado 1500 Single Cab Pickup Truck (A60352)
2016 Chevrolet...
Wooden Wagon Wheel Bench (A61569)
Wooden Wagon Wheel...
2025 32in. Tilting Bucket Mini Excavator Attachment (A61567)
2025 32in. Tilting...
2000 Kenworth Tri-Axle Dump Truck (A61568)
2000 Kenworth...
 
Top