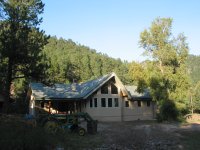
We did much the same thing....bought some land along a creek and built our house ourselves using cash over a period of time and our own labor instead of a loan.
Building it yourself is a great adventure. You will save serious money and have the kind of adventure that money can't buy.
For design, we also did a lot of what Sodamo says in post #48. The basic design we drew out by hand on draft paper, and then we went to an architect for formal drawings that the county requires. That took several iterations. But we kept with our requirements of making doors wide, hallways wider, some big picture windows, good handicap access - the things we felt were important.
The architect contracted for the foundation - which was a very good idea. I think we actually saved there over doing it ourself.
During building, we bought a lot of 2nd hand lumber. A really good table saw, an old pickup truck and a 12 foot long trailer turned out to be indispensible for buying used materials and cutting them to size. There are several second hand stores in the area here that sell good used wood from houses and barns that are torn down. It's good and cheap, but needs being resawn to standard dimensions.
The handicap access we required isn't just for us when we get older, it also means having a comfortable house just to walk around in when we are younger. We like large rooms and high ceilings, but used some sliding double-wide doors to be able to divide things up for privacy of just to make the inside of the house a little different. A spiral staircase leads up to a loft for kid's & younger guests.
A lot of bookshelves and an attached workshop right off the living area are the kind of custom touches that you get to do when it's your own house.
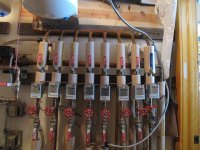
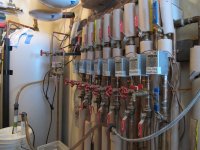
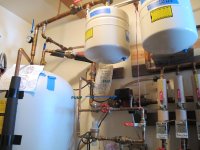
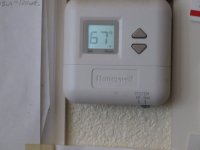
The floor is a cement floor with hydronic heating pipes within. Cement is then acid stained latigo color and buffed with a heavy wax coating. Very durable and attractive & inexpensive way to build a floor. The hydronic heated floors aren't designed to heat the house - they just provide a warm floor to walk on and keep the house from freezing if we leave for a few months in the winter.
Mistakes? Yes, there are a few... but less than if we had it built without our input. One thing I wish I had done is put in a large stone chimney/fireplace right from the beginning. Instead I used double-walled stainless steel 6 & 8" stovepipe from a central wood stove. It works well for heat, but in doing it that way we missed a chance to have a local mason build us a beautiful stone chimney as a focal point.
Things done right?? Well, we got the kitchen, island, and living/dining room space right - although we didn't realize how well we had done until the house was finished and beginning to be used. BTW, If you have a deck, it is always nice that it be accessible from both the kitchen and the living room. Or from a doorway between the two.
Another thing I would have changed is the roofing material. Shingles are fire hazard, couldn't find metal that didn't look like a fast food stand, so ended up with a concrete tile. It is nice, but you can't walk on it if need be - or put solar cells up there. I'd probably put more work into searching out a good metal roof next time.
We built using our motley collection old smallish tractors, old implements, and homebuilt tractor accessories..... mostly because we just couldn't see our way clear to spending the huge amount of building funds that a newer & nicer tractor would cost.
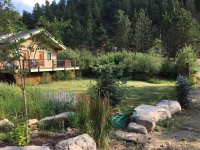
When we got it all built and moved in, we still had all the final road building and landscaping to do, so we went out and bought the right tractor - a Kubota
M59 TLB with a BH & thumb and optional 3pt. That's one of the smartest things we ever did. We would have been way ahead to have bought it right at the start of the project but couldn't afford it and didn't want the debt. In the end it didn't matter; the house got built just fine with the old tractors anyway.
Building your own house is a great adventure. We loved doing it. I envy you guys.
rScotty