My Bridge

   / My Bridge #1  

KennyG

Elite Member
Joined
Jan 13, 2011
Messages
4,328
Location
SW Michigan
Tractor
John Deere 2320
Since there seems to be a lot of bridge interest lately, I've finally gotten time to post some photos of mine. I've been working on this for the last month or so but I only get a day a week to work on things if I'm lucky, so nothing happens very quickly around my place.

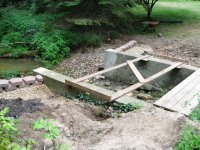
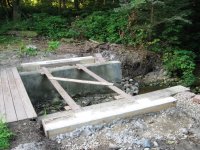
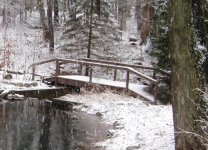
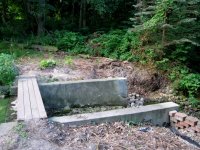
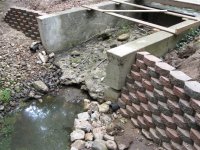
I've got a pond with a concrete dam and spillway. I need to cross it to get to some of my property. I've attached an old picture of the original bridge which was too small for my tractor, rotting out on the approaches and the support posts were washing out. The second picture shows the bridge torn out with a temporary bridge next to the dam. I used some retaining wall blocks I salvaged from another project to build up the downstream edge of the spillway. The old spillway (in addition to needing some patching) is far from square, so I built a template frame out of scrap lumber to set the new foundations (which will be concrete) parallel.
br0.JPG br1.JPG br2.JPG br3.JPG
 
   / My Bridge
  • Thread Starter
#2  
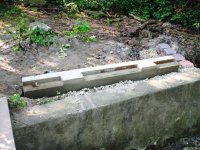
Moving forward, I framed up forms for the concrete footings. They are 6 to 8 inches thick, about a foot wide and have two 8" diameter form tubes (4 feet deep) under each footing. The foundations have beam seats cast in. The bridge beams won't actually be anchored since there is no danger of flooding. The beam seats will keep the bridge from shifting.

br4.JPG br5.JPG
 

Attachments

  • br6.JPG
    br6.JPG
    267.1 KB · Views: 899
   / My Bridge
  • Thread Starter
#3  
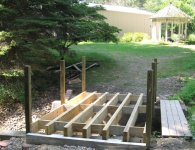
OK, the last post got a little messed up, but now here are the actual tractor pictures. I built the bridge frame in three sections on the concrete floor of the pole barn and moved them into position. The beams are 12 foot long 2 x 10s doubled with about 12" spacing. There are a total of 12 beams so the overall capacity should be about 4 to 5 tons point load or 8 to 10 tons distributed loads.

br6.JPG br7.JPG br8.JPG
 
   / My Bridge #4  
Looks as though this could easily be a beautiful bridge (more for the mrs's). I can see it looking much like the beautiful old covered bridges of yesteryear. Great job!!! Hope I don't forget to check in and see how you finish it up.
 
   / My Bridge #5  
I've actually thought about using my "hog lift" to build a cabin or shack. I've built a few bridges using old rail road timbers but nothing as nice as what you're doing.
 
   / My Bridge #6  
Are you using yellow wood?

Did you put anything between the wood and the concrete?

I have something similar planned for my spillway, and I'm unsure if I want to put a piece of rubber or tar paper under the boards where they touch the concrete or not.

Eddie
 
   / My Bridge
  • Thread Starter
#7  
It's above ground treated wood. I will add concrete blocks at the ends so the wood only contacts concrete. I think that will be ok.
 
   / My Bridge #8  
I think you're right. I'm debating with myself about trapping water where the wood rests on the concrete, or allowing airflow to dry it out faster or keeping the wood off the concrete would help it last longer. I'm also thinking that I'm over thinking it and it doesn't matter either way. LOL

Eddie
 
   / My Bridge #9  
IF you are that worried about where the wood touches the concrete, lay down a ground contact rated treated 2x8 on top of the footer. Attach the bridge to that.
 
   / My Bridge
  • Thread Starter
#10  
Now you've got me thinking (always dangerous). Another board wouldn't work but it would be easy to put some tar paper under the beams. Would that be a good idea?
 
 
Top