LS Tractor Owner
Super Member
- Joined
- May 1, 2017
- Messages
- 7,549
- Location
- Edgewood, NM
- Tractor
- LS XG3025 TLB, Previously MT125 TLB, Craftsman GTS6500
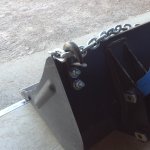
Finally got to finish up some extras on my little MT. Don't have a pic of it on, but added a Neat Farms tooth bar on the bucket. Also a couple of hooks. Definitely need to add a third one in the center, as I quickly found out using them today to pull out 16 - 4x4 fence posts that have been in the ground about 15 years.
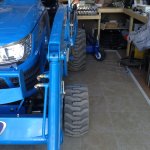
Next added some LED light cubes. I used 2-30lb magnets on each light, this way I can easily move them to the rear, or bring them down onto the fenders, or even underneath if needing to fix something. They also swivel, so can be and led out to the side. With that in mind, I used smaller magnets and small screws / nuts to use cable clamps to hold the wire. This way, no zip ties to cut or reinstall. Wire can get routed and held in place to wherever the light gets mounted.
Next up was an LED flood light for the backhoe dipper arm. Shines wherever the bucket goes.
Got the lights off eBay, $30 for the 2 cubes and 2 of the 4" floods. They are better and brighter than expected.
Wired them using relays direct from the battery, blue (of course) LED lighted switches. One for the tractor lights, one for the BH light. Used automotive pull apart plugs at the rear for when the BH comes off.
Couldn't stop there, so added 1 1/2" wheel spacers on all 4 corners. Really makes the tractor feel much more stable, especially with a loaded bucket on rough terrain. Rears are 'flush' with the sides / edges of the front bucket.
I noticed that I was scratching the outer edges of the floor board getting on and off the tractor, where the rubber mat doesn't cover. Also the area right behind the seat (part of fender / rear body) was getting scratched from turning the seat for the BH operation. Happens if you drop the seat when it is only partially turned. I found rubber diamond plate, self stick step treads at Walmart for $8 for 2 treads. Put one behind the seat, cut the other one in half (surprisingly easy with a razor knife) and put them on the floorboard on each side.
Found the self stick worked on the full piece behind the seat, but the 1/2 cut pieces on the floor board started peeling in the middle. The bend is real tight in that area. Took them off, removed the remaining adhesive with mineral spirits, and reapplied them using exterior double-sided Gorrilla tape. They have been out in the sun, stepped on multiple times, and 50 degree temp swings. They are on there now!
Next project is going to be a static thumb for the BH. Eventually I'll plumb a couple of rear remotes, but that will have to wait for some better financial times (can't believe how much they cost, then of course top and tilt stuff for the implements).
Thought about fiberglassing up my own canopy, but decided that would really take a lot of time, effort, and would be a real PIA, so my current electrical conduit and sunshade cloth will have to do for now.
Attachments
-
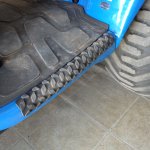 image.jpeg1.3 MB · Views: 735
 -
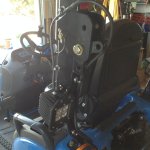 image.jpeg959.7 KB · Views: 634
 -
 image.jpeg1.4 MB · Views: 529
 -
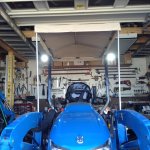 image.jpeg1.2 MB · Views: 573
 -
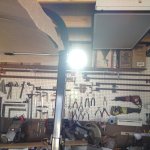 image.jpeg1.2 MB · Views: 446
 -
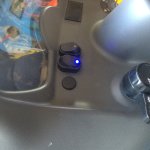 image.jpeg976.7 KB · Views: 541
 -
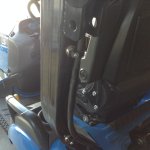 image.jpeg882 KB · Views: 526
 -
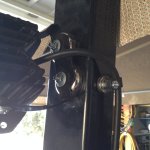 image.jpeg946 KB · Views: 503
 -
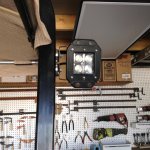 image.jpeg1.1 MB · Views: 549
 -
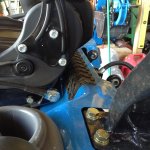 image.jpeg1.3 MB · Views: 775
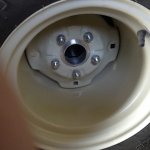
 :laughing::laughing: I tried looking for some center caps and trim rings but couldn't find any to fit....just kidding...