GC 2410 belt change help

   / GC 2410 belt change help #11  
Keep in mind I didn't remove my driveshaft totally, only disconnected it at the HST fan end... but IIRC the other end just slips out. Sorry my memory's not so good!

Here's another view of the HST cooling fan at the rear end of the HST shaft. Look closely, you can just see the end of the locking bolt there ( oops, no nut, just a bolt). The front end of the shaft slips into the splines. And yes, I did grease that up when I was in there!
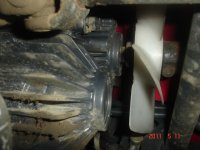
output shaft seal.JPG
 
   / GC 2410 belt change help
  • Thread Starter
#12  
Well, today I dove into replacing the belt and lower rad hose. Irvingj you were right, one bolt is removed from the hst end of the driveshaft, the shaft can be slid forward to remove it from trans end, then moved back and off the motor end after moving to one side of hst fan for clearance. I was also able to remove and install belt without removing engine fan. I did remove the radiator for clearance and to assist in accessing the lower hose, but probably didn't need to be.
The new belt actually filled the entire pulley groove, unlike the original. I had to remove the alternator bolts and cant the pulley inward to get the new belt on it was that short. Now I'm at the inner end of my adjustment bracket, like it should be. I also changed the coolant as well as the air filter. Both were original 2009. New air filter was nice and snug in the housing, where the old was was kind of loose fitting.

Thank you for your help. I will try to post pics.
 
   / GC 2410 belt change help #13  
OK, thanks for the update! I'll probably be changing mine soon (?) -- so far, many of the normally-consumable parts on my 2007 are holding up well. (Still on original battery!)

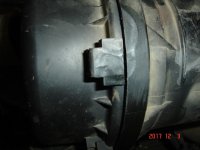
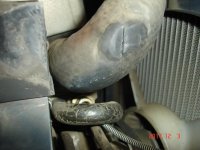
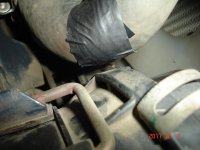
While you're in there, check the rotational position of the air filter housing carefully for housing-to-radiator hose clearance -- I found mine had shifted just enough that it was contacting --and cutting into-- the upper radiator hose. Tried some duct tape as a buffer & re-positioned the filter housing, but eventually it began to leak and I had to replace it, just 3 years ago.

DSC06410.jpg DSC06408.jpg DSC06407.jpg
 
   / GC 2410 belt change help
  • Thread Starter
#14  
Thanks irvingj. Yes I repositioned the air filter to be clear of the hose when I put it back in, as there was a rub mark on the upper hose. Also, when fitting the driveshaft back into motor end. I think it's "keyed" to go back only one way. I had a heck of a time getting it to go back into the yoke unless it was clocked in the exact position that it came out. I couldn't tell by looking at the splines, but it just wouldn't go back in any other way. I only know this because when I went to hook the hst end back on, the bolt was in the exact orientation that it was when I removed it.
 
   / GC 2410 belt change help #15  
Yes, that's quite likely; I've noticed the same thing on the connection from mid-PTO to the MMM.

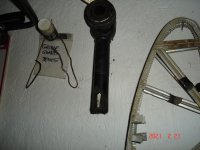
I used a white-out marker to make lines on both pieces that I can see and then line up when connecting. The splines sure LOOK like they're evenly spaced, but they're definitely not -- only one way to get them to connect. I believe this is done to ensure u-joints area oriented correctly to reduce vibration.

MMM short shaft.jpg
 
   / GC 2410 belt change help
  • Thread Starter
#16  
Here's a few pics of the old and new belts:
KIMG0792.JPG
KIMG0791.JPG
KIMG0796.JPG
 
   / GC 2410 belt change help #17  
little hacksaw work and old one would have been fine LOL
as soon as windchills well above 0 gonna take a gander at mine again just to be safe
 
   / GC 2410 belt change help
  • Thread Starter
#18  
Here's a pic with radiator removed, fan shroud is still in place around fan but not attached, showing u joint with slip coupling coming off crank pulley:


KIMG0793.JPG


.
Here is lower radiator area showing hose barb and the drain hose. Looks like it could be damaged easily.
KIMG0799.JPG

KIMG0795.JPG
 
   / GC 2410 belt change help
  • Thread Starter
#19  
Better pic of u joint below radiator:
KIMG0794.JPG
 
   / GC 2410 belt change help
  • Thread Starter
#20  
All finished up and back at the minimum adjustment:
KIMG0800.JPG
 
 
Top