Before & After

   / Before & After #1  

IrTxRx

Silver Member
Joined
Apr 9, 2004
Messages
249
Location
Central Texas
Tractor
Power Trac 1430
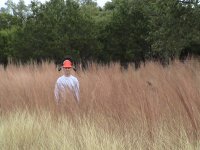
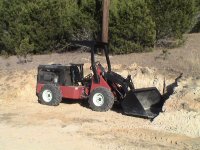
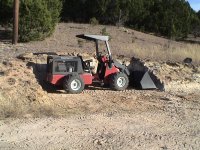
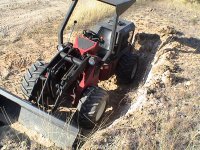
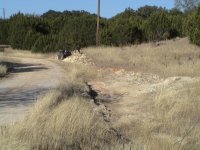
I wanted to start a thread that shows what our projects looked like before we started and the end results after application of our PT's and their various attachments. So many times everyone on the board is so excited to get on their tractor that we only get AFTER pictures. This makes it a little difficult to get visual information for how much work our tractors can do.

Case in point, my driveway used to look like a creekbed and is now smooth. The amount of work that my new baby did is impressive to me, but I forgot to take the creekbed picture... oops.

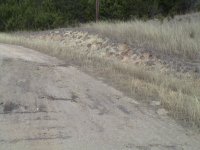
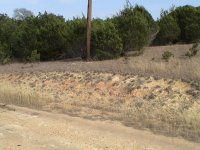
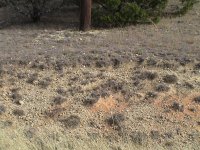
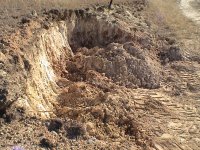
I went out and took a bunch of pictures of areas that I expect to be working on in the near future. That way, I will have a file to refer to when I excitedly get on the tractor and take the after picture.
 
   / Before & After
  • Thread Starter
#2  
Before --

Record rainfall in Central Texas let native bluestem grasses grow 6ft high
 

Attachments

  • DSC00291.JPG
    DSC00291.JPG
    488 KB · Views: 465
   / Before & After
  • Thread Starter
#3  
After --

2.5 hours later, burp the baby, and finish the job.

4 acres of 6 foot tall prairie grass, 1 broken blade after 30 minutes of mowing, 35 chewed up old cedar stumps because the mower mows WAY to low for a brush cutter. Still, I LOVE MY MUT!!!

My grass seemed to mow a little better when it was just barely damp, FWIW

Also, My front casters are FILLED from the factory. But I don't think my grease zerks are going to last long...
 

Attachments

  • DSC00304.JPG
    DSC00304.JPG
    447.9 KB · Views: 455
   / Before & After #4  
Greetings,

Would it be in bad taste to show a before and after of the PT-429 before and after I use the CT322 for it's first application?

Love,

Steve
 
   / Before & After
  • Thread Starter
#5  
scarg said:
Greetings,

Would it be in bad taste to show a before and after of the PT-429 before and after I use the CT322 for it's first application?

Love,

Steve

Perfect...let 'er rip

Edit - oops, just assumed that you were doing another awesome mod on the 429 before I read your other post...But, yeah, I think it is part of the story. I would guess only a hundred or so PT posters and five have gone back to regular CUTs that I can think of off the top of my head.
 
Last edited:
   / Before & After
  • Thread Starter
#6  
Before...nope, forgot to take pic
After...nope, remebered to take pic before I was through

BRAFTER --

removed a shrub that grows like crasy and makes it hard to mow no matter how much I prune it back every year. It is about 6 inches in diameter with medium sized root ball. Lackender hoe with grapply, no problem and bye-bye shrub
 

Attachments

  • DSC00316.JPG
    DSC00316.JPG
    466 KB · Views: 305
  • DSC00317.JPG
    DSC00317.JPG
    450.8 KB · Views: 284
   / Before & After
  • Thread Starter
#7  
Before -

big hill of kaliche (caliche) road base and I need material for my drive
 

Attachments

  • DSC00299.JPG
    DSC00299.JPG
    445.7 KB · Views: 281
  • DSC00300.JPG
    DSC00300.JPG
    501.8 KB · Views: 283
  • DSC00301.JPG
    DSC00301.JPG
    448.9 KB · Views: 277
   / Before & After
  • Thread Starter
#8  
Before (road base hill, con't) --

I love my PT, but one of its biggest weaknesses is brute force (or lack thereof) so what to do... Minihoe, possible... teeth on grapple, probly not... Potato digger, sounds good... but wait, the roar of the 2cylinder engine the whine of the PTO and the glint of sunshine off 24 carbide tipped teeth, enter the wheel trencher

Man I love yhis attachment. It is truly impossible to appreciate this machine unless you have tried to dig in our central texas soil (e.g. clay/rock).
 

Attachments

  • DSC00293.JPG
    DSC00293.JPG
    465.4 KB · Views: 321
   / Before & After
  • Thread Starter
#9  
After (road base) --

Two hours of tractor time later and the PT has a new parking space. The deminsions are (4' X 8' X 14') / 2 which is 224cubic feet which is pretty close to a 10 yard dump truck of material (PT already saved me $150, yeehaw).

After the initial cutting fun with the wheel trencher, I also used the lackender hoe. However, i found that the best tool was the potato digger. Mainly it was best because of speed. Drop the LM bucket, pick up he potato digger and rip the hill a little, stab the digger in the ground and un hook, back to the bucket. Unpowered implement to unpowered implement wins the day (but turning the wheel trencher up and driving into the hillside was still the most fun!!!).


BTW -- check out the awesome parking job (if I do say so myself)!!!
 

Attachments

  • DSC00319.JPG
    DSC00319.JPG
    442.1 KB · Views: 291
  • DSC00320.JPG
    DSC00320.JPG
    466.7 KB · Views: 289
  • DSC00321.JPG
    DSC00321.JPG
    461 KB · Views: 265
  • DSC00322.JPG
    DSC00322.JPG
    487.1 KB · Views: 284
   / Before & After
  • Thread Starter
#10  
Before (my road is a son-of-a-ditch)

Our 1/4 mile drive has not had any maintenance since it was cut in 1992. I forgot to take pics of the drive, but basically it looked like a creekbed, because it had become the ditch. I got all the potholes filled in, now I just need to get new ditches cut before (if) it rains again.
 

Attachments

  • DSC00323.JPG
    DSC00323.JPG
    482.6 KB · Views: 287
   / Before & After #12  
Moved approx 2500 lbs of travertine and slate using a trailer. Tile man coming tomorrow....was going to hook-up to the truck but hate backing and lining up with the hitch. Put hitch in the adapter plate and voila'...

Was very easy to hook-up and move around. The trailer was very steerable.
Trailer driving PT style is a hoot! :D 
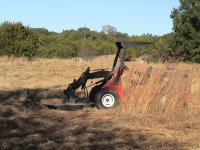
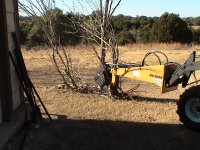
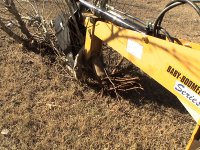
What with the "double articulation" of the PT and trailer.

Sorry, no "after" pick. It was just an empty trailer....:D If the PT would have fit through a "36 wide door the job would have been much easier.... just say'n.
 

Attachments

  • PT Trailer.JPG
    PT Trailer.JPG
    909.3 KB · Views: 242
   / Before & After
  • Thread Starter
#13  
Red Zebra said:
If the PT would have fit through a "36 wide door the job would have been much easier.... just say'n.

We want to rip up all our various floor coverings and put refinished, stained concrete in its place. I MAY take off the sliding glass doors and do some INDOOR TRACTORING!!! (CFO still hasn't signed off on the idea though) If I do, I will definitely post before, during and after pics.

Full speed ahead and Dang the carbon monoxide!!!
 
   / Before & After #15  
IrTxRx said:
We want to rip up all our various floor coverings and put refinished, stained concrete in its place. I MAY take off the sliding glass doors and do some INDOOR TRACTORING!!! (CFO still hasn't signed off on the idea though) If I do, I will definitely post before, during and after pics.

Full speed ahead and Dang the carbon monoxide!!!
You know, that sounds funny and all, but at my employer, we have had to remove carpet that was glued down to concrete many times. The guys take two 2x4 and sandwich the edge of the carpet between them and bolt them together with carriage bolts and wing nuts. Then they attach pull straps to each end of the lumber and make a Y connection to an electric powered skid mover (a mini forklift) and back up. It pulls the carpet off nice and evenly. :)
 
   / Before & After #16  
IrTxRx said:
We want to rip up all our various floor coverings and put refinished, stained concrete in its place. I MAY take off the sliding glass doors and do some INDOOR TRACTORING!!! (CFO still hasn't signed off on the idea though) If I do, I will definitely post before, during and after pics.

Full speed ahead and Dang the carbon monoxide!!!


I've seen stained concrete with different patterns....NICE! and durable.
A few well positioned throw rugs and comfy slippers and you're good to go!
 
   / Before & After #17  
Said house building continues....

Builder said needed two retaining wall footers dug on each side of the house. 18"D x 15"W x 10ft long. Since we're doing cost "plus" he said a bucket hoe is $100 for the call and $75hr or about 175 total. I said no problem....I'll handle that...you handle the footers/etc.

Here's a before and after....about 15 min work per side. A big bucket hoe would have taken more time to set up than to dig the small trench..:eek:
But hey....I had fun and saved a few bucks.

Hard to show the scale of the trench in the photos. The wide angle shows it best! Would have taken me hours and advils to do it with a shovel.

I have this idea about placing a moat around three sides of the house but SWMBO says no-way! :rolleyes:
 

Attachments

  • FOOTER BEFORE.JPG
    FOOTER BEFORE.JPG
    838.9 KB · Views: 183
  • FOOTER AFTER.JPG
    FOOTER AFTER.JPG
    910.7 KB · Views: 187
  • FOOTER AFTER.1.JPG
    FOOTER AFTER.1.JPG
    896.4 KB · Views: 186

Tractor & Equipment Auctions

1999 John Deere 7810 (A60462)
1999 John Deere...
2014 Freightliner M2 106 Palfinger PK22002EH 6 Ton Knuckleboom Flatbed Truck (A55973)
2014 Freightliner...
2022 FORD F-250 STV CREW CAB TRUCK (A59823)
2022 FORD F-250...
159119 (A60430)
159119 (A60430)
2020 MACK GRANITE (A58214)
2020 MACK GRANITE...
2009 Peterbilt 335 Cab and Chassis Truck (A55852)
2009 Peterbilt 335...
 
Top