Anyone with ICF building experience?

   / Anyone with ICF building experience? #21  
the only other issue i have is i wonder about fumes if there's a fire.

Not sure about the Nexcem product, but on the poly ICF, there would likely be a lot of residual smoke. But if there is a fire, I'd want to vacate the premises anyway.

As far as using a hot knife to cut thru the poly block for romex installation, I chose to use an elec chainsaw with a depth gauge (so as not to hit the poured concrete inside the form). The chainsaw creates a wider channel for romex and pex to fit into than a hot knife. And the chainsaw won't burn the poly ICF (or anything else) if laid up against the form by accident.

To each his own, but that was the advice I got from an expert installer.

FWIW.
 
   / Anyone with ICF building experience? #22  
Good info, good to hear you're happy with the Faswall system. Any pix you can share?

Have I got pics? :scratchchin:

Cabin - 3 of 39.jpg

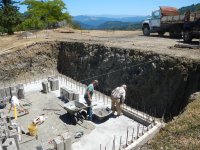
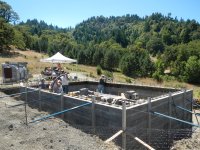
Started with some beefy footings as they were going to be carrying A LOT of weight. After the footings set, I coated them with a Zypex product to prevent moisture from wicking into the Faswall block through capillary action.

Cabin - 6 of 39.jpg

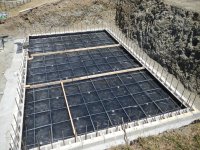
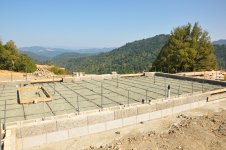
After getting the plumbing lines situated, we leveled and set the first course of Faswall blocks in a mortar bed. Then I laid in 2" of rigid foam lapping the foam over the footing and butting it against the block (creating a thermal break) before pouring a 6" slab reinforced with #5 rebar.

Cabin - 8 of 39.png

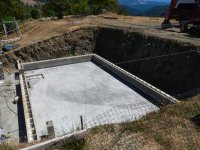
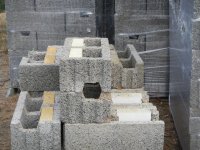
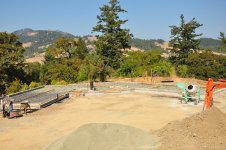
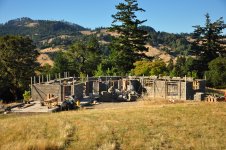
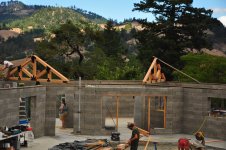
A photo of the building site before beginning to stack the Faswall block. Those pallets of block looked a whole lot less intimidating once they were stacked. :)

Cabin - 9 of 39.jpg Cabin - 10 of 39.png

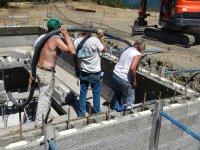
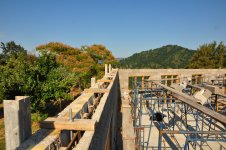
We minimized the amount of bracing required by stacking the wall up to the level of the entry level floor, attaching the rim joists, setting the floor trusses, and decking the floor. Having the floor decked also provided a platform to work off of during the concrete pour, negating the need for a bunch of scaffolding and interior wall bracing. And, while Faswall says their block can be simply dry-stacked, we found we could maintain a more stable wall while stacking by using a little bit of Advantech's floor decking foam adhesive to "glue" blocks in place as we went.

Cabin - 13 of 39.jpg Cabin - 14 of 39.jpg

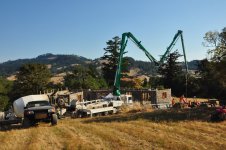
The exterior walls were completed in 3 separate pours, using the same process described above. The portion of the wall below grade was coated with Tamoseal (similar to Thoroseal) as a water-proofing agent, then covered with Superseal dimpled foundation mat, then 2" of Roxul Comfortboard. There's also a perimeter drain around the footing which drains to daylight near the septic tank. The dimple mat is applied with dimples facing in which permits water vapor inside the building to move out through the wall.

Cabin - 20 of 39.png

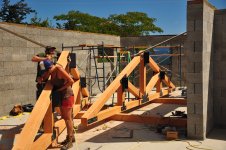
Once the roof was on, we continued up the exterior walls, setting windows flush to the block wall, then framing boxes around the windows and attaching furring boards to facilitate the installation of the metal siding. I had a machinist neighbor fabricate the deck beam braces from 1/4" 4x4" HSS, had them powder coated, and attached to the brackets previously secured to walls by running 3/4" A325 equivalent all-thread embedded 12 inches into the concrete cores of the corner block (which we had removed the Roxul inserts from to provide a more secure anchor point).

Cabin - 39 of 39.jpg Cabin - 36 of 39.jpg

And a quick shot taken a couple of weeks ago showing the (nearly) completed product. The elevated deck proved to be somewhat of a nightmare to get engineered, fabricated, and installed but it was essential to achieve the 'look' we wanted and it is a fantastic space. Still have to do some landscaping (essentially a rock border with a gravel apron to create a 'defensible space' around the structure) and pour a concrete patio on the pond side of the cabin. But we're moved in and feeling like we're living at the Ritz after seven years in the bunkhouse in the pole barn.

How's that for a few pics? More than you EVER wanted to know. :laughing:
 
   / Anyone with ICF building experience?
  • Thread Starter
#23  
How's that for a few pics? More than you EVER wanted to know. :laughing:

Thank you for posting all that! What a great house, location, result....congratulations! I wish you weren't so far away, I'd love to see it in person. Would you like to build another one in Ohio in a couple years??? :shocked::cool2:

PS: Would love to also see some inside pix if you care to share them...
 
   / Anyone with ICF building experience?
  • Thread Starter
#25  
   / Anyone with ICF building experience? #26  
Stupid me, didn't even think about youtube....D'oh! Thanks for the link & idea! Will definitely check it out.

Blame one of my daughters, she had to remind me when I had a question about installing standing seam roof (have not made the decision yet, but have looked at some videos)..
 
   / Anyone with ICF building experience? #27  
Inside pics? Now you want inside pics? :) I can probably round up a few.

The cabin was designed to have the feel of a USFS fire watch tower. I got the idea from a cabin built by an architect on some family land out of Lewistown, MT, which was featured in a cabin book I bought about ten years ago. The cabin is three floors: a 'basement' level which has a mechanical room and laundry, storage, and a bath with shower and sauna. The entry level off the front deck has a coatroom area, a powder room, and the master (and only) bedroom, the upstairs is all open with a kitchen area on one side and living area on the pond side. Plus the wraparound deck, which is a little over 500 sq. ft.

Cabin - 18 of 39.png Cabin - 21 of 39.jpg

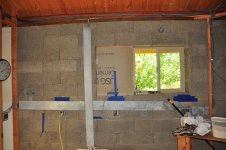
The idea was to have as many windows as possible on the upper floor, to really accentuate the 'lookout' feel, but we are on an elevated location prone to high winds and the roof (with 5' deep eaves to cover the deck) is like a giant sail, so I wanted to have the four corners of block walls solid, reinforced, and anchored right down to the footings so the top plate and roof trusses had something stout to grab onto. When you try to go with solid windows all the way around, there's just no shear strength to the wall and would have required essentially building a structural steel 'cage' between the roof and the block wall. I put one small interior wall in the kitchen area which provided a convenient chase for plumbing vent lines and electrical (and also provided a safety net of sorts for lines we might have forgotten to place in the exterior walls prior to pouring concrete). Here you can see the bare block and the scratch coat of stucco in preparation for the lime plaster.

Cabin - 19 of 39.jpg Cabin - 24 of 39.jpg

We used closed-cell polyurethane foam for the roof insulation. Prior to spraying the foam a false roof deck was installed below the actual roof decking, so there is about 6" of open space under the actual roof deck to allow air circulation from the soffit vents to vent space around the curb for the skylight. An additional benefit of the foam was it really locks the roof trusses in and makes a VERY solid roof system. We also installed a whole house fan in the skylight vault to pull cool air into the cabin on summer mornings. With the thermal mass of the block walls, it's possible to maintain comfortable temperatures year-round without much in the way of heating and cooling costs. For the interior walls and ceilings, we used knotty pine T&G, although we did incorporate some of the metal siding from the outside in the stairwell, bath, etc. as an accent.

Cabin - 31 of 39.jpg Cabin - 30 of 39.jpg

We went with a traditional finish on the knotty pine to enhance the cabin feel and the lime plaster has a very natural look, a matte (almost suede) texture, and mottling that gives it some depth, It was a royal PITA to do, but it was something I kind of had my heart set on from the beginning and it turned out great. The skylight is a 4x4' commercial Velux unit which admits a ton of diffuse light, even in the winter when the sun is very low on the horizon. And the little propane-fired fireplace can heat the area very quickly and also provides a nice atmosphere. And it even has a remote, so when I want a 'fire' all I have to do is click a button. I like a wood-burning stove as much as the next guy (and have one in the bunkhouse) but with 60 in the year view mirror, I also like not hauling wood up or ashes down the stairs.

Cabin - 27 of 39.jpg

Here's the sauna in the downstairs bath, which is accessed from the bedroom. Nice little kit from Finlandia which went together without any hassles.

Cabin - 38 of 39.jpg

And here's a snapshot I took a couple of weeks back as my wife and I were sitting on the deck watching a spring storm blow in. Even the clouds above seemed to be giving us a thumbs up on the cabin. Designing and building this cabin took a lot more time and a lot more money than I had originally intended (mainly because I kept upgrading things as we went, falling prey to the old "in for a penny, in for a pound" and "we're only going to do this once" mentality), but we're thrilled with the result and I hope we get to spend many years enjoying our little piece of Big Sky Country.
 
   / Anyone with ICF building experience?
  • Thread Starter
#28  
Inside pics? Now you want inside pics? :) I can probably round up a few.

Great pix, thank you again! The plaster is an interesting look....probably not reflected completely in a picture. I was also leaning towards the pine v-notch for my cabin interior, but may use that plaster in kitchens/bathrooms.

Maybe a tough question, but all else being equal, what would you estimate the ICF portion of your build added to the cost of the project, from a percentage standpoint, vs. standard lumber construction? I'm reading 5-10% is the norm, just wondering if you would concur? Did you price it out both ways?
 
   / Anyone with ICF building experience? #29  
Great pix, thank you again! The plaster is an interesting look....probably not reflected completely in a picture. I was also leaning towards the pine v-notch for my cabin interior, but may use that plaster in kitchens/bathrooms.

Maybe a tough question, but all else being equal, what would you estimate the ICF portion of your build added to the cost of the project, from a percentage standpoint, vs. standard lumber construction? I'm reading 5-10% is the norm, just wondering if you would concur? Did you price it out both ways?

I’m afraid I can’t provide much guidance in that area, as I did not price it both ways. The truth is I decided on using the Faswall block before I even had the plans complete. Again, for the DIYer with time and some good help during the critical times of pouring the concrete, I think there is an argument to be made the blocks are a cost-effective method yielding a superior building over stick-framing. That argument goes out the window when hiring a contractor who has no experience with the product.

One thing to note when comparing Faswall (or similar) blocks to standard foam ICFs. While they are obviously similar in design and construction, there are some fundamental differences. Foam ICFs yield a conventional building envelope which places a high value on being air-tight. Faswall blocks are designed to create a wall which is vapor-permeable, acting not only as a thermal mass but also as a humidity sink, maintaining a more stable indoor relative humidity. Additionally, Faswall blocks are more efficient as a thermal mass because the insulation is all on the outboard side of the concrete core. A conventional foam ICF generally has the same thickness of insulation between the concrete core and the inside of the building as it does between the core and the outside, which significantly impairs the flywheel effect of the thermal mass.

My location is in an area with timber and high risk for wildfires. And it can get VERY WINDY. I chose the Faswall blocks (and exterior Roxul insulation, steel framing for the decks, metal siding and roof, hardwood decking with a Class A fire rating, etc.) because I wanted a structure built like the proverbial brick sh*thouse and as fireproof as I could make it. Those considerations obviously added some significant costs to our project.
 
   / Anyone with ICF building experience? #30  
There is one product that will replace both SIP's and ICF...they are insulated studs. The only real benefit to SIP's and ICF is a thermal break. Well you can now get that in an insulated stud. Then you build in a traditional manner with the option of foam panels on the outside or spray foam on the inside. The insulated studs have break away chases to run electrical wires etc. It builds up quick at a fraction of the cost. It's such a simple concept, I surprised no one has thought of it before.

Thermal — Tstud
maxresdefault.jpg

Insulated Studs? This is a BIG Innovation in Framing! - YouTube
 

Tractor & Equipment Auctions

AGT MX15RX Mini Excavator (A44501)
AGT MX15RX Mini...
2014 FREIGHTLINER CORONADO (A45046)
2014 FREIGHTLINER...
2010 UTILITY 53X102 DRY VAN TRAILER (A43004)
2010 UTILITY...
2019 Bobcat T740 Two Speed Compact Track Loader Skid Steer (A42742)
2019 Bobcat T740...
2012 UTILITY VS2RA 53FT REEFER TRAILER (A43004)
2012 UTILITY VS2RA...
Honda FRC800 Walk Behind Tiller (A44502)
Honda FRC800 Walk...
 
Top