downsizingnow48
Elite Member
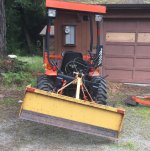
After some years of struggling with 3pt hitch implements, I decided to install a hydraulic top link and hydraulic side links.
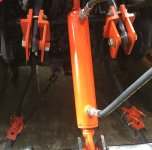
The top link was straightforward. I bought a $185 top link from Surplus Center (2x8). It had a double pilot operated check valve, which I don't want for this application, but I do want for another use. So for purposes of this project, the cost of the hydraulic top link was about $120 (the check valve is about $65 separately). The only modification was, I had to grind 1/8" off each side of the base end swivel eye to fit the B21 bracket. The retracted hydraulic top link is about 1/2" longer than the retracted length of the factory top link, which is OK.
For the side links things are more complicated. The usual way is to fabricate angled clevises and weld them to the rod and base ends of a cylinder. One way or the other, various operating angles and motions need to be accommodated. I decided to use off-the shelf cylinders, and then accommodate the angles and motions with fabricated shackles.
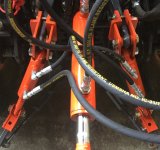
The cylinders, also from Surplus Center, are 1.5" bore x 3" stroke, with retracted length of 11". Each end has a swivel eye (spherical bearing) with 5/8" hole. Usually 2" cylinders are used for the side links, but the 1.5" cylinders have plenty of power to lift my implements which weigh 500-600 lbs. They cost $89 each.
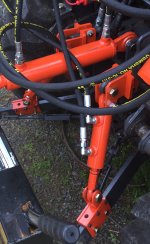
The bottom shackles are pinned to the lower 3pt arms using the two factory adjustment holes. The shackles can be swapped end for end to provide different lifting geometry, same as the factory side links. A clevis is used to attach the tilt cylinder to the bottom shackle. The clevis is made from 1.5"x4"x3/16" tubing, with a 1/2" bolt welded in, that screws into the shackle. The clevis swivels to accommodate operating motion.
The upper shackles are the same as any leaf spring shackle, made from 1/4" bar. The attaching bolts are 5/8" with spacers. The spacers are needed to keep the shackles far enough apart to let the swivel eyes in the lift arms and the cylinder base end move freely to accommodate various angles and motions.
To function properly the shackles work in conjunction with snubbers. The snubbers prevent the shackles from rotating forward and backward. They are made from 2"x3/8" angle. They clamp to the lift arms with 5/16" bolts. The lift arms are tapered, so the snubbers clamp against the taper, and cannot move anywhere.
I could have used one tilt cylinder, that would have been satisfactory, with 1.5" up and 1.5" down movement. I used two because I wanted to use two, and the incremental cost was not that great. The combination allows for 3" drop on either side, which is more than adequate for anything I might do. With both cylinders retracted, the hitch is level. That is convenient. The installed length of the tilt cylinders (retracted length plus top shackle plus bottom shackle) is about 1.25" shorter than the fixed factory side link. This provides useful additional height.
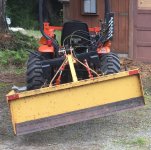
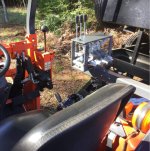
The photos below show the details. I owe great thanks to the many TBN contributors who have shared their TNT experience and knowledge, especially MtnViewRanch, henro, 3RRL, bcp, and ovrszd. No way could I have figured this out on my own.
Attachments
Last edited:
