Patio and pergola installation

   / Patio and pergola installation #1  

VABlue

Platinum Member
Joined
May 12, 2007
Messages
655
Location
Thornburg, VA
Tractor
JD2305
I've finally started building a patio off the basement door that we've wanted since moving in. Getting the pergola support posts into the ground before the patio was built would actually ensure that the pergola gets built, also! Anyway, I'll get to the photo documentary...
Start.jpg
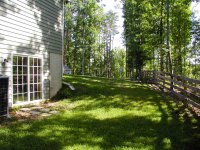
Before I started...

Leveling.jpg
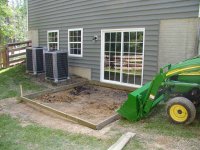
Getting the area leveled and framed so I knew where to put the posts; given the tight area and slopes, most of the leveling was done by hand rather than the loader :(
Auger.jpg
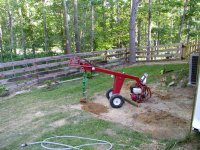
How I dug the post holes - probably a waste of money considering the effort I put into moving this thing around and the time it took to clean up the holes...
moving-posts.jpg
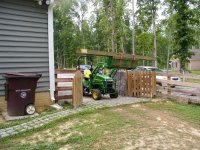
6x6x12' posts, glad I had the loader... Each post is 18-20" deep with 160# of concrete.
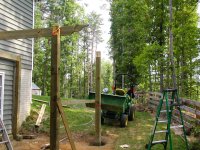
Setting-posts.jpg
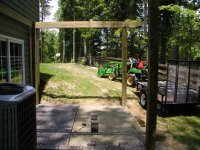
Getting the posts up by myself took some ingenuity. The loader acted as a brace while I leveled and squared them.
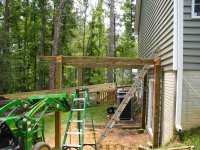
placing-beams.jpg
Some ladders, the loader, and straps held the beams in place until I could get holes drilled for the 1/2" carraige bolts. I balanced them on the loader, then climbed the ladder and pulled the beams into place to strap them onto the posts.
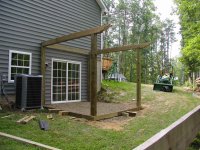
ready-for-pavers.jpg
6" of crushed stone base later and it's ready for the 6x6" brick pavers.

I'll make the next set of pictures smaller, but right now I'm tired of setting at the PC and want to get more work done...
 
   / Patio and pergola installation #2  
Looks like a fun project. I especially love the pictures of your tractor in action. Just add one more thing to the list of why you can't live without it!!!

Eddie
 
   / Patio and pergola installation #3  
Looks great so far, post some finished up pics.

Be sure to slope the patio a good amount so any rain water wont get under your door and in your basement.
 
   / Patio and pergola installation
  • Thread Starter
#4  
It's sloped about 5" and has a daylight drain under everything. I'll also put in slotted drains running from the gutter downspouts on the house corners and run them on either side of the patio and out the fence. That should be enough drainage to keep everything dry. I'm still laying the pavers - life got in the way of play this afternoon... :) I'll post more pics tomorrow.

The pergola won't be finished for a while yet, I needed to get the patio in only because the paver pile has the boat barracaded in the garage. Not good!!! I figured if I didn't get the posts in, it would look awful seperated from the patio.
 
   / Patio and pergola installation
  • Thread Starter
#5  
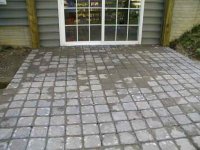
Got some more work done yesterday... Don't think I'll do much today, my vacation is over and I've worked harder than I would have at work! Think I'll rest a little. Or get some other stuff done... Anyway, I got the patio in now...

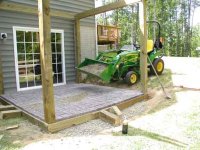
Laying-Brick-2.jpg
Laying bricks - two trailer loads of 6"x6"x2" brick pavers (~5# each). Without the 2305, I would have needed about 40 trips with my 18hp Craftsman and dump cart!

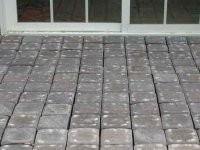
Closeup-before-filling.jpg
Closeup of what it looks like - its not very level or evenly spaced, but so what? Adds to the charm... (Or so I tell myself!)

Filling-in.jpg
Adding some leftover crusher run to lock the bricks in place. Side bonus - the stones make a nice bed for drain tile on the outer edges of the base framing.

closeup-after-filling.jpg
Another closeup after filling and hosing it down to help settle the dirt. There's a low spot on the right side that I'll have to repair, about 8 bricks need to be raised a little.
 
   / Patio and pergola installation #6  
If you decide to put down some pavers again, sand will give you a good level base on top of the rock. Just put down two 3/4 inch PVC pipes and scree off the sand to the height of the pipes. Remove the pipes and fill with sand.

Of course, on a small pad, it's not that noticable. Thanks for the updates, it's coming right along and looking good.

Eddie
 
   / Patio and pergola installation #7  
That looks great, I can so relate to the working harder on vacation than at work. I have to put down some more decking tomorrow my self after a week off
 
   / Patio and pergola installation
  • Thread Starter
#8  
I thought about using sand to lock the bricks but the extra base was easier than running back to the store. I never thought about screeding sand to keep it all level! I did run a 10' 2x4 over the base like a screed, but it was too long to pull from one side and too short to work it back and forth. I didn't bother to attach eyes and rope to pull from the middle... Maybe I was just tired of working on it and needed a break so I took shortcuts? The lessons we know and keep having to relearn!:eek:

Anyway, thanks for the comments! I don't think I'll do anything more until next weekend. Maybe lay out the drain tile if I get too bored today...
 
   / Patio and pergola installation #9  
Looks really good! I'm assuming your going to run a beam between the two outter 6x6's to support the "joists" of your pergola.

If that's the case, then, my only suggestion is to install that beam in a timley fashion. That GT wood moves, shrinks, twists, checks, bows, bends, and crowns pretty quickly. Getting everything screwed down helps alot. You may need to retorque your lags after the wood shrinks too, i do.
 
   / Patio and pergola installation
  • Thread Starter
#10  
Good advice, thanks! I'm going to put 2x6's on top of the joists (notched to fit nicely) as part of the top structure. I was hoping to wait a couple of weeks, but if I need to do it soon, I can. I didn't think the PT would dry out that quickly...

Actually, thinking about it, I'll put up a temporary 2x4 between the joists to hold everything straight this weekend . I want to get the drain lines in and backfill the patio frame before I start playing up top again.
 

Tractor & Equipment Auctions

LOT LOCATIONS (A51222)
1994 FORD F450-SUPER DUTY FLATBED (A51219)
1994 FORD...
2006 International 9400i (A51039)
2006 International...
2023 PETERBILT 579 TANDEM AXLE SLEEPER (A51222)
2023 PETERBILT 579...
2019 Chevrolet Tahoe SUV (A48082)
2019 Chevrolet...
2016 Chevrolet Silverado 1500 Crew Cab Pickup Truck (A48081)
2016 Chevrolet...
 
Top