My Horse Barn in Progress

   / My Horse Barn in Progress #11  
That looks like a fine horse barn. I'm from Michigan so the 18" deep buried water line seems shallow. I go about 48" here (minimum 42) but you must be in the sun belt somewhere. Lot of work ahead. Best wishes on your project.
 
   / My Horse Barn in Progress #12  
That looks like a fine horse barn. I'm from Michigan so the 18" deep buried water line seems shallow. I go about 48" here (minimum 42) but you must be in the sun belt somewhere. Lot of work ahead. Best wishes on your project.
2' down is required down here for electric or water. Up north in Ohio, or other cold climates, it needs to be below the frost line.
 
   / My Horse Barn in Progress
  • Thread Starter
#13  
I'm in NC, and code here is 12" below the frost line, which works out to 18". It may be a bit more in places; it's just down as far as my subsoiler would go. Deeper is better for frost, but shallower is better to fix the inevitable leaks that will someday happen.

More to come, including maybe a pic or two of some horses and the dogs when they're not quite so clean.

And maybe there'll even be a picture of the tractor somewhere in all of this. That's a novel concept on a tractor forum. :)

Josh
 
   / My Horse Barn in Progress
  • Thread Starter
#14  
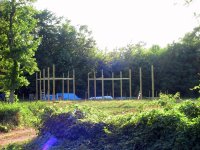
Step 3: Posts

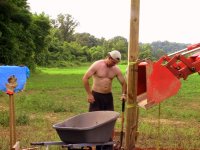
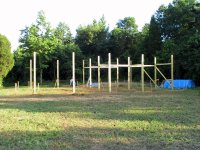
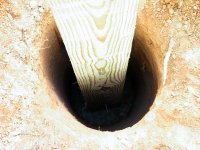
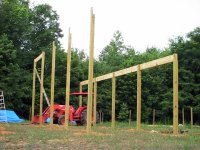
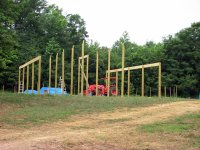
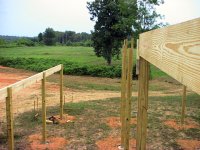
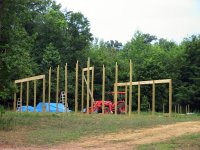
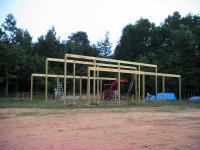
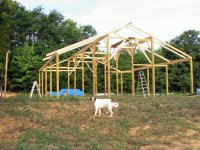
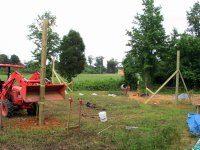
I'm using 6x6's for the posts. The outside rows of posts, where the eaves are, are about 11' out of the ground. Since I can dig down to almost 48" with my 3PH auger, a 16 footer works just fine. For the interior rows, I need 16' out of the ground. However, the cost for 6x6x20's is ridiculous - about 3x what I paid for 6x6x16's. So I used 16's and spliced on an extention with a dovetailed lap joint and some big honkin' hex bolts. It turned out to be a lot of work cutting all those joints. I had to make a pass on each side with a circular saw, finish with a sawzall, and clean up with a block plane. In the end, they're rock solid though. And it saved me about $500.

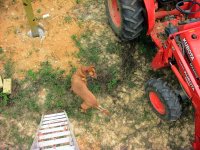
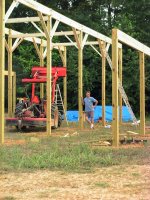
The Kubota was an incredible help in this whole process. Since I'm doing all this work by myself on weekends, you can imagine how difficult it could be to move all of these posts. Anyone who's ever tried to lift a 6x6x16 PT post knows how heavy they are. With the tractor, I could pick up a bunch of posts with forks, drive them to a different location, and set them down with one end resting on a 6'-tall stack of OSB. That leaned them up at enough of an angle that I could then drive up to the low end, tilt the bucket all the way down as far as it would go, lower the bucket down onto a post, and strap it on with a 5000-lb ratcheting tie-down. Then it was simply a matter of lifting the whole post and tilting it upwards at the same time until I got it sticking straight into the air. After that I could drive it over to a hole and slowly and carefully lower it in. It's an iterative process to get the posts just right in the hole. The loader travels on an arc, of course, not straight up and down, so as I lowered the post I'd have to back the tractor up a few inches at a time to compensate. Meanwhile, I'd have to continually tilt the bucket up to compensate for the downward tilt from lowering it. By the time I'd done the 20th post (several weekends after starting the process) I was able to get everything square and plumb and within about 1/16" of the mason's lines I was using to set the position within about 15 minutes of strapping it onto the bucket.

While each post was still strapped to the bucket, I'd brace it temporarily, then untie the tractor and back away. After I'd get a couple posts set, I'd mix up some concrete and start filling them in.
 

Attachments

  • Barn.jpg
    Barn.jpg
    576.9 KB · Views: 747
  • Barn 077.jpg
    Barn 077.jpg
    525 KB · Views: 1,064
  • Barn 085.jpg
    Barn 085.jpg
    610.7 KB · Views: 636
  • Barn 092.jpg
    Barn 092.jpg
    629.3 KB · Views: 522
  • Barn 098.jpg
    Barn 098.jpg
    591.6 KB · Views: 554
  • Barn 099.jpg
    Barn 099.jpg
    623.3 KB · Views: 498
  • Barn 014.jpg
    Barn 014.jpg
    539.4 KB · Views: 487
   / My Horse Barn in Progress
  • Thread Starter
#15  
Step 4: Girders and cross bracing

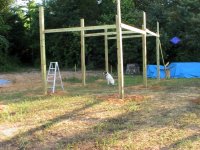
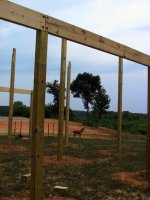
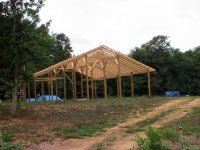
With all the posts planted in concrete the next step was notching the tops and erecting the girders. I set a level line on all the posts using a transit. Then I measured up and notched the outside row. For the inside rows, I measured the existing height to the top of the splice, then notched the extentions at the right length in my workshop before attaching them permanently - much easier than doing them in the air.

The girts are double 2x12's, nailed and glued together. Like the posts, they're pretty freakin' heavy and unweildy, so the tractor was a major help. It can't reach 16' in the air to do the tall inside posts, but at least it could get me up high enough so I could stand in the bucket and set them in place myself. It would have been impossible to do that working off a ladder - oh the joys of working alone. I attached the girts to the posts with a couple of 5/8" hex bolts at each end.

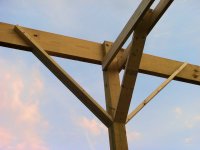
I added diagonal bracing to all the interior posts. The exterior ones will have sheathing and rafters to hold them firmly in place.
 

Attachments

  • Barn 007.jpg
    Barn 007.jpg
    500.1 KB · Views: 439
  • Barn 003.jpg
    Barn 003.jpg
    583.9 KB · Views: 355
  • Barn 002.jpg
    Barn 002.jpg
    600.7 KB · Views: 383
  • Barn 012.jpg
    Barn 012.jpg
    641.1 KB · Views: 394
  • Barn 016.jpg
    Barn 016.jpg
    706.3 KB · Views: 401
  • Barn 033.jpg
    Barn 033.jpg
    611.3 KB · Views: 287
  • Barn 040.jpg
    Barn 040.jpg
    517.9 KB · Views: 687
  • Barn 046.jpg
    Barn 046.jpg
    622.1 KB · Views: 983
  • Barn 049.jpg
    Barn 049.jpg
    691.8 KB · Views: 544
  • Barn 050.jpg
    Barn 050.jpg
    428.5 KB · Views: 994
   / My Horse Barn in Progress
  • Thread Starter
#16  
Step 5: Rafters

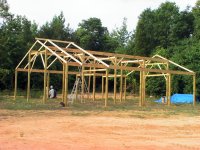
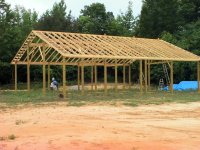
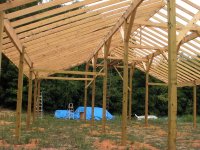
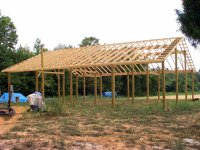
For the rafters I used full 24' long 2x6's. They're tied to the girders with H1 brackets. It's a pain working with lumber that long, especially since I actually had all 52 boards stacked in my workshop to cut all the angles and notches. Plus, boards that long always warp and twist more than shorter ones. However, it was nice when the time came to put them up on the roof, because I could lift one end up by hand and just slide them up as high as I could reach. Then I'd finish putting them in place from a step ladder. Plus, there was no precarious balancing act trying to lean them up against the ridge pole all by myself.

The gable overhang was a little dicey all alone. I put in a couple of the lookout rafters then added some temporary blocking for the end rafters to sit on until I could get them more permanently in place.

I'm planning to add 2x4 collar ties near the peak, though I'm not really sure they're necessary since the rafters are tied firmly to two different girders.
 

Attachments

  • Barn 055.jpg
    Barn 055.jpg
    612.9 KB · Views: 570
  • Barn 060.jpg
    Barn 060.jpg
    645.8 KB · Views: 430
  • Barn 001.jpg
    Barn 001.jpg
    522.1 KB · Views: 357
  • Barn 002.jpg
    Barn 002.jpg
    613.7 KB · Views: 598
  • Barn 004.jpg
    Barn 004.jpg
    634.4 KB · Views: 992
  • Barn 005.jpg
    Barn 005.jpg
    562.3 KB · Views: 427
   / My Horse Barn in Progress
  • Thread Starter
#17  
Step 6: Roof

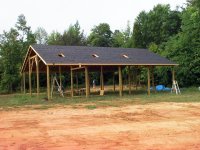
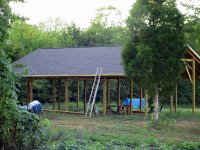
In doing the roof, the tractor was once again enormously helpful, allowing me to avoid carrying full-size sheets of 3/4" OSB or bundles of shingles up a ladder. I could just lift a whole stack of sheathing or pallet of shingles with my clamp-on forks.

Finally, in addition to my trusty tractor, I got some help from a couple friends. One neighbor came over and worked with me all day getting the sheathing up on the roof. The next day another neighbor dropped in unexpectedly and spent the entire afternoon helping me nail all of it down. Then he ran home for a quick dinner and came back and helped me put on the felt. It's great to have wonderful neighbors!

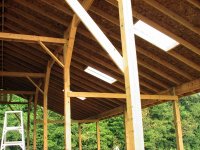
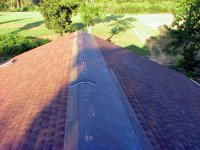
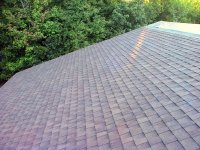
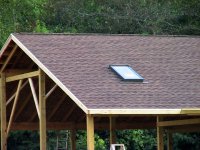
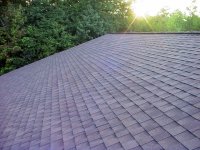
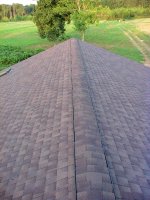
The next weekend was time for shingles. I don't know about the rest of you, but I've never shingled a roof in my entire life when it wasn't at least 85 degrees outside, and that weekend didn't dissappoint. There was no way I was going to get 2200 square feet of roof covered in a weekend by myself, so I hired a couple of guys I know who needed work to help me out. They hadn't ever done roofing before, but they seemed to be fairly quick learners, and they worked really hard. By the end of a very long 87-degree day, I had installed 3 skylights and helped them put on all 70 bundles of architectural shingles. The bad news was that the roof ended up needing 76 bundles. :) I'm not really sure how I miscalculated so badly, but no matter. I had the entire following day to finish the last couple of feet near the peak, install the ridge vent, and put on the ridge shingles. It was 89 degrees that day, and I finished with the last of the ridge at about 7:30 p.m.

The following day when I was back in the office it was bright and sunny with a high of 67!!!! That was the end of August, and now that I finally have shade to work under, it's pretty much been cool ever since.
 

Attachments

  • IMG_3484.JPG
    IMG_3484.JPG
    579.4 KB · Views: 475
  • IMG_3486.JPG
    IMG_3486.JPG
    601.5 KB · Views: 390
  • IMG_3493.JPG
    IMG_3493.JPG
    664 KB · Views: 283
  • IMG_3495.JPG
    IMG_3495.JPG
    613.1 KB · Views: 468
  • IMG_3509.JPG
    IMG_3509.JPG
    658.9 KB · Views: 382
  • IMG_3507.JPG
    IMG_3507.JPG
    622.6 KB · Views: 244
  • IMG_3506.JPG
    IMG_3506.JPG
    738.5 KB · Views: 345
  • IMG_3522.JPG
    IMG_3522.JPG
    670.1 KB · Views: 242
  • IMG_3524.JPG
    IMG_3524.JPG
    611.3 KB · Views: 347
  • IMG_3527.JPG
    IMG_3527.JPG
    665.9 KB · Views: 274
  • IMG_3529.JPG
    IMG_3529.JPG
    638.2 KB · Views: 345
   / My Horse Barn in Progress
  • Thread Starter
#18  
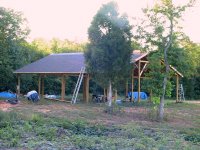
So now you're all up to date on my progress. What I've posted so far has taken about three months of weekends, and several years of useful life off of my back. It's nice to get back to my desk job on Mondays to give it a rest.

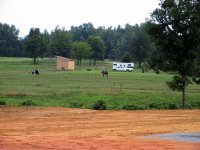
It's been a busy September with planting pastures and mending fences and all the miscellaneous other stuff that has to happen on a farm and doesn't care if you're busy doing other projects. Since finishing the roof in late August I haven't had time to do much of anything on it, but hopefully I'll be back at it later this weekend. First I need to get the hay storage situation sorted out, but that's a subject for a different post. There'll be some hay storage in the barn, but not nearly enough for five horses.

Anyway, the next steps are to set the remaining posts for stall doors etc., rough in all of the under-slab plumbing and drainage, and pour the concrete floors. I'll try to post pictures of the progress as it happens.

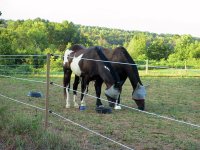
Meanwhile, here are a couple of other pics of some of my other "helpers".
 

Attachments

  • IMG_3521.JPG
    IMG_3521.JPG
    605.1 KB · Views: 657
  • Barn 027.jpg
    Barn 027.jpg
    540 KB · Views: 948
  • 124_2439.JPG
    124_2439.JPG
    576.2 KB · Views: 1,013
   / My Horse Barn in Progress #19  
Looks great!!!! I know there is a lot of work left but I think you are through the worst of it.

MarkV
 
   / My Horse Barn in Progress #20  
Looks like you got things well under control,as well that dog does too.We built a barn that size when we lived over in MO., be we cheated and had a neighbor that builds tobacco bards do the framing and the roof. Went with a metal roof. We used 1x10 pine boards for the siding. One, it looked better when it was stained and two, it priced out about equal if I did the work, and I work for free. I used pipe clamps to get the boards tight, but they still shrank, so I ended up ripping 2" bats to cover the gaps.

Nice looking horses, but how come the bell boot on the paint? What do you use the horses for? We used to do competitive trail with NATRC. Wife's horse is too old (32) and my horse is gettin there (20) and too fat.
 

Tractor & Equipment Auctions

Auger (A50860)
Auger (A50860)
2007 Pace American Enclosed Trailer (A49461)
2007 Pace American...
John Deere 950A Zero Turn Mower (A50860)
John Deere 950A...
2004 Tem-Trail T/A 20 ft. Gooseneck Trailer (A50860)
2004 Tem-Trail T/A...
3-Point Single Disk Plow (A50860)
3-Point Single...
2014 Yale 3 stage 8500lbs lift solid tire forklift (A51039)
2014 Yale 3 stage...
 
Top