Jack Yuan
Platinum Member
- Joined
- Apr 14, 2013
- Messages
- 507
- Location
- Changzhou, JiangSu, China
- Tractor
- Jinma 504, Jinma 904, DF1604, YTO X1804
Well I finally have time to start getting the side shift kit onto the TM1900. The "directions" (if you can call them that) are TERRIBLE. I am trying to document the process in case anyone else can benefit from it.
View attachment 543360
To fit the side shift kit you have to take all the standard hitch equipment off.
View attachment 543351
This leaves you with the standard top link tower and lower 3pt mounts as spare parts (unless you take the slide shift kit off later).
The kit comes with it's own top link tower. It is different from the standard one
View attachment 543361
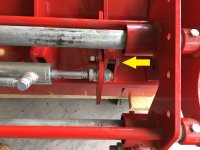
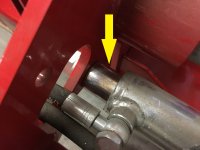
I dry-fit the side shift assembly on top. It's held on by a bolt and some wire. The cylinder mounts aren't lined up in this picture, so it won't normally be cockeyed.
View attachment 543356
View attachment 543362
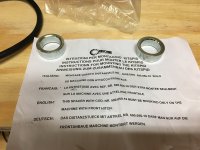
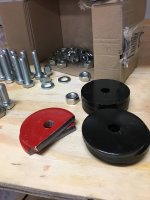
One thing I didn't realize was that holes need to be drilled to mount the kit. I'm not looking forward to that. That's the next step, for another day. There are spacers that need to be inserted on the cylinder assembly, but I haven't figured out exactly how many or where. Different spacing is required for rear mount or front mount assembly, and the instructions aren't clear.
=============================================================================================Well I finally have time to start getting the side shift kit onto the TM1900. The "directions" (if you can call them that) are TERRIBLE. I am trying to document the process in case anyone else can benefit from it.
View attachment 543360
To fit the side shift kit you have to take all the standard hitch equipment off.
View attachment 543351
This leaves you with the standard top link tower and lower 3pt mounts as spare parts (unless you take the slide shift kit off later).
The kit comes with it's own top link tower. It is different from the standard one
View attachment 543361
I dry-fit the side shift assembly on top. It's held on by a bolt and some wire. The cylinder mounts aren't lined up in this picture, so it won't normally be cockeyed.
View attachment 543356
View attachment 543362
One thing I didn't realize was that holes need to be drilled to mount the kit. I'm not looking forward to that. That's the next step, for another day. There are spacers that need to be inserted on the cylinder assembly, but I haven't figured out exactly how many or where. Different spacing is required for rear mount or front mount assembly, and the instructions aren't clear.
=============================================================================================
WAIT, WAIT, WAIT, Before you start drilling anything!!!!!!!!!!!!!!!!!!!!!!!!!!!!!!!!!!!!!!!!!!!!!!!!!!!!!!!!!!!!!!!!!!!!!!!!!!!!!!!!!!!!!!!!!!!!!!!!!!!!!!!!!!!!!!!!!!!!!!!!!!!!!!!!!!!!!!!!!!!!!!!!!!!!!!!!!!!!!!!!!!!!!!!!!!!!!!!!!!!!!!!!!!!!!!!!!!!!!!!!!!!!!!!!!!!!!!!!!!!!!!!!!!!!!!!!!!!!!!!!!!!!!!!!!!!!!!!!!!!!!!!!!!!!!!!!!!!!!!!!!!!!!!!!!!!!!!!!!!!!!!!!!!!!!!!!!!!!!!!!!!!!!!!!!!!!!!!!!!!!!!!!!!!!!!!!!!!!!!!!
Please purchase an Italian to English language dictionary to do the work first !!!!!!!!!!!!!!!!!!!!!!!!!!!!!!!!!!!!!!!!!!!!!!!!!!!!!!!!!!!!!!!!!!!!!!!!!!!!!!!!!!!!!!!!!!!!!!!!!!!!!!!!!!!!!!!!!!!!!!!!!!!!!!!!!!!!!!!!!!!!
You have to flip the side shift kit over to mount it in the 3 attachment holes that correspond with the three holes in the side shift kit on both weldments on the flail mower shroud.
I will have to get in touch with Rodney Barbour about this.


