You are using an out of date browser. It may not display this or other websites correctly.
You should upgrade or use an alternative browser.
You should upgrade or use an alternative browser.
Home Made Trailer
- Thread starter GaryBDavis
- Start date
- Views: 5975
More options
Who Replied?
/ Home Made Trailer
#1
OP
GaryBDavis
Gold Member
OP
GaryBDavis
Gold Member
OP
GaryBDavis
Gold Member
OP
GaryBDavis
Gold Member
OP
GaryBDavis
Gold Member
OP
GaryBDavis
Gold Member
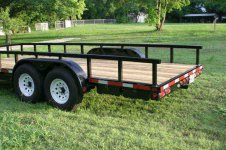
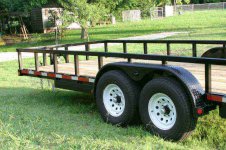
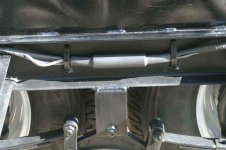
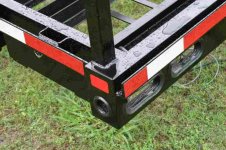
The rear bumper fabricated from c-channel with a ramp lip, C2 marking tape, recessed sealed beam lights, 2” hitch receiver, and wiring jack for second trailer. Note the rub rails and chain pockets incorporated into the sides and covered with C2 marking tape.
Attachments
OP
GaryBDavis
Gold Member
OP
GaryBDavis
Gold Member

OP
GaryBDavis
Gold Member

OP
GaryBDavis
Gold Member

Egon
Epic Contributor
Terrific job. You have a nicely equiped shop too.
Egon
Egon
Mayhem
Bronze Member
Great job.
I would like to know where you got the electrical conectors and heat shink from. My cousin's roll off container trucks have rear lights running through the rear bumper and their always rusting and breaking.You did a nice neat job with your wiring, and it looks weather tight.Just what I'm looking for.
I would like to know where you got the electrical conectors and heat shink from. My cousin's roll off container trucks have rear lights running through the rear bumper and their always rusting and breaking.You did a nice neat job with your wiring, and it looks weather tight.Just what I'm looking for.
Egon
Epic Contributor
Chances are you can find all the parts at an electrical shop that has weather proof fittings and improvise from there.
Rear lights are a sealed unit. Have to change out the entire unit for a burned out bulb.
Egon
Rear lights are a sealed unit. Have to change out the entire unit for a burned out bulb.
Egon
OP
GaryBDavis
Gold Member
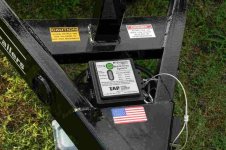
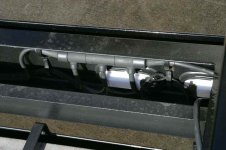
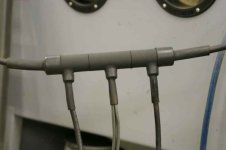
The splice points are made out of Raychem heatshrink and copper pipe fittings. You can buy ready made "T" fittings that are basically molded pieces of heat shrink, but they are expensive (~$20 a piece). I improvised and soldered copper Ts together, painted them flat black and closed them off with heat shrink. For the straight splices, there is a piece of 1" copper pipe inside the heat shrink that helps it hold a nice clean shape as the heat shrink is shrunk down. I've used this type of heat shrink on several trailers for several years and if you use the kind with a heat activated glue on the inside, it will give you a water tight wiring harness.
On the sealed lights, you may have to replace the whole bulb assembly when the bulb burns out, but the internal fixture will not rust like the cheap, generic type will.
On the sealed lights, you may have to replace the whole bulb assembly when the bulb burns out, but the internal fixture will not rust like the cheap, generic type will.
Piedmont3
Silver Member
Gary,
Do you make these to sell ? /forums/images/graemlins/grin.gif
or just for your personal use? /forums/images/graemlins/frown.gif
If you would sell one, How much? /forums/images/graemlins/shocked.gif
Thanks,
Do you make these to sell ? /forums/images/graemlins/grin.gif
or just for your personal use? /forums/images/graemlins/frown.gif
If you would sell one, How much? /forums/images/graemlins/shocked.gif
Thanks,
GeneD14
Veteran Member
- Joined
- Jul 29, 2003
- Messages
- 1,458
- Location
- Tennessee
- Tractor
- Kubota B26 TLB, Allis Chalmers D17 series IV, Kubota ZG-23 Mower, Kubota ZD 1211, Kawasaki Mule 610, Stihl 361, Stihl 045 AV Super, and a Stihl 660 Ported and tuned
Nice job on your trailer! Everything looks top-notch. I really like the stars.
Here are some similar links:
- Replies
- 0
- Views
- 625