General freshen up of 1967 Ford 4100

   / General freshen up of 1967 Ford 4100 #1  

Pete O

Silver Member
Joined
Apr 8, 2016
Messages
122
Location
Victoria, Australia
Tractor
Ford 4100
We've had this tractor for about 8 or 10 years, it's been very useful for general work around the property like carting firewood, moving dirt and mulch etc but it was in a pretty poor state when we bought it and it has only got worse. The clutch was slipping badly, there was oil leaking out of every possible place, the hydraulic system was functioning so poorly I couldn't grade my driveway with it (one of the key justifications for the tractor purchase in the first place) and the loader was struggling to lift much more than a house brick. Last year I ripped the loader bucket apart, stupidly using it to push out a small tree stump, and that was pretty much the straw that broke the camel's back; I had to decide whether to start fixing things or get rid of the tractor and find something better. The option of fixing things won the day as we decided that the tractor as it was would not sell for more than a few hundred dollars and we were looking at spending something in excess of $20k to replace it with something that would do what we wanted, whereas I figured if I spent something like 4-5k doing what this tractor needs done, I would have a good basic machine that was more than capable of meeting our needs. I have pretty good mechanical skills and a well-equipped workshop, although my experience of hydraulics is close to zero.
Four weeks ago I dismantled the loader from the tractor and then parked the tired old beast in the shed, drained all the oils and started dismantling it.

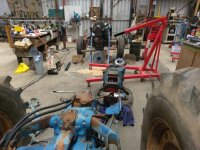
After removing everything that was in the way of splitting the tractor at the engine / gearbox interface, I spent a good while devising and fabricating a set of stands that would support the front end, allow it to be rolled forward and also provide for some tilt adjustment when it comes time to reassemble. I supported the bell housing on a trolley jack and the two halves came apart without much difficulty. Separating the gearbox from the rear axle was the next step, trolley jack moved to behind the gearbox rear flange and the floor crane used to lift the gearbox away. That gearbox is seriously heavy.
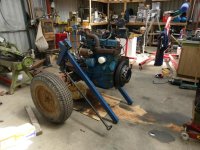
front end on stands.jpghalf split.jpgstretched tractor.jpg
 
   / General freshen up of 1967 Ford 4100
  • Thread Starter
#2  
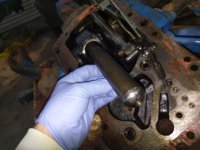
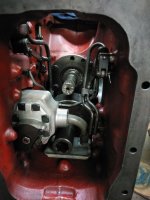
I started stripping components out of the hydraulic chamber, trying to remember how they came out so I have some chance of putting them back in. The tractor has a gearbox-mounted hydraulic pump and independent PTO so there's a lot going on in there. Or at least there was...
hydraulic chamber empty.jpg
in between cleaning hydraulic bits and waiting for my parts to arrive, I got a few things done like mounting the flywheel in the lathe and cleaning up the face
flywheel finished on lathe.jpg
the flywheel came up ok although there's a lot of deep heat-cracking, I figure it doesn't have to drive like a luxury saloon so as long as it is flat and doesn't slip I'll call it good.

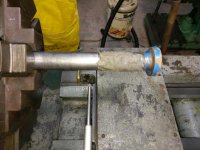
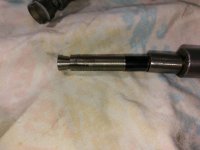
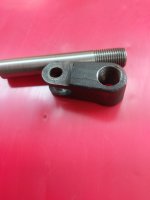
lots of other bits showing signs of 50 years of use (like myself), the brake & clutch pedal pivot shaft goes across through the hydraulic chamber, the section where the clutch pedal goes was worn down a fair bit. I ground it down to fresh metal and filled it with loctite metallised epoxy paste then machined it round again. The clutch fork pivot shaft that goes across inside the bell housing was worn down at both ends, I put it in the lathe to cut the plug weld that holds the lever on one end, then turned both ends down to fresh material and then enlarged them somewhat with the MIG welder, before turning the ends back to size and re-attaching the lever in it's correct orientation.
brake shaft with epoxy.jpgclutch shaft welded.jpgrepaired clutch fork shaft.jpg
I posted the brake shaft repair in another thread and people were wondering why I didn't weld the brake shaft instead of using epoxy; I'm worried about distortion on this one as it runs straight through the bottom of the hydraulic fluid reservoir with a seal at either end; I really don't want it to leak there once the job is done. The worst that will happen if the epoxy is not up to the job is there will be some lateral slop in the clutch pedal. I can live with that more comfortably than pools of hydraulic oil.
 
   / General freshen up of 1967 Ford 4100
  • Thread Starter
#3  
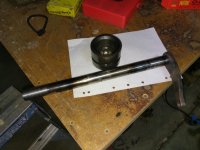
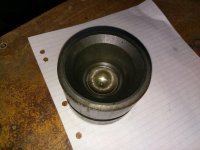
One area that has taken a lot of time and energy is the lift cylinder for the 3-point linkage. The cylinder bore was deeply scored, way beyond just honing a and putting a new seal in it. Aftermarket replacement cylinder assemblies are available for the 3000 series tractors, they look the same but have a 3" bore whereas this tractor has a 3.3" bore size. I could not find a replacement and didn't want to spend over a grand to get a much smaller cylinder. After weighing up a few options here and elsewhere i decided to bore the cylinder to the next 'standard' size and make a new piston to suit. The complicating factor with this is the way the pushrod seats in the back of the piston; there is a concave seat that accepts the convex end of the pushrod.
lift piston, cup.jpglift cylinder pushrod end view.jpg
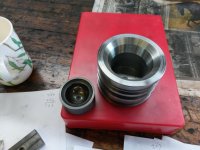
I don't have a means of replicating this concave seat in a new piston, so I machined the old piston away until just the pushrod seat remained, made a new piston to accept the seat insert and pushed the old into the new with a bit of loctite 620 to help it stay there. The new piston was designed to accept a modern single-acting piston seal, along with 2 wear rings so there won't be metal-on-metal contact between piston and bore.
new piston ready for insert.jpgpiston seat insert.jpg
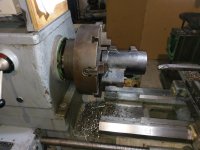
Mounting the cylinder casting in the lathe to bore it to the new size was a pain of a job. I took it out to .008" shy of the 85mm target size and then took it to a local engine reconditioner who honed it to finished size with a surface as smooth as a baby's bum. He charged like a wounded bull but I didn't have the equipment needed to get a perfect finish so I paid up.
lift cylinder in lathe.jpg
 
   / General freshen up of 1967 Ford 4100 #4  
Impressive work. I spent the day splitting a JD 950 and removing the engine. I'll pull the crank in the next couple of nights. I wish I had as much room as your shop. I had to stop today and clean up just to have a place to work!
 
   / General freshen up of 1967 Ford 4100
  • Thread Starter
#5  
Yes I'm very blessed with the workshop I have. There's room to spread a tractor all over the place and still have completely unrelated messes in other parts of the shed.

The piston seal and wear rings arrived today, I haven't got the top cover ready yet but I went ahead and installed the seal on the piston. the wear rings have a split so go on easily. The piston seal was a different matter; getting it into that centre groove was very difficult, even after a soaking in boiling water to soften it up.
piston with seal and wear rings.jpg

I thought I'd finished all the lathe work I was going to have to do for a while but I was dismantling the flow-control valve this morning and the spring-loaded spool was stuck solid in it's bore. I had to make an expanding mandrel to grip the inner bore of the spool to pull it out. Even with the tool tightened fully, I kept just pulling the tool out of the spool; I had to warm up the casting with the oxy-acetylene set to be able to withdraw the spool.
flow control valve housing.jpgvalve spool expanding puller.jpgflow control valve spool.jpg
Once the spool and it's bore were cleaned up, it was a nice sliding fit as it should be. There was a lot of filthy, gooey old 'oil' all through the valve. No wonder nothing on this tractor worked.

The new hydraulic pump was not supplied with a gasket; I decided to fit gaskets rather than just goo as the thickness of the gasket will affect the mesh of the gear set driving the hydraulic pump. I figured it was designed with a gasket there so it had better have on again. The pump and the flow-control valve housing have to be on the same plane so I had to make gaskets for both.
gasket making.jpghyd pump gasket.jpg

I actually made some progress on reassembling the hydraulics this evening. Had to abandon the tractor for much of the day as the weather was perfect for broad-leaf spraying for the first time this year. Got that all done so I may make some more progress on the tractor tomorrow.
 
   / General freshen up of 1967 Ford 4100
  • Thread Starter
#6  
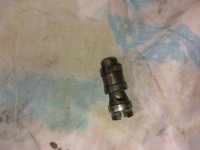
Made some more progress on the tractor today; the PTO lever had been broken off at some time in the past and a previous owner had welded a bolt onto the remaining stub of selector shaft sticking out the side of the gearbox. I had to cut it off with an angle grinder to remove the PTO selector fork. The fork is cast as one piece with it's shaft, so to remove the shaft I had to put it in a collet in the lathe and drill it through. I then tapped the hole 1/2 unf and made a short piece of shaft to screw into it, screwed it together nice and tight with the addition of some high-strength loctite, then cross-drilled it, reamed the hole and drove a small taper pin through it for good measure. I don't want it coming unscrewed inside the box once things are back together.
Made a bush to go over the outside end and added a simple lever arrangement. I haven't even seen an original one, don't know what the proper PTO selector looks like.
pto fork threaded.jpgnew pto lever.jpg

Having made the new selector, i now have almost everything back together inside the hydraulic chamber. Still have to put the brake pedal shaft through and a couple of side cover plates on.
hydraulic chamber assembled.jpg

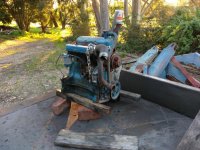
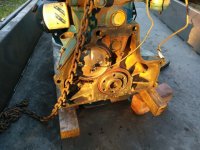
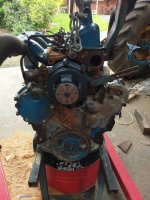
I cleaned the decades of caked-on engine oil mixed with clutch dust from the inside of the gearbox bell-housing; the rear main seal has been leaking a long time. Needless to say, I got covered with filthy back-spray whilst getting the pressure washer into the bell housing. Once I had the gearbox clean, I dismounted the engine from the front axle business, put it on the trailer and took it outside for a wash. Again, decades of caked- on filth; leaking rocker-cover, front crankshaft seal, sump gasket, rear main seal, fuel-tank tap has been dripping diesel all over it, took ages to get it clean.
engine front.jpgengine rear.jpg
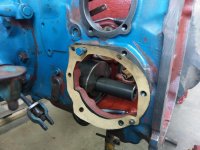
It looks like that big welsh-plug thing at the back of the camshaft bore (I think) has been leaking too, better fix it before it goes back together with a new clutch. If anyone can tell me how they're sealed i'd appreciate it.
 
   / General freshen up of 1967 Ford 4100 #7  
Good stuff man. You got skills. Keep it coming!
 
   / General freshen up of 1967 Ford 4100
  • Thread Starter
#8  
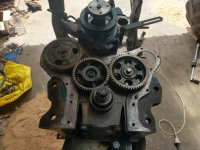
I've been getting through a bit more work on the tractor; focussed on the engine for a bit while I waited on other parts...removed the sump and cleaned it out- no nasty surprises in there thankfully. Had to remove the timing cover to replace the front crankshaft oil seal which is fitted from the inside. Thankfully all seems well inside the timing cover.
timing gears.jpg
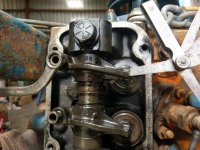
Adjusted the valve clearances. Specs are .015 inlet and .018 exhaust; #2 exhaust valve had about .040, the others varied from a little tight to fairly loose. nice and easy to find TDC with the sump off.
adjusting valve clearances.jpg
New water pump, rocker cover gasket, sump gasket, front & rear crankshaft oil seals, big O-ring seal on the rear camshaft cover, new o-ring on the power steering pump, used grey gasket goo on the timing cover and hyd pump blanking plate. Hopefully the thing won't leak oil.
engine finished.jpg
 
   / General freshen up of 1967 Ford 4100
  • Thread Starter
#9  
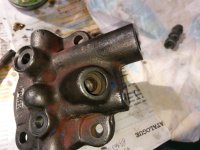
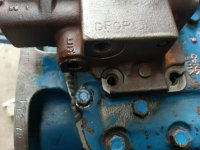
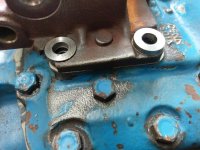
I struck a problem with the hydraulic diverter valve, as mentioned in another thread. The lugs where the valve is bolted down to the top cover are both broken.
diverter valve bolt tabs.jpg
I contemplated a welding or brazing repair, this would involve a fair bit of machining to get the base of the valve flat again. As the valve had shown no sign of leaking in it's damaged state, decided to do something far less time-consuming as a trial; the worst possible outcome is that the valve might leak at the interface with the top cover, in which case it's a matter of undoing 2 hoses and 4 bolts and going back to the brazing repair.
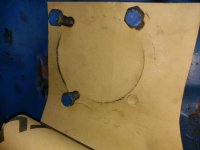
I turned up a couple of simple bushes to clamp the valve down- even had some shaft on hand with the right O.D. so this was about 10 minutes work.
diverter valve bolt bushes.jpg
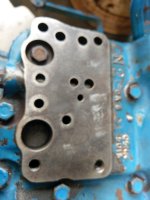
When I sit the valve on the top cover i find that it rocks; i.e. the two faces do not match perfectly. On investigation, I found that the non-flatness is in the surface on the top cover, whereas the valve housing face is flat. There were some minor ding marks on the top cover surface which I scraped to remove any displaced metal sitting proud of the surface, but it remains non-flat. No wonder the lugs have broken off the valve, as it has been bolted down tight to a non-flat surface.
top cover div valve face.jpg

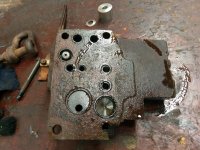
There's an annoying design feature in the diverter valve arrangement; the oil passageways are sealed with O-rings but the recesses that the o-rings sit in are on the underside of the valve, meaning that they will all want to fall out of place as the valve is fitted. I don't like to use any kind of adhesive on o-rings. Refitting the valve with new o-rings in place promises to be a challenge. As I still have the rear axle separate from the gearbox, I plan to flip the axle housing upside-down and fit the valve from underneath so the O-rings stay in place. Won't get to that until at least Saturday.
 

Attachments

  • diverter valve underside.jpg
    diverter valve underside.jpg
    162.1 KB · Views: 371

Tractor & Equipment Auctions

2008 Chevrolet Uplander LS Van (A51694)
2008 Chevrolet...
2024 Kubota L3302 4x4 Tractor with Backhoe (A51573)
2024 Kubota L3302...
ITEM LOCATION LOT NUMBER 3 (A53084)
ITEM LOCATION LOT...
2016 CATERPILLAR 277D SKID STEER (A51246)
2016 CATERPILLAR...
2010 Ford Edge SE SUV (A51694)
2010 Ford Edge SE...
New Wolverine72 In Skid Steer Brush Cutter (A53002)
New Wolverine72 In...
 
Top