A timber frame cabin memoir

   / A timber frame cabin memoir #61  
I’ve only seen those used to attach deck ledgers to inside floor joists, instead of ledger bolted to rim joist.
I would have used permacolumn brackets under the posts and be done with it.
 
   / A timber frame cabin memoir
  • Thread Starter
#62  
I use Adobe Acrobat to open the PDF files of my drawings. Through trial and error over the past year I have learned to click on measurements. measuring tool then right click to change scale. I looked at few PDF type readers but most do not have the measurement function. It would be nice to have program that does that and doesn't default every time you close the program plus readings in fractional inches. Currently it (acrobat) does measure feet or inches in 10ths.

I asked the lead Amish guy if it was ok to be in the picture. He said they did not want to be in pictures. I honored their wishes. It was interesting watching them climb the bents and 30' to the concrete basement floor. Wednesday it was getting them up to speed. They started to notice some of the bents were not square and plumb so they spent a couple hours redoing temporary bracing until they were happy. Maybe the contractor, who these guys are subbed through, has a wonky level. He had tow 19 y.o. kids working for him and one was first day on job. Wed my contractor showed up with replacement telehandler. The Amish crew arrived with their driver and trailer. After tweaking bracing and getting things more true they got all the East side purlins on. Thu they did the West side purlins and got 1/6th of the tongue and groove roof sheathing on. They finished the T&G on Friday and got a couple rolls of Epilay Premium on. I got to use my used SIPS groover for the first time. Slow but not as stinky as I thought it would be. Electric Foam Scoop
The nail base panels only have OSB on one side. I would say it melts at about 1" in 1-2 seconds. They were going to try to screw one panel in but I didn't have the other side grooved out. A dimensional 2x10 is put into the edge groove. Anyway they tend to keep bankers hours and left around 2:30. they do have about an 1:15 drive one way. I'll put a few pictures up when I get them on computer. I was going to hire them to put the I-joists in and maybe sub floor but these guys are way too rich for my blood. So I order my I-joists next week and will be back there by Monday to see them fini$h up.
Nail Base example.jpg
 
   / A timber frame cabin memoir
  • Thread Starter
#63  
All nail base panels and perimeter board are done.

1.East side of purlins done.
2. West side purlins done and starting on T&G on East side.
3. All T&G done
4. What my nail base panels look like. I had bought a used SIPS scoop iron to carve out the perimeter that gets a dimensional 2x10
5. West side nail base done and much of East side done. This was the start of the final day 11/14/2023
20231108_151455.jpg
20231109_143750.jpg
20231112_160336.jpg
20231113_114328.jpg
20231113_142322.jpg
 
Last edited:
   / A timber frame cabin memoir #64  
Thats an amazing roof/insulation panel 8"? You will have a tight house when done - looking good!
 
   / A timber frame cabin memoir
  • Thread Starter
#65  
Thats an amazing roof/insulation panel 8"? You will have a tight house when done - looking good!

They call it a 10" panel. R39 I think? You also run a bead of Great Stuff Pro foam in the joints. The plan is to have a wood stove in the living room but also have a propane furnace for backup. The panel is fastened with 12" screws (they provide) into the purlins. I talked to the area lumber yard and said there is little lead time for ordering I-joists. I will probably order them after the holidays. I'm looking forward to building again and not watching someone else.
 
   / A timber frame cabin memoir #66  
Are those t&g prestained before going up? Just wondering. Had to finish someone's new t&g after it was up, and will never do it again. Using a brush was a mess. But not having spray equipment, do with what you have. Jon
 
   / A timber frame cabin memoir
  • Thread Starter
#67  
No and no plans to stain them. My parents did that in the 70's on their dream home the whole family helped build. I remember Mom up on a scaffold staining with a brush.
 
   / A timber frame cabin memoir #68  
Hi. Can anybody tell me how a timber framed building or extension, which is clad on the outside is constructed? What I mean is is it built as a single frame with the cladding on the outside and plasterboard on the inside? Or is it built like a conventional brick and block build with an inner wall a cavity then an outer wall? So two separate wood frames with a cavity between them. I hope this isn't too daft a question but it's something I haven't been able to find on the net. Thanks.
I can tell you how I built mine. Raised the frame, sheeted the entire frame with 1x6 tongue and groove knotty pine, (2x6 T&G for the roof/ceiling), then framed it out with 2x6's for wiring and insulation, then sheeted the outside with shiplap and finished it off with cedar clapboards. Basically built the house from the inside out. Today I'd use SIP's, (structural insulated panels) over the timber frame, but 30+ years ago they were still using Formaldehyde and my wife has allergies.
 
   / A timber frame cabin memoir
  • Thread Starter
#69  
Some companies use SIPS. Legacy designs theirs to use standard 2x6 framing cheated out to show part of the lower beams. My rim board (1.5") will sit on the outside of the bent posts. The edge of that will sit the edge of my walls. The sheathing (osb) will go maybe 2" below the top of foundation and the board and batten siding right over that. It helped sell me on the structure as I didn't want to deal with SIPS. Many years ago a member in here had a home built by Clydesdale and I think they go the SIPS route. It's how I became interested in timber frames.
 
   / A timber frame cabin memoir
  • Thread Starter
#70  
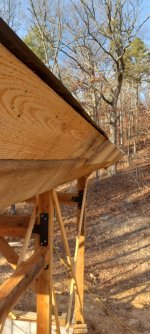
After the Amish crew left I was looking at the drawings and realized a fascia has to go on before the roof metal drip edge. Ooops. I had taken about 2 weeks off from the project due to weather and visiting my mom over Thanksgiving. She lives over 4.5 hours away and had not been up there since Spring. So last Tuesday I rented a towable man-lift for a week. A buddy calls me up before I arrive at job site asking if I need some help. Sure come on over. He was here for for about 24 hours. It was nice having a ground guy. It took at least a day+ to get each side done. All boards are rough sawn lumber. First it gets a 1x8" then below that a1x10" then over the top of the 1x8 it gets another 1x10. The lumber was about 16' long so too long and often too bowed to use as one piece. I would screw in some temporary wood block to help hold one end. The basket on a Haulotte 3522a is a bit small and I'm too overweight to have myself and friend in basket to hold boards. I had some wood screws from maybe Dad's stuff after he passed. They were phillips head and stripped out pretty easily when using to attach temporary holding blocks. Or they broke the phillips head bit in my little impact. Another issue I ran into was switching from Metabo to DeWalt brand collated nails. Something about the collation goop would cause issues between nail clips in my Milwaukee pneumatic nailer. They were cheaper but learned a lesson there. Also, moving the lift and getting it to level on such a sloped property took a little finesse. I had to move it 7 times for a 4 sided roof line. I could have avoided that with the 45' lift but it was $150 more for the week rental. I got the 3522 for $599 +tax which is in my town I still own a house in. It's the best rate I have found. The boards would sometimes be bowed from sitting for a year so a long bar clamp would take that bow out as I worked my way along nailing. I still haven't had time to order my floor I-joists and rim board but that will happen soon.
20231207_110140.jpg
20231207_110140.jpg
20231207_154500.jpg
20231207_154712.jpg
20231207_154500.jpg
 
 
Top