You are using an out of date browser. It may not display this or other websites correctly.
You should upgrade or use an alternative browser.
You should upgrade or use an alternative browser.
My Horse Barn in Progress
- Thread starter jcaron2
- Start date
- Views: 97714
/ My Horse Barn in Progress
#131
Trails2004
Gold Member
Have you considered using FRP on the interior walls of the wash rack??
Mike_Kanzer
Gold Member
- Joined
- Jul 14, 2005
- Messages
- 335
- Location
- Chester county, PA
- Tractor
- Kubota L3830 HST, JD Gator 855D
The barn is coming out really nice! Our wash stall is lined by tongue n groove pine with pressure treated boards at the bottom. It has polyurethane on it and it has held up real well over the last 5 years without any signs of water damage. I think you will be happy the way you have constructed yours. We have a heated tack room for the hot water heater, well pump, sink and plumbing. We don't have water running to each stall - we have a yard hydrant in the center aisle that we use for water in the winter. The only downside to this arrangement is the tack room is heated with electric baseboard heat which seems fairly expensive. One other thing to consider in your wash stall would be to install a ceiling radiant heater for the horses - It is kind of a luxury item but is nice when you hose them down when it is pretty cold out. My wife thinks nothing is too good for the boys ! (4 geldings) - Mike
OP
jcaron2
Silver Member
The barn is coming out really nice! Our wash stall is lined by tongue n groove pine with pressure treated boards at the bottom. It has polyurethane on it and it has held up real well over the last 5 years without any signs of water damage. I think you will be happy the way you have constructed yours. We have a heated tack room for the hot water heater, well pump, sink and plumbing. We don't have water running to each stall - we have a yard hydrant in the center aisle that we use for water in the winter. The only downside to this arrangement is the tack room is heated with electric baseboard heat which seems fairly expensive. One other thing to consider in your wash stall would be to install a ceiling radiant heater for the horses - It is kind of a luxury item but is nice when you hose them down when it is pretty cold out. My wife thinks nothing is too good for the boys ! (4 geldings) - Mike
Thanks for the feedback, Mike. Funny you should mention the radiant heaters. I was already planning to put a couple of heat lamps in the ceiling. Our wives sound similar.
")
OP
jcaron2
Silver Member
Have you considered using FRP on the interior walls of the wash rack??
I thought about it briefly, but felt like it wouldn't be in keeping with the knotty pine T&G theme throughout the rest of the interior. I'm sure there are options that look a lot better than the trashy-gas-station-restroom 4x8 sheets, but I didn't spend a lot of time looking into it.
OP
jcaron2
Silver Member
Step 16: Drainage.
Well, it's been two months since I posted an update. Sorry for my delinquency. My biggest reason for procrastinating is that Photobucket now seems to be blocked at work, and I have a slow limited-bandwidth connection at home.
Anyway, I really HAVE been busy working on the barn, even though I'm at the stage where a lot of the work doesn't really show.
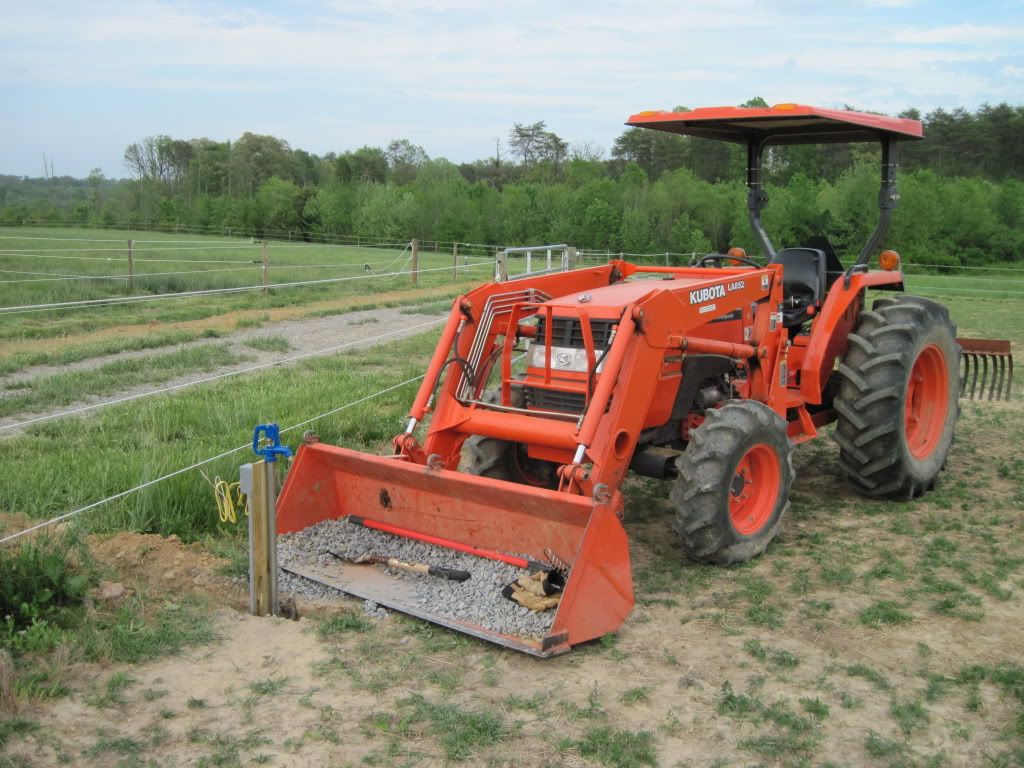
I ran drainage lines for the roof gutters and the wash rack, along with about 1400 feet of water and electrical lines out to the pastures. I realize the latter doesn't fit under the category of drainage (or really even in the category of barn-building), but it all involved digging lots of trenches so I'll write about it here anyway.
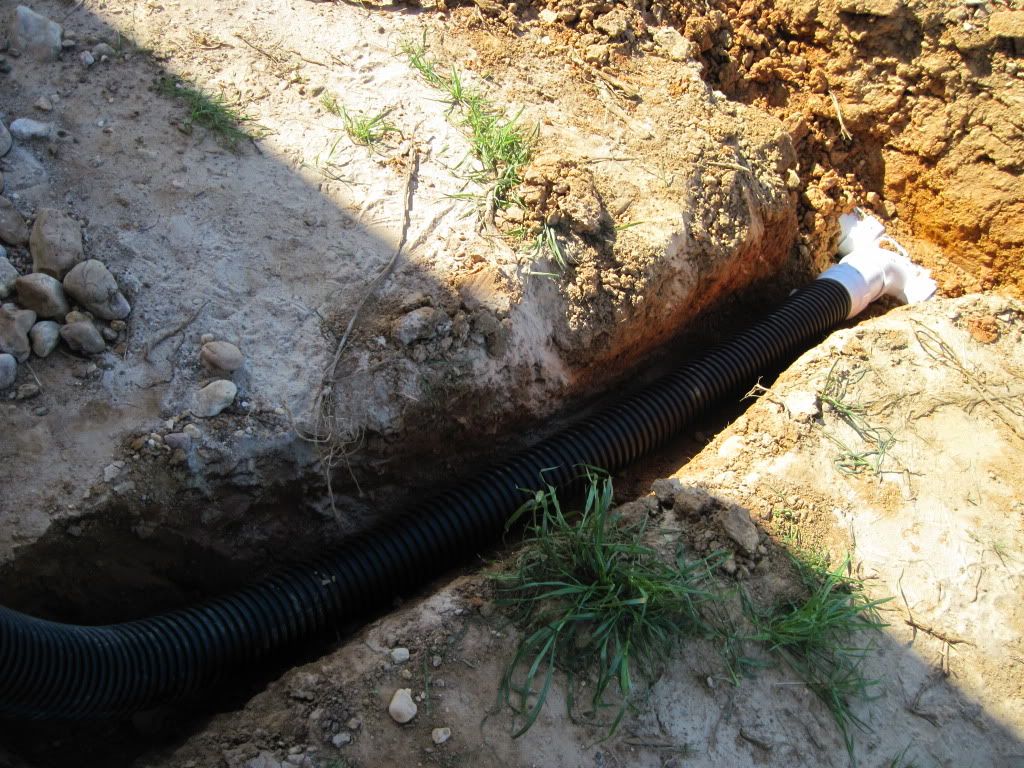
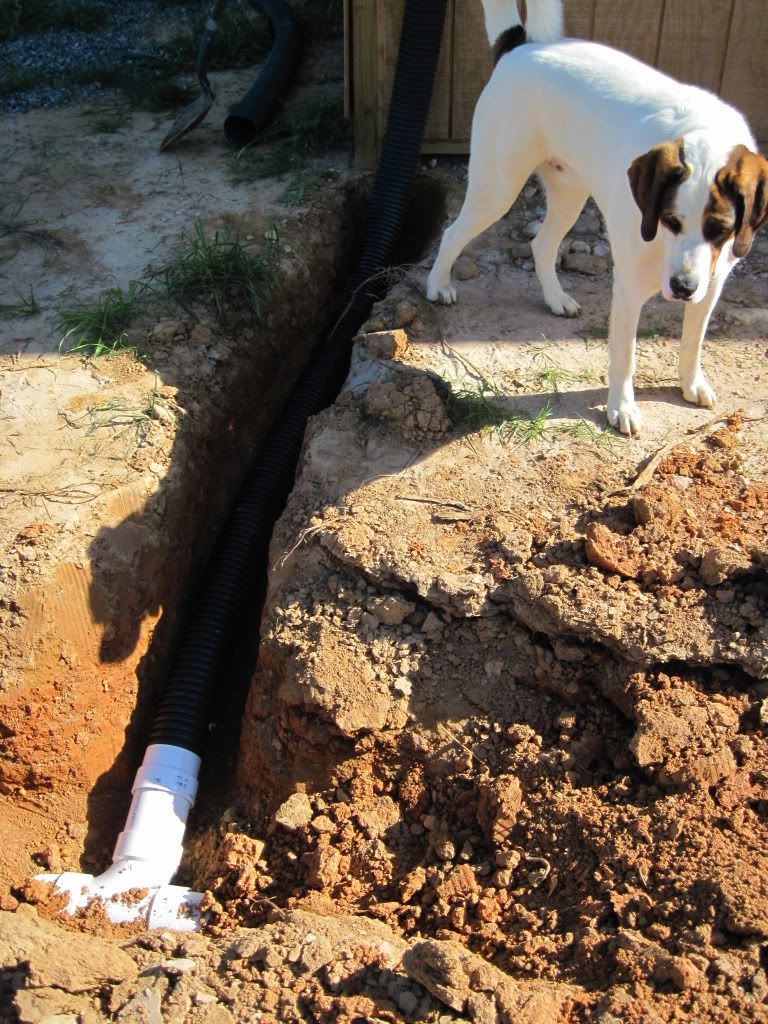
On the north side of the barn I ran a 4" PVC drain line about 150' long. It drains the gray water out of the catch basin in the wash rack, as well as the two downspouts on that side of the barn. One of my buddies with a little baby Kubota BX-24 came up and dug that trench for me with his backhoe. My tractor's a lot bigger, but I'm waaaaaay jealous of the backhoe. I really need to get one sometime soon. It ended up taking the entire day to dig the trench, so I ruled that out as an option for the other 1400' that had to be dug.
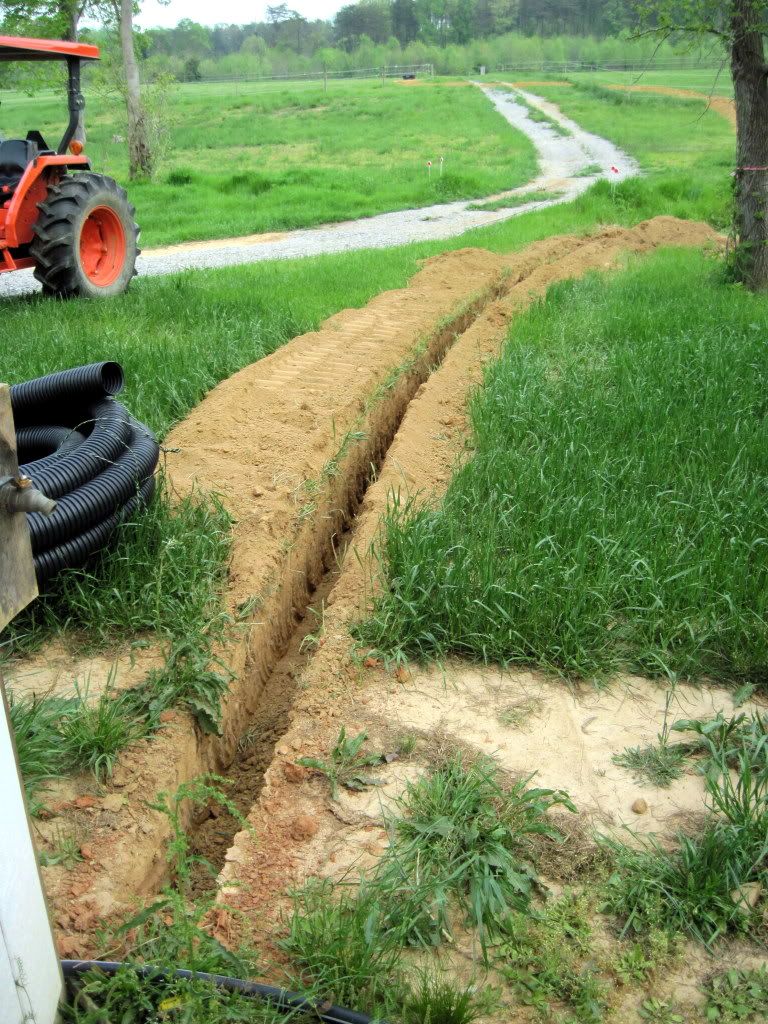
I was all set to rent a ride-on trencher for the weekend for around $350, but had to postpone at the last minute. I'm glad I did. In the meantime, I bumped into a friend who referred me to a friend-of-a-friend of his with a landscaping business. My friend told me this guy had dug 1000 feet of trench for him with a Bobcat for $200. I called him up, and he showed up the next day. It took him 4 hours at $65/hr; he charged me $250 when all was said and done. All I had to do was stand around and watch (which is NOT what I'm used to when it comes to this barn!). Anyway, money well spent in my opinion.
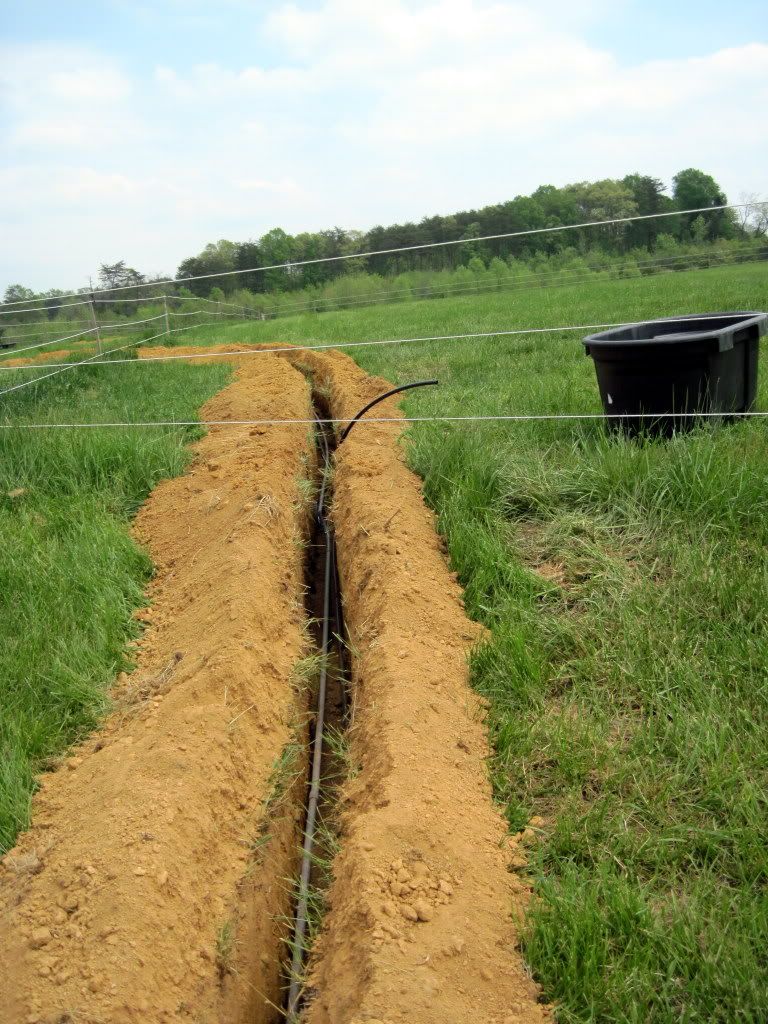
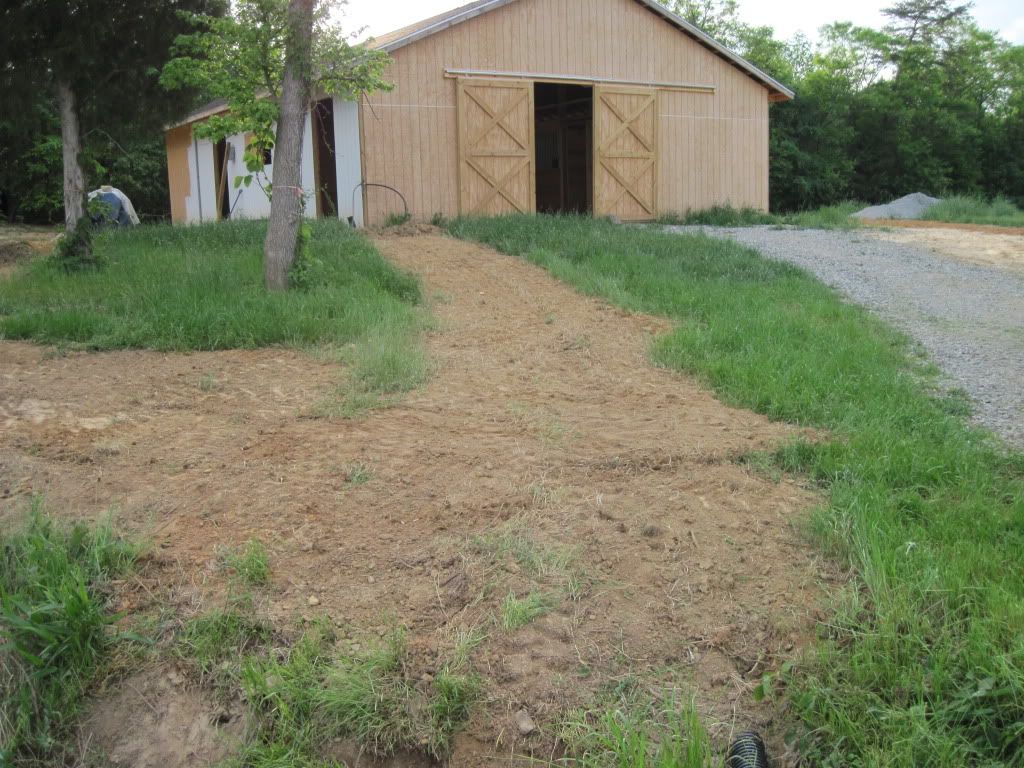
There was one relatively short trench (~75 feet) for the drainage line for the downspouts on the south side of the barn. There was a second trench about 700' long for water and electrical lines out to the five horse paddocks adjacent to the barn. Then there was a third trench about 600' long starting at my house and running out to the four paddocks on the other side of it.
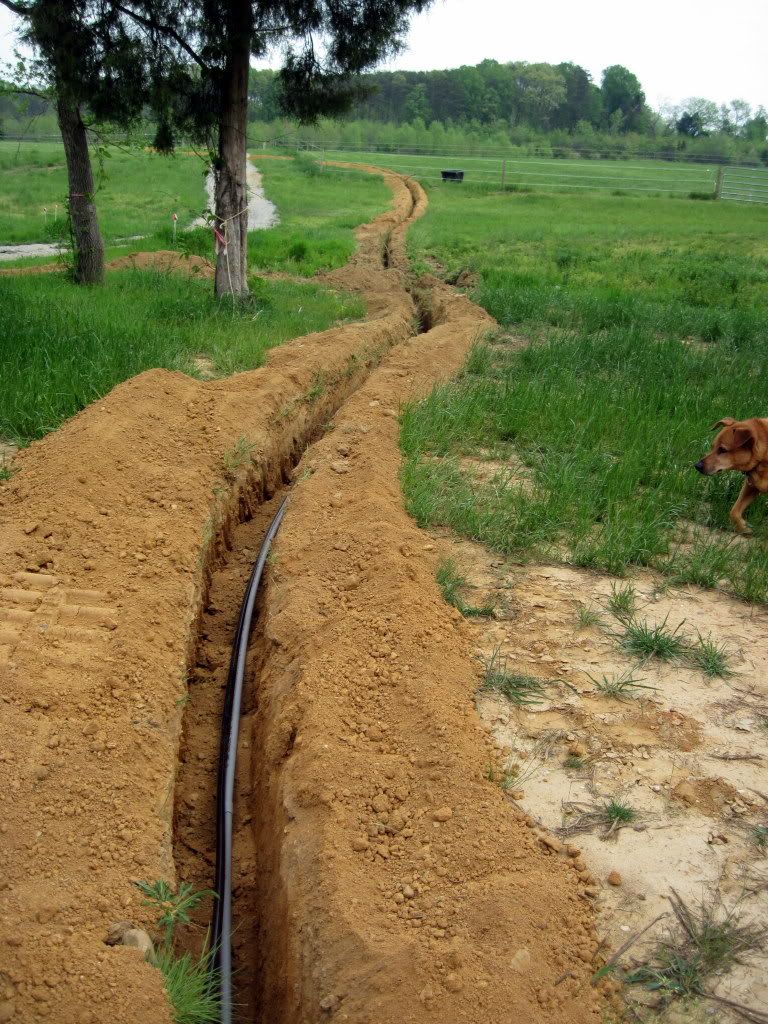
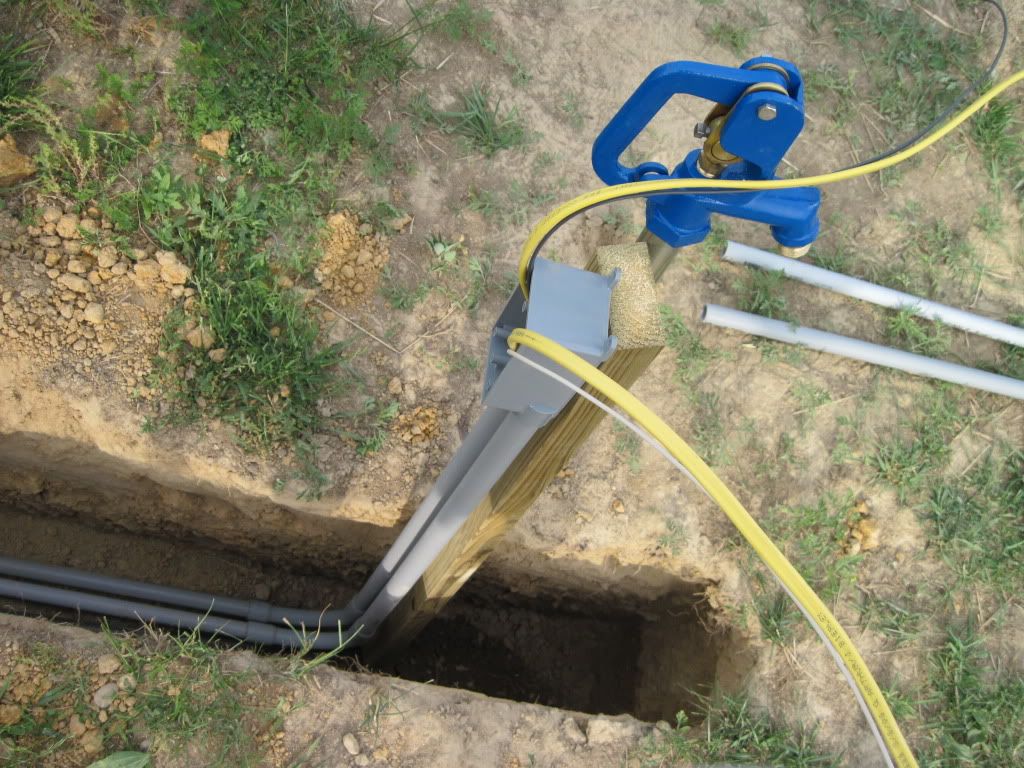
The water lines were relatively straightforward. I ran 3/4" PE pipe in 500' rolls, then installed a frost-free hydrant at each water-trough location. (Okay - actually I've only installed two so far; I still have to go pick up the others at the store).
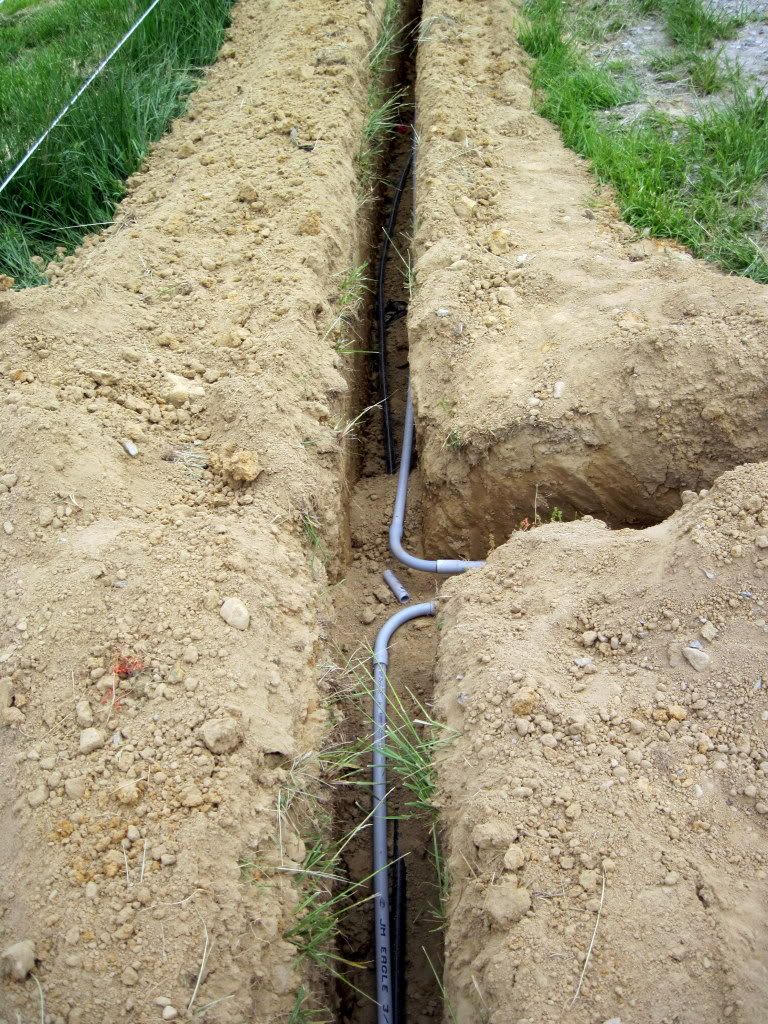
Along with the water lines, I also ran 3/4" gray PVC electrical conduit, through which I pulled the electrical line. In case you're wondering why I ran electrical lines out to all the pastures, it's for water trough de-icers. It's not any fun (or really even feasible) to carry 3 or 4 buckets of warm water out to each of nine different water troughs several times a day on cold January days. The de-icers I need are 500 watts @ 120V, and with runs up to 700' long with five de-icers in parallel, voltage drop on the lines is a real issue. I ended up finding a guy on Craigslist selling two 1000' spools of 12/2 Romex for about half price. I bought all the wire and split about a third of it into its two separate wires. That gave me about 1300' of 12/2 plus an extra wire. (Obviously it would have been easier if I could have bought 1300' of 12/3 wire for half price, but that wasn't an option). With the extra wire, I can run half the heaters off one hot wire and the other half off the other wire, thus cutting the current draw by half. Furthermore, since the wires are opposite polary, the return current through the neutral cancels, thus cutting the ohmic losses (i.e. voltage drop) by half again. (We'll ignore the fact that one of the runs has an odd number of heaters).
Once everything was in place in the trenches, I filled them back in with my trusty tractor.
As usual, here are some pictures:


Well, it's been two months since I posted an update. Sorry for my delinquency. My biggest reason for procrastinating is that Photobucket now seems to be blocked at work, and I have a slow limited-bandwidth connection at home.
Anyway, I really HAVE been busy working on the barn, even though I'm at the stage where a lot of the work doesn't really show.
I ran drainage lines for the roof gutters and the wash rack, along with about 1400 feet of water and electrical lines out to the pastures. I realize the latter doesn't fit under the category of drainage (or really even in the category of barn-building), but it all involved digging lots of trenches so I'll write about it here anyway.
On the north side of the barn I ran a 4" PVC drain line about 150' long. It drains the gray water out of the catch basin in the wash rack, as well as the two downspouts on that side of the barn. One of my buddies with a little baby Kubota BX-24 came up and dug that trench for me with his backhoe. My tractor's a lot bigger, but I'm waaaaaay jealous of the backhoe. I really need to get one sometime soon. It ended up taking the entire day to dig the trench, so I ruled that out as an option for the other 1400' that had to be dug.
I was all set to rent a ride-on trencher for the weekend for around $350, but had to postpone at the last minute. I'm glad I did. In the meantime, I bumped into a friend who referred me to a friend-of-a-friend of his with a landscaping business. My friend told me this guy had dug 1000 feet of trench for him with a Bobcat for $200. I called him up, and he showed up the next day. It took him 4 hours at $65/hr; he charged me $250 when all was said and done. All I had to do was stand around and watch (which is NOT what I'm used to when it comes to this barn!). Anyway, money well spent in my opinion.
There was one relatively short trench (~75 feet) for the drainage line for the downspouts on the south side of the barn. There was a second trench about 700' long for water and electrical lines out to the five horse paddocks adjacent to the barn. Then there was a third trench about 600' long starting at my house and running out to the four paddocks on the other side of it.
The water lines were relatively straightforward. I ran 3/4" PE pipe in 500' rolls, then installed a frost-free hydrant at each water-trough location. (Okay - actually I've only installed two so far; I still have to go pick up the others at the store).
Along with the water lines, I also ran 3/4" gray PVC electrical conduit, through which I pulled the electrical line. In case you're wondering why I ran electrical lines out to all the pastures, it's for water trough de-icers. It's not any fun (or really even feasible) to carry 3 or 4 buckets of warm water out to each of nine different water troughs several times a day on cold January days. The de-icers I need are 500 watts @ 120V, and with runs up to 700' long with five de-icers in parallel, voltage drop on the lines is a real issue. I ended up finding a guy on Craigslist selling two 1000' spools of 12/2 Romex for about half price. I bought all the wire and split about a third of it into its two separate wires. That gave me about 1300' of 12/2 plus an extra wire. (Obviously it would have been easier if I could have bought 1300' of 12/3 wire for half price, but that wasn't an option). With the extra wire, I can run half the heaters off one hot wire and the other half off the other wire, thus cutting the current draw by half. Furthermore, since the wires are opposite polary, the return current through the neutral cancels, thus cutting the ohmic losses (i.e. voltage drop) by half again. (We'll ignore the fact that one of the runs has an odd number of heaters).
Once everything was in place in the trenches, I filled them back in with my trusty tractor.
As usual, here are some pictures:
dcyrilc
Elite Member
As always, nice looking job. I notice you paint like I do though.:laughing:
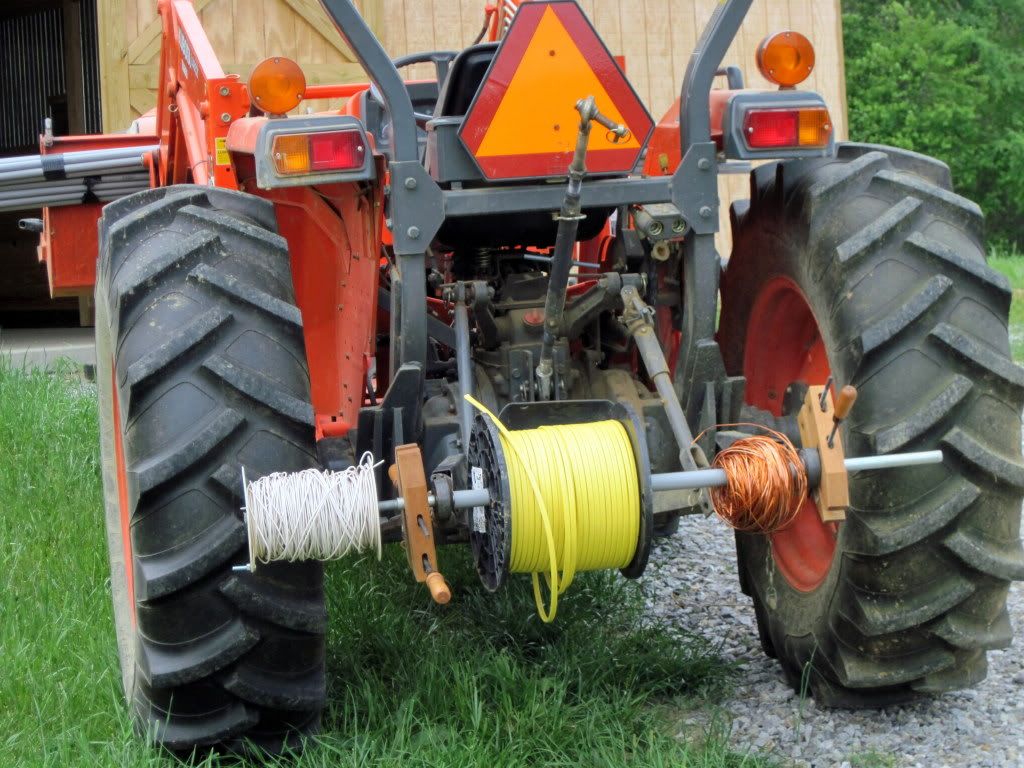
I like how you racked up the wire on the back of the tractor. I'll have to remember that.:thumbsup:
I like how you racked up the wire on the back of the tractor. I'll have to remember that.:thumbsup:
OP
jcaron2
Silver Member
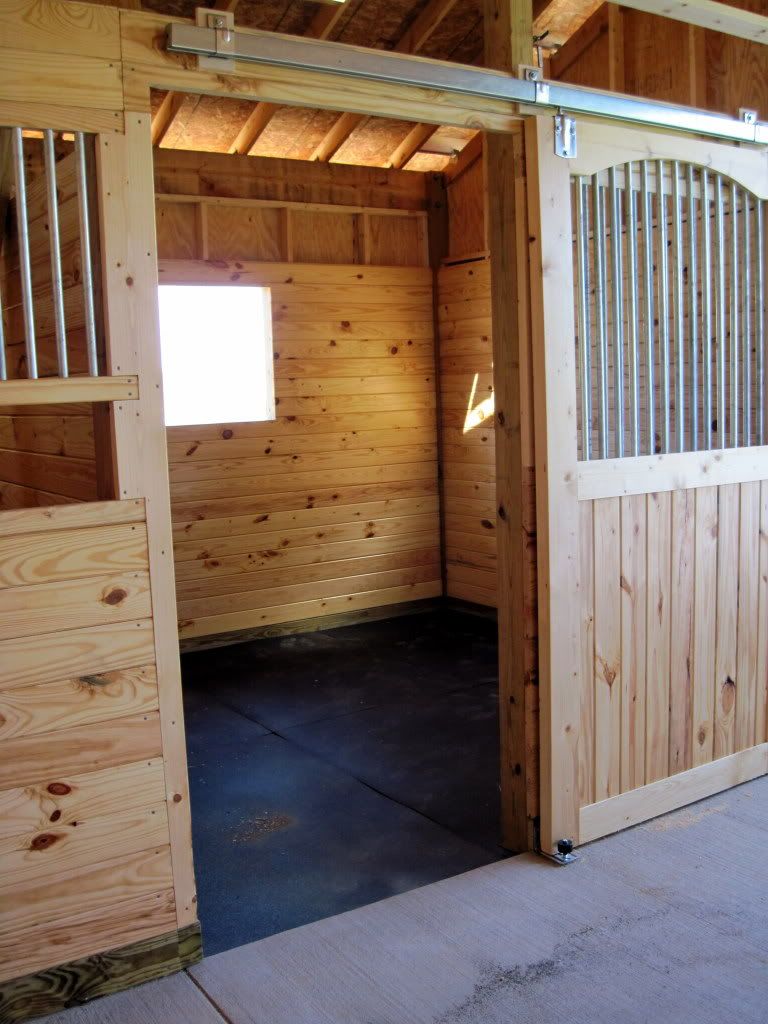
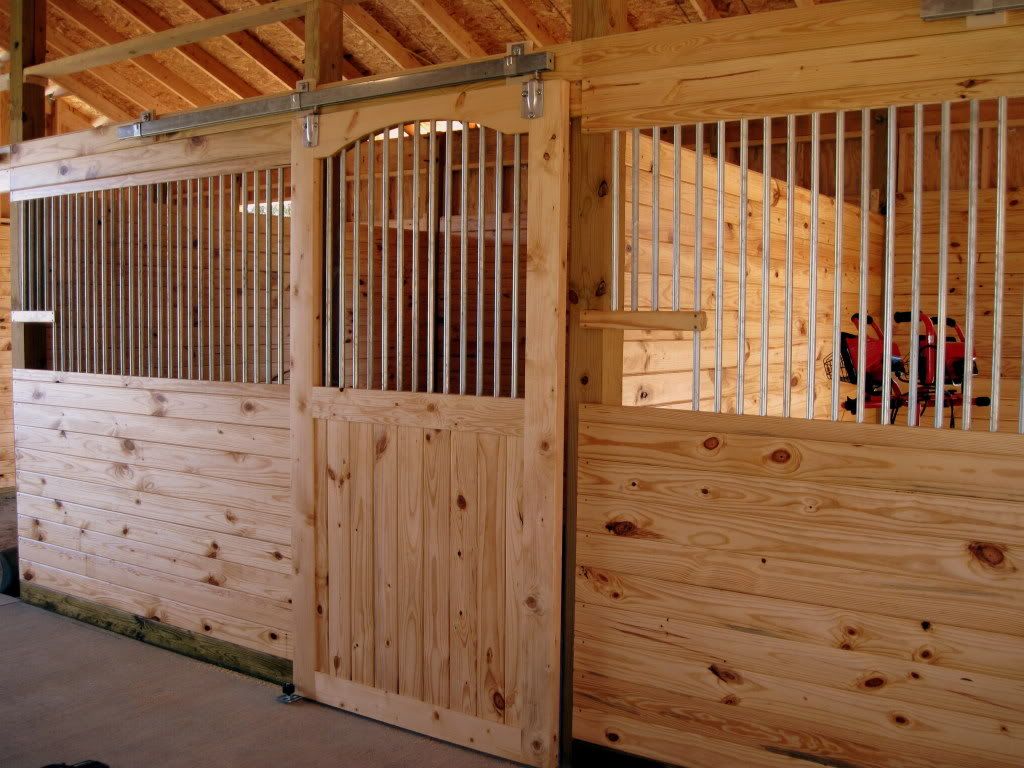
Step 17: Stall Doors and Floor Mats
We had a farrier appointment a few weeks back, and with the barn almost done, it's much more convenient for him to work inside it. However, it's not ideal to have one horse in the barn getting new shoes while the other horse is outside in the pasture. Horses are social animals, and they get nervous when they're away from the safety of their herd. Since a farrier's job is back-breaking enough without having to deal with a nervous horse pawing and fidgeting, we decided it would be best to finish off a couple of stalls so that the horses could both be inside while the farrier worked.
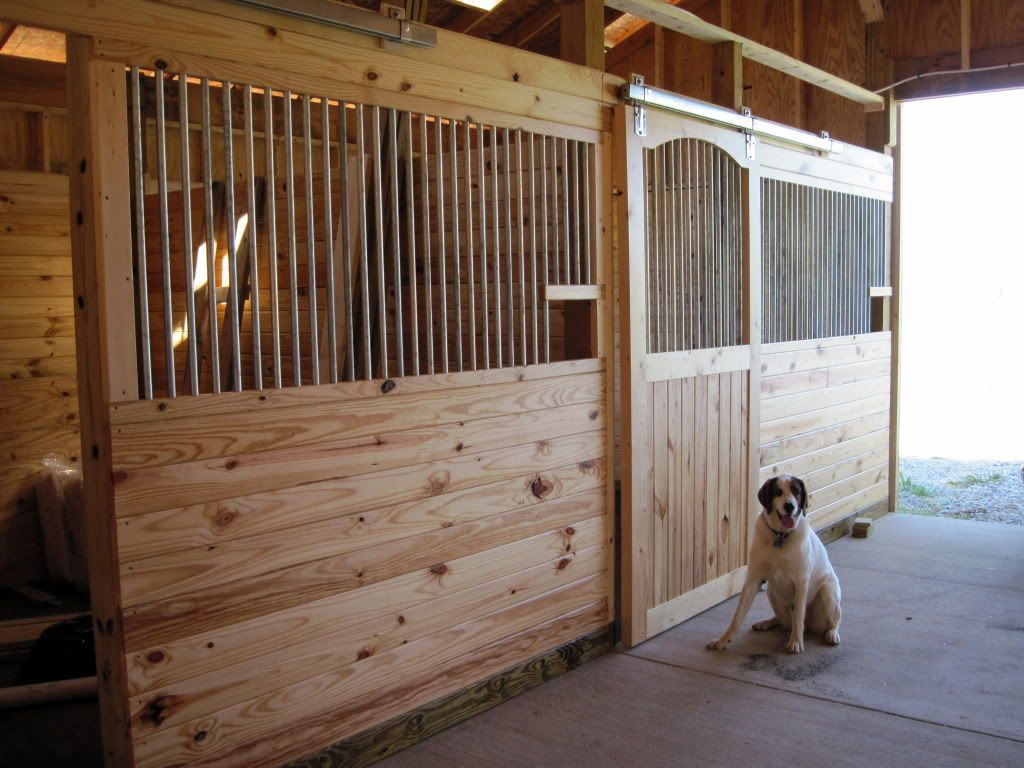
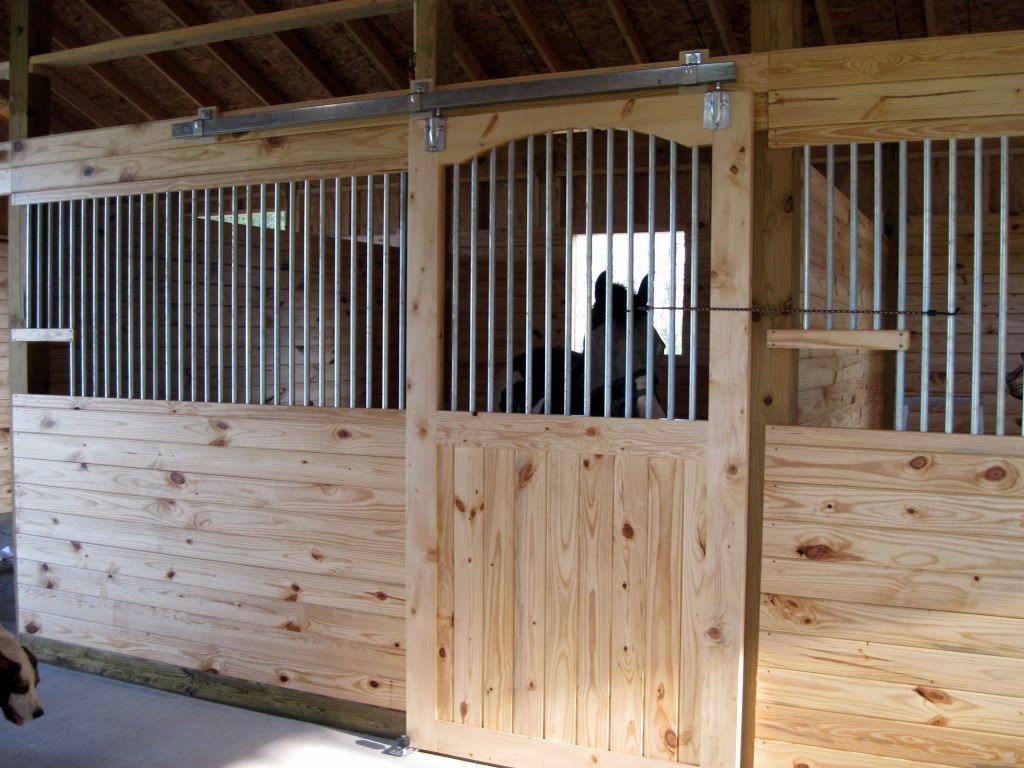
I hung the sliding door hardware, and moved the two doors I've built so far from my basement workshop down to the barn. It was a relief to see that they fit the door openings just right. I know the tape measure doesn't lie, but they looked HUGE inside my basement compared to the size of the door openings down in the barn.
While I was hanging doors, my wife leveled and tamped the rock screenings in the two stalls. Then we added the stall mats. The mats are 4'x6'x3/4" recycled rubber, and they weigh a TON. They feel like about 80 pounds, and they're bulky and unweildy and generally a complete pain in the butt to move around. It takes six mats to cover the floor of each 12' x 12' stall. However, due to the thickness of the walls, presence of the posts, etc., they all had to be cut to some extent. The first one just need the corner notched out for the post. First I tried cutting it with a hand-saw, thinking it would nibble right through the rubber; it did almost nothing. Then I tried my jigsaw, followed by my circular saw. The latter managed to cut, albeit quite slowly and with much squeeling, black sawdust, and noxious smoke. Then, just for the heck of it, I tried a good sharp utility knife, and lo-and-behold it sliced with relative ease. Five or six passes and I was able to cut all the way through. Another lesson learned.
I hung the sliding door hardware for all the stalls, but I have yet to build the other three stall doors.
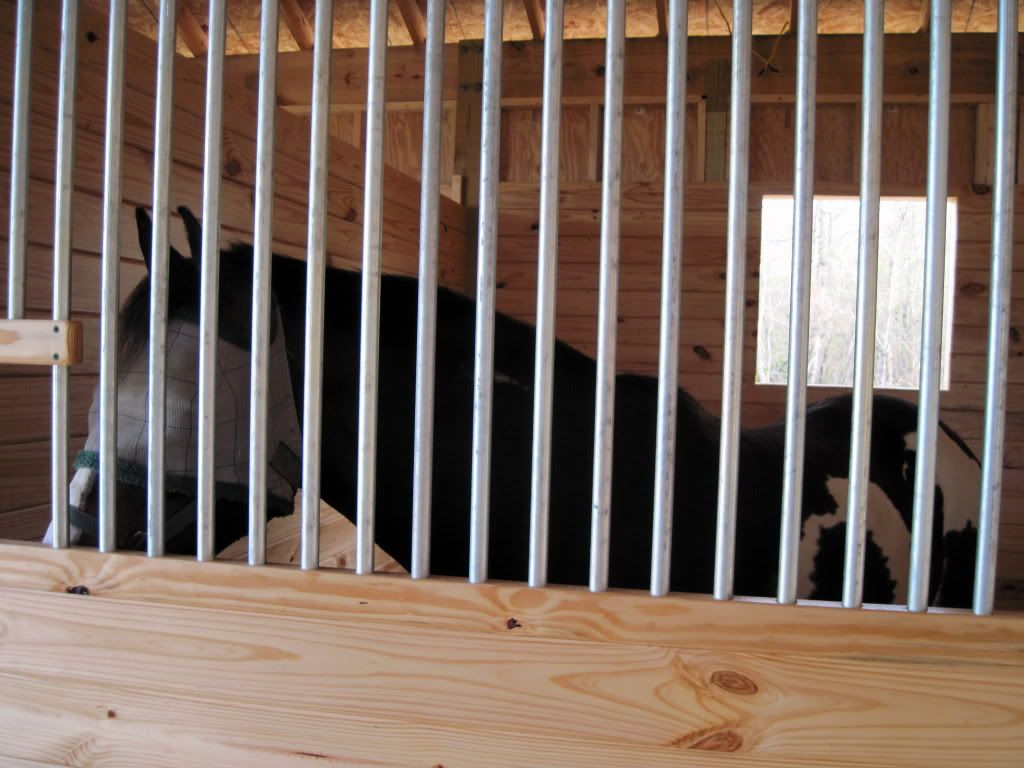
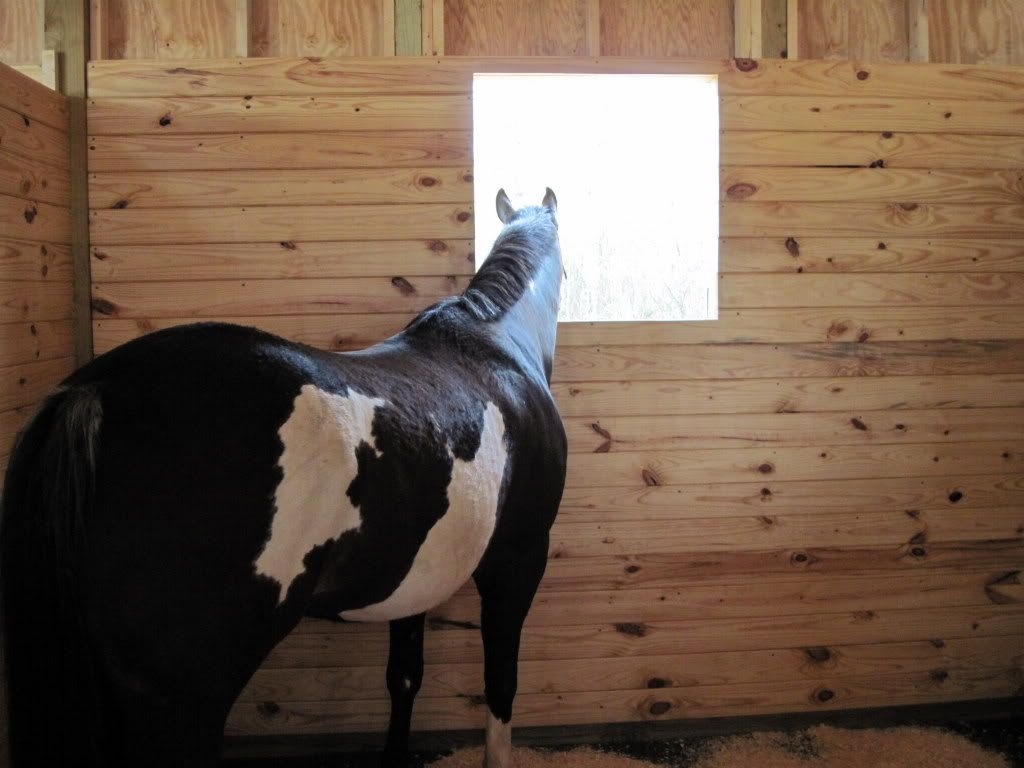
In the end, the horses seemed really happy with their new accomodations. They took turns napping while the other got his feet worked on.

We had a farrier appointment a few weeks back, and with the barn almost done, it's much more convenient for him to work inside it. However, it's not ideal to have one horse in the barn getting new shoes while the other horse is outside in the pasture. Horses are social animals, and they get nervous when they're away from the safety of their herd. Since a farrier's job is back-breaking enough without having to deal with a nervous horse pawing and fidgeting, we decided it would be best to finish off a couple of stalls so that the horses could both be inside while the farrier worked.
I hung the sliding door hardware, and moved the two doors I've built so far from my basement workshop down to the barn. It was a relief to see that they fit the door openings just right.
I know the tape measure doesn't lie, but they looked HUGE inside my basement compared to the size of the door openings down in the barn.While I was hanging doors, my wife leveled and tamped the rock screenings in the two stalls. Then we added the stall mats. The mats are 4'x6'x3/4" recycled rubber, and they weigh a TON. They feel like about 80 pounds, and they're bulky and unweildy and generally a complete pain in the butt to move around. It takes six mats to cover the floor of each 12' x 12' stall. However, due to the thickness of the walls, presence of the posts, etc., they all had to be cut to some extent. The first one just need the corner notched out for the post. First I tried cutting it with a hand-saw, thinking it would nibble right through the rubber; it did almost nothing. Then I tried my jigsaw, followed by my circular saw. The latter managed to cut, albeit quite slowly and with much squeeling, black sawdust, and noxious smoke. Then, just for the heck of it, I tried a good sharp utility knife, and lo-and-behold it sliced with relative ease. Five or six passes and I was able to cut all the way through. Another lesson learned.
I hung the sliding door hardware for all the stalls, but I have yet to build the other three stall doors.
In the end, the horses seemed really happy with their new accomodations. They took turns napping while the other got his feet worked on.
dcyrilc
Elite Member
Again, very nice!:thumbsup::thumbsup:
OP
jcaron2
Silver Member
As always, nice looking job. I notice you paint like I do though.:laughing:
I like how you racked up the wire on the back of the tractor. I'll have to remember that.:thumbsup:
LOL! As you probably remember, we started priming last fall, just in time for the weather to get cold and miserable. It didn't warm up again until a couple of months ago, and we haven't gotten back to it yet.
Spooling the wire that way worked pretty well. I just used a piece of conduit through the 3PH arms with a couple of clamps on the ends to keep it from working its way out. It made life much easier when pulling the wire from the far end of the conduit.