smithboy
New member
- Joined
- Aug 3, 2014
- Messages
- 14
- Location
- Carrollton, GA
- Tractor
- Yanmar 2010d, John Deere 2640, Deutz Allis 6250
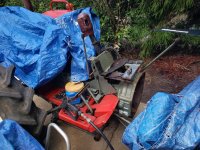
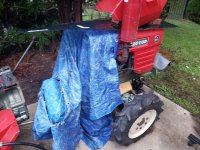
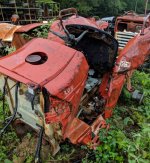
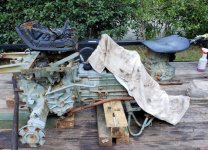
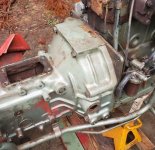
It's been a while since my clutch went out on my 2010D. It sat in my barn for a few years because I had access to other equipment that could use to accomplish some of the same jobs...however, I got a bee in my bonnet and decided to start on it this past week. My shop and my house are in different locations, so I brought the tractor to my house for easy access...Of course, after weeks of no rain we have had several big showers.
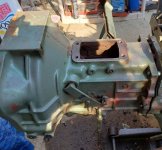
Although splitting the tractor was a bit of work, there was nothing too complicated in the process. I tried to put in my steps for someone working on the same or similar tractor. There are some differences from the Hoye tractor parts video, but I really do appreciate the info provided by them as a reference, and many thanks to Aaron for answering questions.
Steps:
0) make sure you are on a flat smooth piece of concrete and have a lawn chair and beer handy...This aids in the thinkin' process. Pressure wash everything and gather some containers to put parts/bolts/nuts/misc. stuff into. Also, cheap plastic sandwich baggies with rubber bands work well to protect sensitive stuff from dirt (or, in my case RAIN) while it's disassembled.
1) remove side engine panels/grills for access and disconnect the battery to prevent fires and shorts...you will be dealing with electricals.
2) remove the steering wheel...I was able to use a gear puller in place of the standard steering wheel puller.
3) remove the gauge panel. This was a bit more complicated than expected, as the lights immediately came out of the back of the indicator slots when I pulled the panel away from the cowling. I think they were only held in by spider webs, so I may need help getting them back to the right locations on re-assembly.
4) unhook wiring harness from the lights, ground (front frame), alternator, starter, glow plug thingie, temp sending unit, oil pressure sending unit, voltage regulator, and a few other things and be prepared to pull it through the firewall (or what ever the plate is called). You will need to be very careful, because the plastic connectors are old and brittle and the wire coatings are not much better. Label each pair of wires or connectors with masking tape and sharpie, just to be safe...I started doing this almost too late...Don't pull yet, you need to take the cowling off first.
5) Unhook the compression release cable at the engine, but leave it attached to the cowling.
6) Take off the gear shift cover to unhook and remove the throttle bar at both ends...Pull it forward through the fire wall.
7) disconnect unscrew and remove the switch and various other threaded-in or hard-wired components from the cowling. This includes the hour meter and rpm gauge cable and what ever was left connected in the cowling....i.e., all those items directly connected to the wiring harness.
8) Remove and set aside the cowling.
9) Remove the fuel tank and pull the wiring harness through the left side of the fire wall, then lift out the fire wall.
10) disconnect the drag arm on the steering. I didn't remove the steering gear box as Hoye shows in their video because it was less accessible on the 2010d. I would have had to remove the left foot rest and associated braces and a bunch of sheet metal to get to the bolts.
11) disconnect and tie back the two hydraulic lines from the pump on the engine.
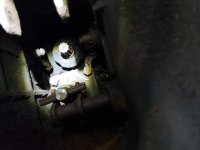
12) Take out the 4X4 drive shaft...much simpler than I thought it would be. Loosen the cover clamp in the middle, then take out 1 bolt on the front side and two on the back side and slide the plastic cover back. Then compress the spring forward and hold it in place by clamping vice grips on the shaft (but not too tightly). With the spring compressed, take out the pin. Release the spring. Then pull the drive shaft towards the back of the tractor and be ready for it to fall out quickly...I wasn't ready and dropped it on me and had to look around for the ball bearings...Found all 12...Whew! Take care of the rubber cup that falls out of the front side.
13) Support the front of the tractor under the front bumper and the back of the engine so it doesn't walk around while you are messing with the back. I had to use wooden 4x4s to support the jack stands, as mine were too short.
14) Put a rolling jack under the bell housing to support the back half and get ready to split!
15) remove the bell housing bolts. They are tight! I tried to loosen and pull apart without taking all bolts out for safety. After the two sides start to split, you may be glad you didn't take the bolts completely out. It starts splitting slowly, but once it's going, things happen fast.
My specific problems...
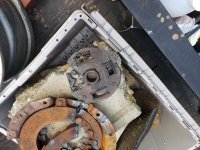
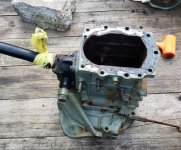
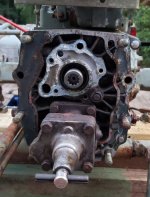
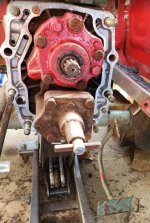
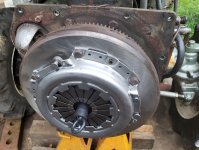
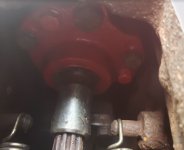
1) my clutch center was completely destroyed and spun semi-freely even with the pressure plate engaged. The heat and shrapnel caused by the destruction of the clutch caused damage to the flywheel, which I will have to have re-surfaced.
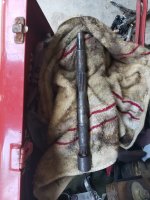
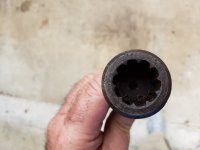
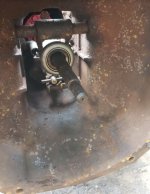
2) some previous owner welded the splined coupler to my clutch shaft to save having to buy another shaft WHEN THEY WERE PLENTIFUL! This may have led to premature failure of the clutch...or, maybe not...but I'd prefer to blame it on a previous owner regardless. Anyway, that's what I told my wife. **** YOU PREVIOUS OWNER!!!
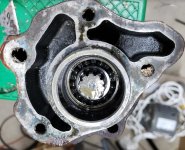
3) the welding of the splined coupler may have hardened the coupler, because it chewed up the splined shaft on my power shift pump as well...a very expensive part only available used now. I am currently talking to a local machinist to see if there is any way he can repair or manufacture a new clutch shaft and/or pump shaft. Although I am not a machinist, I do a fair amount of welding, so if I can't get something at a reasonable price, I may resort to my own "talents" and tackle the job myself, I have a couple of ideas, but that's a last, LAST resort.
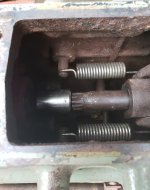
4) Because I waited a few years to tackle the job, I may have contributed to the problem by allowing the clutch shaft to rust into the clutch. Combining a shaft that is rusted into the clutch with a coupler welded to the other end very effectively prevented the throwout bearing from sliding off the back of the shaft when I was pulling the tractor apart. The result was that I got two really STREEEEEEECHED-OOOOOOOUT clutch springs. They are now about 1-foot long and look like industrial-strength curly hair extensions. I was actually wondering why my two tractor ends wanted to go back together so badly, when the rear end was rolling a little UP HILL to do it...I thought initially that these Yanmars could self-repair like Transformers...but, those two clutch springs were pulling the two halves back together.
5) Then the rains set in...
At the moment, I am part-hunting for a used pump/shaft and a clutch shaft. I am also contacting local machine shops to see if anyone is willing and able to repair/build my parts. So far, the splines are the major sticking point. Nobody I have called has the capabilities of cutting splines.
Last edited:
