s219
Super Member
- Joined
- Dec 7, 2011
- Messages
- 8,548
- Location
- Virginia USA
- Tractor
- Kubota L3200, Deere X380, Kubota RTV-X
Been picking at this for a few weeks, hampered by a lot of rain and snow, but finally got to the point where I have enough pictures to start a thread. Will be 12'x21', 252 sq. feet, just under the limit to avoid a building permit and allow use of rough-sawn lumber. Posts will provide about 11' of clearance under the roof once the final grade is done. I plan to do a 4/12 or 6/12 roof with 18-24" overhangs all around.
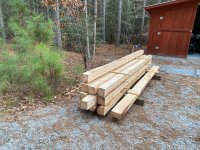
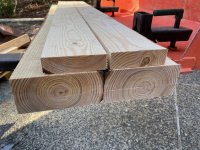
I started by milling a bunch of logs down to make posts and beams:
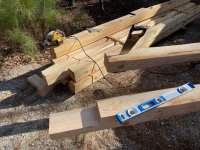
The posts got notched on the bottom and then married with a 4' section of treated 6x6 using bolts and glue. Normally I would put up the posts and then notch them for header beams, but in this case I pre-notched the beam cutouts on each post. This fresh sawn pine is real sappy and hard to cut, and I didn't want to be up on a ladder with a Skil saw this time around.
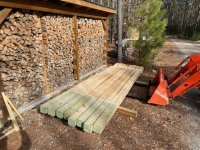
Here are all the posts ready to go:
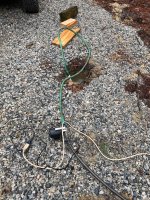
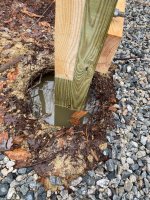
We've had so much rain and snow in the last month that post holes have been a problem. I was able to drill all 8 post holes and pour a concrete footing in each. The concrete cured under water because the post holes started filling in within hours. Before I put posts in, I have to pump out each hole and it will fill in within minutes.
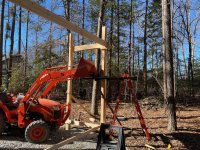
I am assembling the frame tinker-toy style, making two four-post frames that will get joined by the middle beams when complete. This lets me get all the posts square and level little by level. The tractor has been invaluable for standing up the long heavy posts, lifting the header beams, and holding up a working platform (old pallet with some extra slats) to let me reach up to the top.
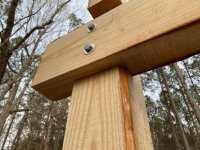
One nice thing about sawing my own lumber is that the quality is good and I can make any length I want. And of course with today's crazy lumber prices, it saves a lot of money.
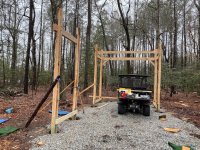
Here's the frame as of last night, before we got more rain and snow for the next couple days.
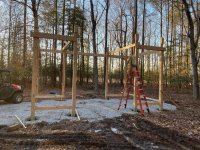
I hope to get back to it this weekend. I have one more middle beam to put up, then final straightening and squaring of the frame and posts before I backfill all the post holes. After that I'll probably finish grading the pad area with more gravel, then move onto the roof framing. Will update as more progress occurs.
I started by milling a bunch of logs down to make posts and beams:

The posts got notched on the bottom and then married with a 4' section of treated 6x6 using bolts and glue. Normally I would put up the posts and then notch them for header beams, but in this case I pre-notched the beam cutouts on each post. This fresh sawn pine is real sappy and hard to cut, and I didn't want to be up on a ladder with a Skil saw this time around.

Here are all the posts ready to go:

We've had so much rain and snow in the last month that post holes have been a problem. I was able to drill all 8 post holes and pour a concrete footing in each. The concrete cured under water because the post holes started filling in within hours. Before I put posts in, I have to pump out each hole and it will fill in within minutes.


I am assembling the frame tinker-toy style, making two four-post frames that will get joined by the middle beams when complete. This lets me get all the posts square and level little by level. The tractor has been invaluable for standing up the long heavy posts, lifting the header beams, and holding up a working platform (old pallet with some extra slats) to let me reach up to the top.


One nice thing about sawing my own lumber is that the quality is good and I can make any length I want. And of course with today's crazy lumber prices, it saves a lot of money.

Here's the frame as of last night, before we got more rain and snow for the next couple days.

I hope to get back to it this weekend. I have one more middle beam to put up, then final straightening and squaring of the frame and posts before I backfill all the post holes. After that I'll probably finish grading the pad area with more gravel, then move onto the roof framing. Will update as more progress occurs.


