beretta96man
Silver Member
- Joined
- Nov 24, 2010
- Messages
- 112
- Location
- North Shore, MN
- Tractor
- RTV 500 with camoplast 4s utv tracks, Bobcat 773 with filled tires and steel tracks
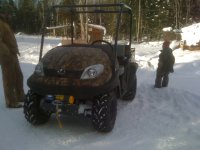
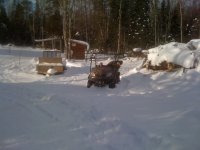
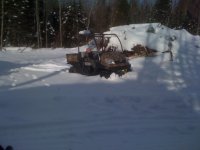
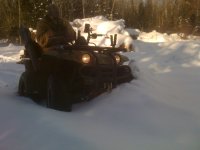
So, here it is. I just finished and will take it out tomorrow and find somewhere to sink it in the white stuff to try it out. Looks like a really nice winch for the cost. It did require a couple mods but nothing that bad.
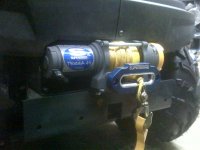
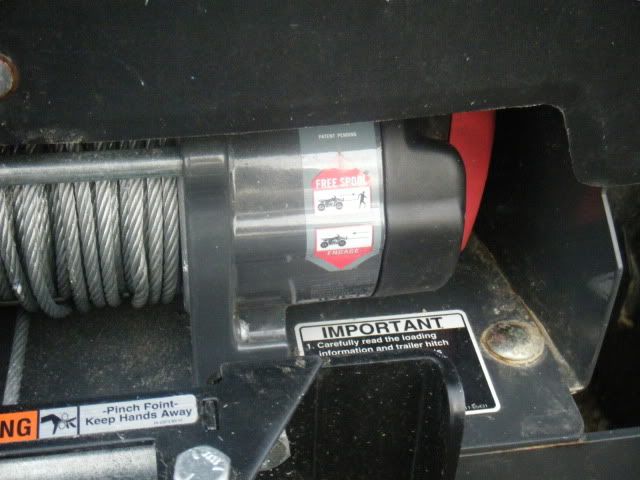
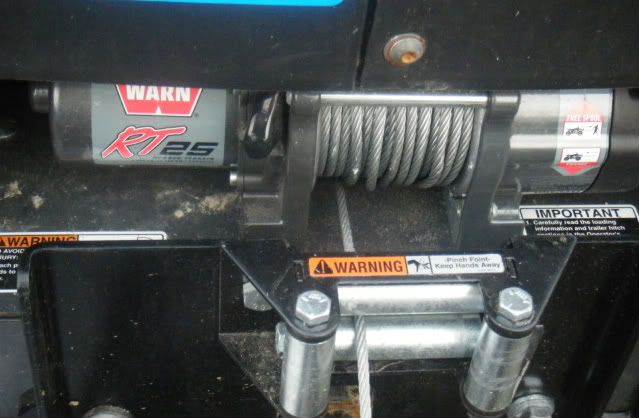
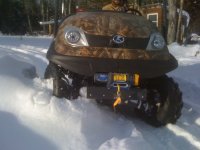
4500lbs Super winch terra 45 synthetic rope with KFI mount kit
1. Kit's mounting bolts were too short . To get ready, go to the store and get four 8mm x 30mm hex bolts, course thread I think (take the ones from the kit with you and get ones 1/4" longer so my advice doesn't screw you up). I got SS with all new washers/lock just for corrosion.
2. If you look closely at the plastic above the winch you can see I scribed an outline around it. The winch did fit behind it but the plastic was pushed out so I customized it with a dremel tool and a razor blade for a nice fit.
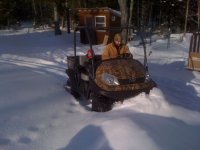
3. I have the factory grill guard and noticed that the front mounting bolts are in the way so 10 min with a 4" angle grinder cutting notches and I'm good to go. It's not on in this pic cuz I'm sending it out to get rhino lined next week.
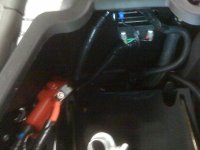
4. Figured the best place to mount the solenoid was in front of the battery, looked nice and dry. I held it high so I could mount a second below as someday I want to put a winch in the rear.
5. Put the switch and socket for the remote left of the steering wheel. Used the replacement screws that came with the KFI mount kit for the switch mounting.
6. Went to the store and bought 1/4", 3/8", 1/2" and 3/4" flex loom to cover every wire. Looks great and protects the wires from rubbing.
7. Ran the winch wires up a new hole near the hood latch and down the passenger side floor channel and the switch wires down the driver's side.
8. **I spliced the two red wires for the switch ("key on") behind the dash but ran the long one with the rest back to the battery. I found a nice little factory "bullet" style connector that tested on with the key. It was red w/green stripe and blue taped to some flex loom below the fuse panel. I'm sure it was meant for some future add on and the best part was that I didn't have to tap into any dash wires. Just crimped a male bullet connector on and plugged it in.
9. Rope was a little tricky to get started in the spool. I ended up stripping the tape and winding new tape on tighter with a pointed end to thread it better.
10. LOVE the remote:thumbsup: Used it to feed to rope on. Otherwise that would have taken two people.
I took some time with this making it look as close to factory as I could Cuz I'm that **** (Hey I'm a trim carpenter, I can't help it :laughing That said it probably took me all of four hours to do but I ended up removing the battery, floor mat (only for the rhino lining), seat (easy) and drank some beer with my brother :drink:while contemplating where to mount things/drill holes. All the work itself is really easy, you just have to get to doing it.
Only thing I want to add is one of those rubber winch savers that sits behind the hook. I can see that the hook is going to scratch the Hawse which will eventually destroy my rope if I don't plan ahead here. Until I get that I'm going to leave the hook down/ loose.:thumbsup:
4500lbs Super winch terra 45 synthetic rope with KFI mount kit
1. Kit's mounting bolts were too short
. To get ready, go to the store and get four 8mm x 30mm hex bolts, course thread I think (take the ones from the kit with you and get ones 1/4" longer so my advice doesn't screw you up). I got SS with all new washers/lock just for corrosion.2. If you look closely at the plastic above the winch you can see I scribed an outline around it. The winch did fit behind it but the plastic was pushed out so I customized it with a dremel tool and a razor blade for a nice fit.
3. I have the factory grill guard and noticed that the front mounting bolts are in the way so 10 min with a 4" angle grinder cutting notches and I'm good to go. It's not on in this pic cuz I'm sending it out to get rhino lined next week.
4. Figured the best place to mount the solenoid was in front of the battery, looked nice and dry. I held it high so I could mount a second below as someday I want to put a winch in the rear.
5. Put the switch and socket for the remote left of the steering wheel. Used the replacement screws that came with the KFI mount kit for the switch mounting.
6. Went to the store and bought 1/4", 3/8", 1/2" and 3/4" flex loom to cover every wire. Looks great and protects the wires from rubbing.
7. Ran the winch wires up a new hole near the hood latch and down the passenger side floor channel and the switch wires down the driver's side.
8. **I spliced the two red wires for the switch ("key on") behind the dash but ran the long one with the rest back to the battery. I found a nice little factory "bullet" style connector that tested on with the key. It was red w/green stripe and blue taped to some flex loom below the fuse panel. I'm sure it was meant for some future add on and the best part was that I didn't have to tap into any dash wires. Just crimped a male bullet connector on and plugged it in.
9. Rope was a little tricky to get started in the spool. I ended up stripping the tape and winding new tape on tighter with a pointed end to thread it better.
10. LOVE the remote:thumbsup: Used it to feed to rope on. Otherwise that would have taken two people.
I took some time with this making it look as close to factory as I could Cuz I'm that **** (Hey I'm a trim carpenter, I can't help it :laughing
That said it probably took me all of four hours to do but I ended up removing the battery, floor mat (only for the rhino lining), seat (easy) and drank some beer with my brother :drink:while contemplating where to mount things/drill holes. All the work itself is really easy, you just have to get to doing it.Only thing I want to add is one of those rubber winch savers that sits behind the hook. I can see that the hook is going to scratch the Hawse which will eventually destroy my rope if I don't plan ahead here. Until I get that I'm going to leave the hook down/ loose.:thumbsup: