I have been reading over forum posts regarding pole barn construction for many months now. However, I have a few questions that I was unable to find answers to. I just this morning took the first delivery of material for my new 24x28x8 pole barn. A couple concerns I have regarding the plans is the 2x12 (header?) that the trusses sit on is simply nailed to the posts. With a moderate amount of snow in central PA and the odd blizzard that dumps 2-3 feet I am concerned that this might be a weak spot in the design. I am thinking that it might be more appropriate to throughbolt the board to the posts with carriage bolts in addition to nails. I should note that there is a board on the inside and outside of the posts. Also the plans call for only 2'8" of post depth and an additional 10" of concrete. I understand that with the concrete frost depth is not a problem, however, lateral stability may be compromised with this shorter depth. Thoughts?
You are using an out of date browser. It may not display this or other websites correctly.
You should upgrade or use an alternative browser.
You should upgrade or use an alternative browser.
pole barn question
- Thread starter Rodmo1
- Start date
- Views: 29192
More options
Who Replied?
/ pole barn question
#1
herd
Gold Member
You would need to explain more about how you're constructing this shed in order to answer about the header load. If you're doinng a "pole shed'' design with 6x6 posts on 10 or 12 foot centers with prebilt trusses and using 2x6 perlins on 32'' centers, the perimeter band will just that, it will not carry the load as the post and trusses will do that.
Now if you're building a conventional roof systems with either 16'' or 24'' rafters/joists on center, then you need a sturdy, solid header. In that design, I would use either 2x10 or 2x12 with .5'' plywood, glued and staggered, nailed both sides with 16d cc's.
If you're sitting the trusses on top the post, I prefer to notch mine down one side the lenght of the truss thickness, then nail and bolt. When done, you will need diagonal wind braces. That along with your perlins will make the structure quite sturdy.
As far as post depth, I prefer 36'', but 32'' with concrecte on an 8' height is plenty. I guess it depends on whether you're digging by hand or with equipment as the soil gets hard at that depth.
Good luck, I am putting up a 24'w by 35'd in a week or so. I will be doing 3 trusses on 12' centers using 2x6 perlins on 32'' centers, using Imperial Ridge painted steel for roofing.
BTW, you didn't mention treated lumber, use treated for your posted, untreated for anything that touches the metal. Treated will rush your metal. You may also want to use a vapor barrier under your metal.
MarkV
Super Member
- Joined
- Apr 7, 2000
- Messages
- 5,698
- Location
- Cedartown, Ga and N. Ga mountains
- Tractor
- 1998 Kubota B21, 2005 Kubota L39
I have been reading over forum posts regarding pole barn construction for many months now. However, I have a few questions that I was unable to find answers to. I just this morning took the first delivery of material for my new 24x28x8 pole barn. A couple concerns I have regarding the plans is the 2x12 (header?) that the trusses sit on is simply nailed to the posts. With a moderate amount of snow in central PA and the odd blizzard that dumps 2-3 feet I am concerned that this might be a weak spot in the design. I am thinking that it might be more appropriate to throughbolt the board to the posts with carriage bolts in addition to nails. I should note that there is a board on the inside and outside of the posts. Also the plans call for only 2'8" of post depth and an additional 10" of concrete. I understand that with the concrete frost depth is not a problem, however, lateral stability may be compromised with this shorter depth. Thoughts?
Thoughts. Well if you are working from engineered plans someone has done the math to show that the nails will have enough sheer strength for the header to post connection. That said, I always through bolt or lag to the posts. Makes me feel better.
MarkV
The only concern with the information provided will be your bracing/purlins. IF the truss requires permanent lateral bracing of the web members, it may be difficult to find the length materials you would require. Check with you truss manufacturer, ideally the bracing members are not butted end to end but rather it is recommended that it runs past to the previous truss, thus could make your bracing and purlins difficult to impossible to purchase.
The bracing, there is a work around, instead of running the material laterally, you can possibly (depending on your design) do an "I" or "L" type "scab".
In the event of high winds, the structure could "rack" and with the bracing butted end to end, hummmm a lot of stresses their anyhow, not sure I would add to the list of potential problems.
JW <'/))))><
patrick_g
Elite Member
I prefer through bolts over nails or even screws or lags. More work and expense but I don't have any doubts regarding longevity. I have seen lots of really strong structures that weakened over time when wood cracked, wind loads repetitively worked on joints till they loosened, and such.
But then, I typically over engineer my projects in self defense.
Pat
But then, I typically over engineer my projects in self defense.
Pat
EddieWalker
Epic Contributor
I find it just about impossible to believe that nails are sufficient for holding the headers onto the sides of the posts on there own. My understanding is that nails are never to be used alone to support load bearing members of a structure. I've never seen it done and would never do so myself.
In my opinion, carriage bolts are the only way to go. I would use three half inch, hot dipped galvanized carriage bolts on each post as a minimum. First, tack on the 2x12's with nails to hold them in place after they are level. The drill your holes and install your bolts.
As for the depth of the posts, I would go 3 feet or more. It would depend on the soil and movement of the soil during the year. In some places, 4 feet would be the minimum. I've heard of areas of the country where that's not even deep enough.
Good luck,
Eddie
Bolts and Lags,
This poses another Engineering feat that must be taken into account prior to the fact. Nails are small in diameter, where as bolts and lags are not, thus could potentially weaken truss members.
Any larger diameter fastner could pose a problem and should be checked into before hand. Especially if these come near a joint and or truss plate.
Its funny because a nail can puncture a plate and be fine PROVIDED it doesn't cause the plate to tear and or pull away from the wood but cutting or drilling is strictly prohibited in most cases.
yooperdave
Veteran Member
- Joined
- Nov 28, 2001
- Messages
- 1,183
- Location
- Luxemburg, WI
- Tractor
- Tool Cat 5600, LS XJ2025H, Branson 4215HC
If you are buying your shed from a 'professional' company, you have the right to demand the structural calculations to PROVE structural adequacy.
Frost depth is frost depth. If the building code requires a certain depth, then hold the company accountable to give you what the building code specifies. You are correct that embedment depth of the pole provides much of the structural integrity of the lateral system of the building.
Big picture: This is a small and low eave height shed - it should not take much to bring this structure into code compliance.
Good Luck,
Yooper Dave
GE222
Gold Member
I spec'd the design of a 42 x 48 shed along with Lester Buildings in Southern Wisconsin.
It was built on a concrete slab versus having the poles cemented in the ground below the frost line.
After 4 years, there have been no issues with the slab settling or cracking.
I started with a good rock/clay base under the slab. It was graded with a Cat D-6 and allowed to settle for several months before the slab was poured.
Limestone was added and then compacted.
The slab itself was roughly 18" thick by 24" wide at the perimeter. The base was tapered up for an average thickness of 5.5".
Rebar was installed at the perimeter, mesh on everything, and fiberglass was included in the mix.
A 1.5" PVC pipe was buried prior to the pour for the main electrical service.
The finished shed has 14" sidewalls with windows, and a 16' x 12' overhead door at each end.
The finished height of the slab is about 12-14" above the local grade for excellent water drainage.
I will probably never have to worry about rotting sill plates, posts, or the tin corroding on the bottom.
The posts are also 8' on center so I can easily add internal sheathing without piece together panels.
Would I ever do it this way again? Yes, Yes, Yes!!!
flusher
Super Member
- Joined
- Jun 4, 2005
- Messages
- 7,572
- Location
- Sacramento
- Tractor
- Getting old. Sold the ranch. Sold the tractors. Moved back to the city.
I have been reading over forum posts regarding pole barn construction for many months now. However, I have a few questions that I was unable to find answers to. I just this morning took the first delivery of material for my new 24x28x8 pole barn. A couple concerns I have regarding the plans is the 2x12 (header?) that the trusses sit on is simply nailed to the posts. With a moderate amount of snow in central PA and the odd blizzard that dumps 2-3 feet I am concerned that this might be a weak spot in the design. I am thinking that it might be more appropriate to throughbolt the board to the posts with carriage bolts in addition to nails. I should note that there is a board on the inside and outside of the posts. Also the plans call for only 2'8" of post depth and an additional 10" of concrete. I understand that with the concrete frost depth is not a problem, however, lateral stability may be compromised with this shorter depth. Thoughts?
Your pole barn is pretty close in size to the 20x28x10H (front),9H(rear) pole frame equipment shed I built last year (metal sides and roof). I used Simpson T and L connectors and 1/2" bolts/nuts to tie the 4x12 beams to the tops of the 4x6 P.T. posts. I needed doubled 2x12s (=4x12) to span 14 ft between two rows of posts. The posts in third row in the rear were on 7-ft centers so I used 4x10 beams.

Used a lot of 4x4 knee braces with 1/2x6" lag bolts to stiffen the frame.
patrick_g
Elite Member
I recently moved a pole barn which is 35x70 with 18 ft side walls and 14x14 roll up doors centered in both ends. It was originally built with a slab floor and the 6 inch diameter steel pipe columns (poles) embedded in the foundation 2 feet.
I cut the columns off flush with the floor and moved the bld intact a quarter mile across one of my pastures to its new location. I now have a dirt floor and the columns are terminated atop 18 inch diameter 12-15 foot deep columns with embedded weld plates on top of the columns.
As the column to weld plate connection makes a good hinge and offers little resistance to the whole structure folding like a parallelogram I had to do some engineering. The metal skin offers considerable sheer strength and helps stiffen the walls against deformation but not nearly enough for me to be comfortable. I welded on diagonal bracing (approx 3 in dia pipe) to stiffen the structure to replace the rigidity lost by not having the columns buried.
The piers will easily carry the weight and will not move laterally but contribute essentially nothing to the prevention of the poles leaning, hence the diagonal bracing.
I also have a rotating jib crane with traveling winch on it. The vertical for it is a 12x14 inch I beam welded to a vertical column. It bends very little when the crane is loaded (2 ton capacity on traveler.) There was a problem though. if you swing the crane so it is oriented cross wise of the bld (the boom is a about 17 feet long) and lift a heavy weight then the force of the lift is translated to a lateral force trying to push the collocated truss laterally, deforming the structure. I added a large triangularizing brace on the opposite side to stiffen the structure against this lateral load at the height of the eaves.
What might I have done differently if I had it to do again?
Embed steel pipes vertically, deeply in the piers with a few feet sticking above the top. These pipes OD would be a decent fit (slightly larger than) the ID of the 6 inch columns. Split the part of the pipes above the piers longways with my plasma cutter. When sitting the building down at the new location maneuver to bring the bottom of the columns into the cut out vertical pipes, force them into intimate contact and tack weld them. After the moving crew has their stuff out of the way go back and weld the cut off vertical halves back in place capturing the columns.
This would have obviated the need for all the additional bracing and made the bld even stronger than original.
Now then, regarding the comparison of losing strength in a wood member by drilling it to receive a bolt vs nailing it with "less invasive" nails. I get the notion of using large bolts to fasten toothpicks together and it is something to discuss around the table between beers but not a very practical concern. If the "timbers" are so small as to be seriously weakened by bolts large enough to be safe for the loads and forces involved then you have serious issues with timber size/strength.
Pat
tommu56
Elite Member
Rodmo1
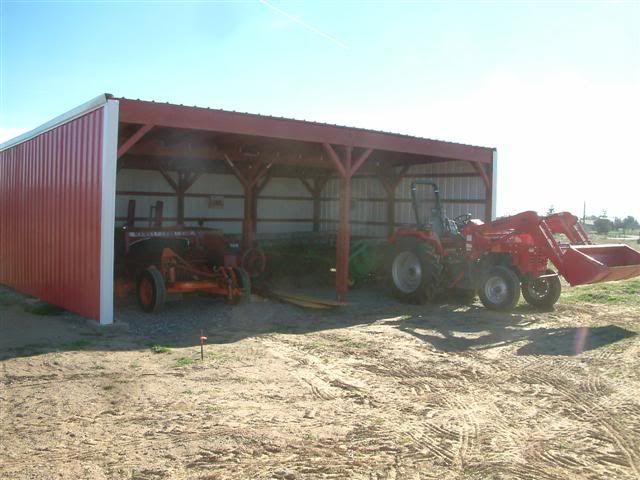
I had one put up last fall and they nailed the headers to the posts the header is a double 2 x 12 one inside one outside the posts
The trusses are on 4 ft center the posts are on 8' centers.
Every other truss is directly on the post the intermediat trusses have a 2x6 between the headers up along side the truss the posts are notched above the header and attached to the side of the truss too
it has 6/12 pitch on roof it is only 20 ft wide and survived this winter with all the snow and ice.
tom
Thanks guys for all the responses. To elaborate on the design, it has 2x6 3 ply laminated posts spaced 8' on center except where the garage doors are it will have 9' spacing. Trusses 2' on center with asphalt roof. With the design it does not call for the posts to be notched out to support the trusses so all the weight will be upon the 2x12 header. Reading the reponses I will definately carriage bolt the header in place (probably 2 bolts per post or 4 where the header terminates). Glad to hear other people did it this way as well. As far as lateral strength due to shorter pole embedment, I am not as concerned as I was initially since looking further on the plans every post is Y braced and should be very strong. This morning I am going to set my first post and continue digging holes...Yes, I am digging my holes by hand. Takes me about 1/2 hour per hole 40" deep by 12" across. Unfortunately I am only good for about 2 holes per day. I live on slope of mountain so ground is too rocky for power auger. May have neighbor come with his Kubota with FEL and try digging some for me. As far as concrete depth in holes I am simply dumping an 80# bag of 4000 PSI (mixed) seems to give me about 6" depth. So in reality I am exceeding the plans by a couple inches however cutting back on the concrete depth by a few inches. I cant imagine this would negatively affect the plans. I should finally add there are no building inspections where I live just an inspection to ensure setback compliance.
I also want to add that I am impressed that a lot of the previous posters have their trusses spaced 8' or more. Seems to me snow load would be a problem at least up my way. Those trusses used must not be the normal variety. Since this is a tractor forum I also want to add that I got my dads old cub cadet model 71 running yesterday after close to 10 years and will trailer it to my house this week so I can move some stone with the attached wagon. So the building already has its first inhabitant.
tommu56
Elite Member
Rodmo1
The truss design the truss manufacture you tell him the span and how far apart you want them and roof loading and the pitch you want.
A friend of mine has a morton building that the trusses art over 8 ft apart,no they aren't 2x4's they are like 2x10 syp and the purlins are 2x6's the truss do sit on post.
Mine is 2x4's though but engineered by the truss co for the span and pitch.
I'm not sure were you are in cpa but there are at least 2 truss manufactures between williamsport and mackeyville that I looked at (I was going to put building up my self) but didn't have the time so I got a contractor to do it.
As for the auger on a tractor they used a skid loader to drill mine and I only have about 18" to to the shale at my place.
with a skid loader you have the down pressure that a tractor doesn't have on its 3 point to help with the stone.
tom
MarkV
Super Member
- Joined
- Apr 7, 2000
- Messages
- 5,698
- Location
- Cedartown, Ga and N. Ga mountains
- Tractor
- 1998 Kubota B21, 2005 Kubota L39
I also want to add that I am impressed that a lot of the previous posters have their trusses spaced 8' or more. Seems to me snow load would be a problem at least up my way. Those trusses used must not be the normal variety.
Much of the spacing difference has to do with the fact you are running asphalt shingles and there for plywood or OSB sheathing. Two foot on center is common for that combination where 8' centers is common for metal roofing.
MarkV
yooperdave
Veteran Member
- Joined
- Nov 28, 2001
- Messages
- 1,183
- Location
- Luxemburg, WI
- Tractor
- Tool Cat 5600, LS XJ2025H, Branson 4215HC
My last shed had the trusses and columns spaced at 10' on center.
We have a 40 psf roof snow load as well.
The further the spacing, the more economical overall - USUALLY (less pieces, less labor).
Yooper Dave
We have a 40 psf roof snow load as well.
The further the spacing, the more economical overall - USUALLY (less pieces, less labor).
Yooper Dave
orangebluegreen
Gold Member
I found a great book at Tractor Supply several years ago when I had similar questions. I spent most of my life in home building and most of it is second nature to me, but this book is a great reference. It was titled Barns Sheds & Outbuildings by John D. Wagner and Clayton Dekorne.
I had the same question as you. On page 72-73 they say using 8" ring nails four per connection will carry approx 2500 pounds, and nails can loosen. Using two 4-6" lag screws can carry approx 5500 lbs and wont loosen. Machine or carriage bolts with nuts and washers can carry approx 8000 lbs. They weren't mentioning bolt diameters for those numbers. I had found a website at one time that gave load carrying specs for different bolt combinations but can't seem to find it now. They also show a specially designed (spike grid) to place between a girt\header and pole that looked like overkill to me. I calculated my desired design load and spacing and decided on two ½" lag bolts per connection for my building. I predrilled with a ¼" (from memory here, been a while, might have been smaller, you'll know by how hard it is to screw into) to make it easier to screw the lags in without splitting the wood and still maintain a tight fit. The smaller the predrill that works the better in my opinion. Some claim to use no pre-drilling but in my experience the risk of splitting the wood is too great and also risks breaking the screw while driving. I used an automotive style air wrench to drive the lags being careful to not over drive them and snap them off. I had used 7/16 on a smaller project and found them way to easy to break, ½" I didn't break any.
I had the same question as you. On page 72-73 they say using 8" ring nails four per connection will carry approx 2500 pounds, and nails can loosen. Using two 4-6" lag screws can carry approx 5500 lbs and wont loosen. Machine or carriage bolts with nuts and washers can carry approx 8000 lbs. They weren't mentioning bolt diameters for those numbers. I had found a website at one time that gave load carrying specs for different bolt combinations but can't seem to find it now. They also show a specially designed (spike grid) to place between a girt\header and pole that looked like overkill to me. I calculated my desired design load and spacing and decided on two ½" lag bolts per connection for my building. I predrilled with a ¼" (from memory here, been a while, might have been smaller, you'll know by how hard it is to screw into) to make it easier to screw the lags in without splitting the wood and still maintain a tight fit. The smaller the predrill that works the better in my opinion. Some claim to use no pre-drilling but in my experience the risk of splitting the wood is too great and also risks breaking the screw while driving. I used an automotive style air wrench to drive the lags being careful to not over drive them and snap them off. I had used 7/16 on a smaller project and found them way to easy to break, ½" I didn't break any.
wv1720
Member
I built a 24 x 24 a few years ago. I bolted the girts to the poles with pieces of all-thread rod. It was a little cheaper than carriage bolts. The building inspector told me a good rule of thumb for pole construction was for every three feet of pole above grade, it should be one foot in the ground. My poles were 12 ft high, so I put them four ft in the ground.
patrick_g
Elite Member
...to make it easier to screw the lags in without splitting the wood and still maintain a tight fit. The smaller the predrill that works the better in my opinion.
Not really.The body of the lag screw/bolt is tapered from tip to shank. When turning into wood the threads pull the screw/bolt into the wood and the tapered shaft acts like a splitting wedge. Pre-drilling, of course, makes screwing in the fastener easier but more importantly reduces the "wedge" effect. Different wood conditions (species, hardness, grain, moisture content etc) have an effect on the likelihood of splitting, now or later when the wood may change moisture content and be loaded by wind, snow, and so forth.
Lags are best installed similarly to most screws in wood. Pre-drill sufficiently such that the wedge effect does not split the wood now or later. The threads are what gives the holding strength. Never pre-drill so large a hole as to be greater in diameter than the shank of the lag (base of the threads.)
Lags have strength in two ways of interest. One is their sheer strength determined by cross section and material strength. The other is the clamping force generated by the threads pulling along the length of the lag. If the pre-drill hole size is "just under" the diameter of the base of the threads (shank diameter) you get full thread engagement and strength with minimum wedge effect to cause splitting now or later.
Drilling the holes significantly undersized (enough to make putting the fasteners in much harder) will not increase the holding power (clamping force) of the threads but will increase the chances of splitting.
It may seem counter intuitive that lags that are so hard to screw in are likely to provide poorer service than those with proper predrilled holes (easier to install) but that is the way it works.
Depending on lag size and wood conditions pre-drilling may not be required (soft wood or wood very resistant to splitting) but will never make for a weaker joint.
Pat