making an hydraulic thumb for my new mini-excavator

   / making an hydraulic thumb for my new mini-excavator #1  

dfkrug

Super Member
Joined
Feb 3, 2004
Messages
7,197
Location
Santa Cruz Mtns, CA
Tractor
05 Kioti CK30HST w/ Prairie Dog backhoe, XN08 mini-X
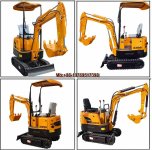
I recently imported a new 1-ton mini-X from China, and it needs an hydraulic thumb.

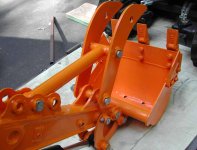
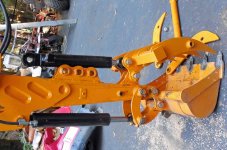
It came with a mechanical thumb installed, but it is flimsy and won't do at all. I made an
hydraulic thumb for my backhoe years ago, and it is indispensable. So, over the next several
days, I will post pix and words on my cool new thumb, now working.

My thread on importing my new machine is here:
https://www.tractorbynet.com/forums...6-importing-modifying-new-mini-excavator.html
 

Attachments

  • XN08_mini-X.jpg
    XN08_mini-X.jpg
    90.5 KB · Views: 353
  • thumb.jpg
    thumb.jpg
    78.7 KB · Views: 480
   / making an hydraulic thumb for my new mini-excavator #2  
Awesome!! Looking forward to following this project!!
 
   / making an hydraulic thumb for my new mini-excavator #3  
That does look flimsey. You could add two pieces of 2in square tube between the two flat plates to make it stronger.

My mini ex needs a hyd cylinder for the thumb i built. Its a manual with two different settings.
 
   / making an hydraulic thumb for my new mini-excavator
  • Thread Starter
#4  
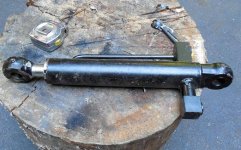
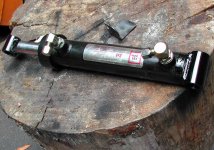
When I bought this machine, I also got a lot of spares, including 2 spare hydraulic cylinders.

They seem well-made and are 50mm ID, and about 10" stroke. Only $50 each, which I suspect is
cost. Same size as the bucket cylinder.

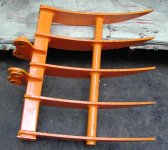
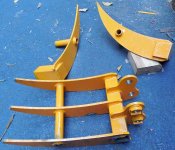
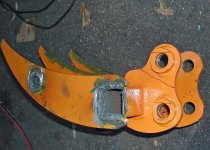
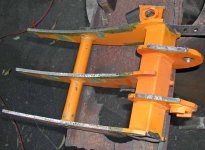
I also bought this accessory, a rake that mounts where the bucket usually goes. I don't really have a use
for a rake, but it was so inexpensive I bought it anyway. I was thinking of using it for my future hydraulic
thumb. It was only about $60 more, IIRC.
 

Attachments

  • rake.jpg
    rake.jpg
    94.7 KB · Views: 248
  • hyd_cyl.jpg
    hyd_cyl.jpg
    105.9 KB · Views: 260
   / making an hydraulic thumb for my new mini-excavator
  • Thread Starter
#5  
You could add two pieces of 2in square tube between the two flat plates to make it stronger.

Yeah, to make this mechanical thumb usable, you would need to weld the 2 sides together, with tubing or plate. I took it off entirely when digging. It was in the way.

I have just over 4 hours on this machine.
 
   / making an hydraulic thumb for my new mini-excavator
  • Thread Starter
#7  
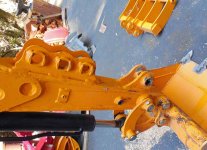
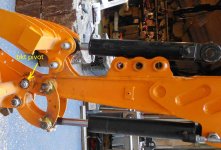
After removing the OEM mechanical thumb, you can clearly see the pivot on the end of the dipper and the 3 anchor point for the thumb brace. These are all 25mm holes, fabricated with DOM tubing over steel plate. The DOM is notched to accommodate the anti-rotate feature of the pins.

Next is the mockup to see what mods I have to make.
 

Attachments

  • mech_thumb.jpg
    mech_thumb.jpg
    113.7 KB · Views: 394
  • mech_thumb_2.jpg
    mech_thumb_2.jpg
    106 KB · Views: 305
   / making an hydraulic thumb for my new mini-excavator
  • Thread Starter
#8  
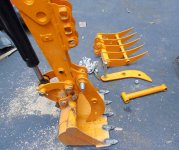
Here is the mockup, using the spare bucket cylinder and the rake.

Right away, you can see that the 3 anchor holes are too far down the dipper to serve as the upper thumb cylinder pivot. The lower thumb pivot also needs to be closer to the end of the dipper. Using the bucket pivot as the shared thumb pivot will not work, either. In my experience, 25mm pins are the minimum size for the forces involved here. Sharing the bucket pivot pin will increase the bending stresses and result in failure.

Both the bucket and the thumb cylinders are 50mm ID, and push with 7700 pounds of force (2400psi).

Finally, the pivot on the rake is all wrong. Much work to be done.....
 

Attachments

  • mockup_2.jpg
    mockup_2.jpg
    88.1 KB · Views: 248
  • mockup.jpg
    mockup.jpg
    105.8 KB · Views: 396
   / making an hydraulic thumb for my new mini-excavator
  • Thread Starter
#9  
First the business-end of the thumb. I made it narrower and trimmed off the "toenails". Then I cut off two of the "ears". I will reuse these later.
 

Attachments

  • thumb_5.jpg
    thumb_5.jpg
    119.5 KB · Views: 156
  • thumb_6.jpg
    thumb_6.jpg
    152.2 KB · Views: 175
  • thumb_7.jpg
    thumb_7.jpg
    89.1 KB · Views: 187
   / making an hydraulic thumb for my new mini-excavator
  • Thread Starter
#10  
Next, the cylinder.

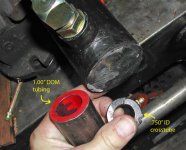
Sadly, I can not make the 2 x 10" cylinder fit. Fully-retracted, it has to clear the boom at the top of the dipper, while retracting the thumb far enough to be out of the way for digging action.

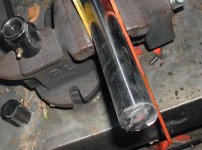
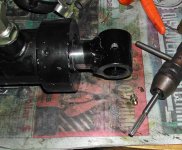
I had one of these 2 x 8" cyls, acquired from Surplus Center years ago. They have only 3/4" ID crosstubes, so that has to be fixed. I cut them off and welded on some 1" ID DOM tubing, which is undersized enough to give ideal grease clearance with a 25mm pin.

The last photo is the final cylinder, in the process of having zerks tapped.
 

Attachments

  • cylinder_2x10_a.jpg
    cylinder_2x10_a.jpg
    125.4 KB · Views: 245
  • cylinder_2x10_b.jpg
    cylinder_2x10_b.jpg
    88.1 KB · Views: 256
  • cylinder_2x10_c.jpg
    cylinder_2x10_c.jpg
    93.4 KB · Views: 262
  • cylinder_2x10_d.jpg
    cylinder_2x10_d.jpg
    116.6 KB · Views: 276
 
Top