Zebrafive
Super Member
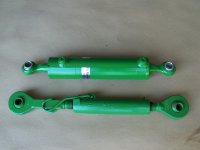
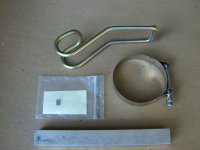
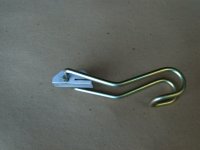
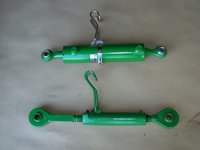
I bought my toplink from Fite Right Hydraulics. At 25 lbs a bungie cord would not cut it for a holder. So I made my own. More bought it than made it. The handle/holder is the same as used on my original toplink. I bought it from the dealer along with the two spring pins that hold it in place. The clamp is from ebay, a T-Bolt clamp, said to be stronger than hose clamps. First one I bought was too big. They sized it for silicone hose and it was 1/2" bigger than the hose size. I bought a 3 1/2" and it was more like 4". Second clamp (3") was just right. Also from eBay was a scrap of aluminum.
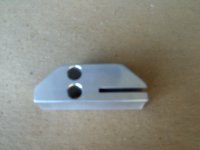
Since I do not have a machine shop I choose aluminum. Sawed with a hacksaw and drilled on Harbor Freight drill press. I experimented with a scrap of wood to get the holes right, I wanted a little preload so it would stay tight to the link when not in use. So the holes are not the same as on my top link.
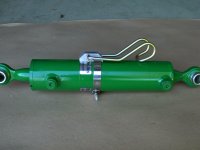
The bottom of the aluminim block is filed to match the cylinder and ends cut at a 45. Then a slot cut for the clamp. I put the slot towards the tractor side. I had considered slotting both ends and using two clamps. I think one is enough.
Pictures show the Implement end to the left. Asembled, but not mounted, notice the preload to keep the handle tight to the cylinder. On the original toplink it was used to lock the setting of the toplink by engaging the implement end. It pivoted forward to hook on tractor bracket when not in use.
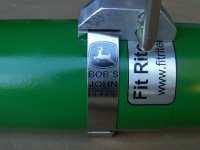
It mounted right over Fite Right Hydraulic's sticker. (Sorry Brian. if you send me a couple more stickers I'll add them below so they wlll show)
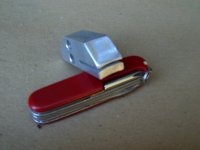
Also note the custom laser engraving on the clamp. I'll post more pictures when I mount it on my tractor.
Since I do not have a machine shop I choose aluminum. Sawed with a hacksaw and drilled on Harbor Freight drill press. I experimented with a scrap of wood to get the holes right, I wanted a little preload so it would stay tight to the link when not in use. So the holes are not the same as on my top link.
The bottom of the aluminim block is filed to match the cylinder and ends cut at a 45. Then a slot cut for the clamp. I put the slot towards the tractor side. I had considered slotting both ends and using two clamps. I think one is enough.
Pictures show the Implement end to the left. Asembled, but not mounted, notice the preload to keep the handle tight to the cylinder. On the original toplink it was used to lock the setting of the toplink by engaging the implement end. It pivoted forward to hook on tractor bracket when not in use.
It mounted right over Fite Right Hydraulic's sticker. (Sorry Brian. if you send me a couple more stickers I'll add them below so they wlll show)
Also note the custom laser engraving on the clamp. I'll post more pictures when I mount it on my tractor.
Attachments
-
 toplink 004.JPG812.4 KB · Views: 298
 -
 toplink 005.JPG819.4 KB · Views: 316
 -
 toplink 006.JPG795.1 KB · Views: 310
 -
 toplink 007.JPG805.9 KB · Views: 289
 -
 toplink 008.JPG791.6 KB · Views: 273
 -
 toplink 009.JPG830.6 KB · Views: 379
 -
 toplink 010.JPG826.6 KB · Views: 621
 -
 toplink 011.JPG814.5 KB · Views: 412
