1stDeuce
Gold Member
About a year ago I bought a standard 24' deckover gooseneck. It was a straight deck trailer, with 7' ramps, and I found it almost impossible to load things on level ground, as the deck height was about 37" off the ground, making the ramps pretty steep. I made some 8' ramps for it, but that didn't really help much, and there was no way I was going to be able to get my Crew Cab 2500 GMC up onto the trailer if I ever had to. I ended up selling it to look for something lower, or with a dovetail.
After a year of searching, I still hadn't located anything I liked, and decided to build something instead of buy... I bought a set of 7000lb axles from an RV place in MI, and had a friend haul them out when he visited. About a month ago, I bought a tractor, and we closed on property in CO that we intend to build on in the spring. Since I have no way to haul the tractor or building supplies, it was time to get busy...
I knew I wanted an 8' wide deck, as my firefighting trailers are more than 84" wide, so a car hauler style trailer was out... I also wanted the ability to haul our two Jeeps if needed, which set the min deck length at 28'. Keeping the deck low was a priority, and having at least some amount of dovetail would allow my truck to load easily if it ever needed a ride home.
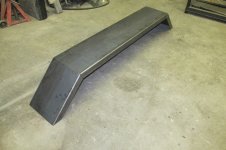
I sketched up a trailer to verify that my truck would load OK with the 8' ramps I already own. I found that using 10"x15lb I beam and piercing the deck supports through it would result in a 30" deck height, and I'd only have to build 3" tall drive-over fenders.
Here's that sketch:
As I was generating an order list of materials, I decided to just go ahead and design the whole trailer in Solidworks, so I wouldn't miss anything. This allowed me to figure out how to fit corners, and to cut things to the right size on the first try. In the end, I kept adding and adding to the model as I went, so basically the whole trailer is in there now. It proved invaluable as I went along to be able to try out a few things without actually cutting metal and making scrap...
Here's the model as it exists today. You can see it's not 100%, but was enough to get the trailer to 100% with a minimum of mistakes: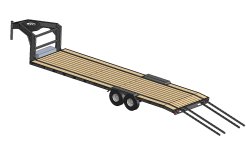
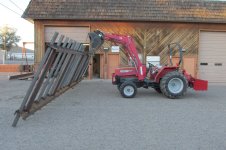
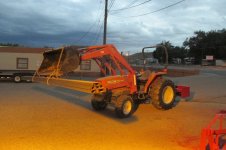
My first order of business was to order about 2400lbs of steel. Two 30' and one 25' I beam for tongue and rails, and lots of 3"x4.1 and 5" channel. Thankfully one of the guys that works in my complex has a gooseneck, and he let me use it to pick up my steel. My trusty 1455 did the unloading, and I stacked it all on the side of the building... This is a 1200lb bundle of channel...
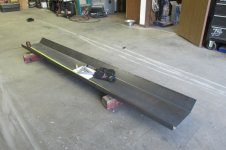
Then it was time to cut the beams to length. The extra 2' was cut off and will be bracing on the tongue, and I carved out a dovetail on each beam and re-welded the top flange.
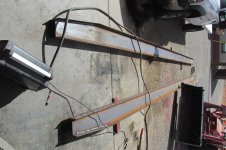
Then I made a template from 1/8" plywood stapled triple thick for notching the beams with my plasma cutter. I've used this technique several times now, and it works well! (Soak the plywood in water a few seconds before each cut if you have to make a lot of them!)
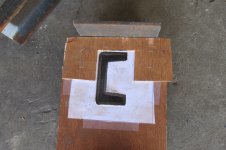
Test cut, yup, channel fits!
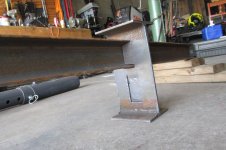
I used 4.5" pipe for the crossmembers to make the trailer torsionally stiffer, without the need to run a "torque tube" down the length of it.
Made another template to cut the 4.5" holes as well, using a 1/8" drill bit for the pivot.
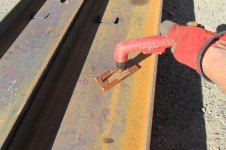
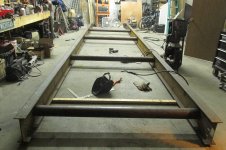
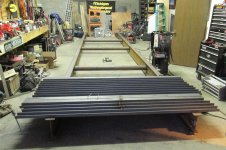
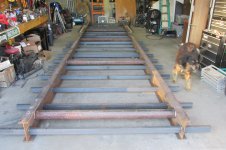
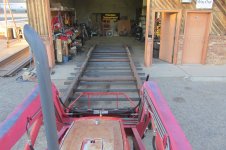
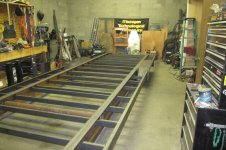
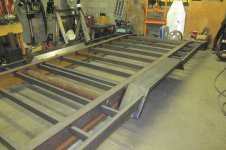
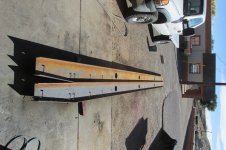
And here's the finished rails.
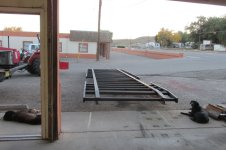
I'm actually playing catchup with this thread. I've been working hard on the trailer for a month now, and just primed it yesterday. This afternoon, I'm going to hit it with the red, just in time for the weather to turn cold... I'll add more entries over the next few days to chronicle the build!
Hope you enjoy!
After a year of searching, I still hadn't located anything I liked, and decided to build something instead of buy... I bought a set of 7000lb axles from an RV place in MI, and had a friend haul them out when he visited. About a month ago, I bought a tractor, and we closed on property in CO that we intend to build on in the spring. Since I have no way to haul the tractor or building supplies, it was time to get busy...
I knew I wanted an 8' wide deck, as my firefighting trailers are more than 84" wide, so a car hauler style trailer was out... I also wanted the ability to haul our two Jeeps if needed, which set the min deck length at 28'. Keeping the deck low was a priority, and having at least some amount of dovetail would allow my truck to load easily if it ever needed a ride home.
I sketched up a trailer to verify that my truck would load OK with the 8' ramps I already own. I found that using 10"x15lb I beam and piercing the deck supports through it would result in a 30" deck height, and I'd only have to build 3" tall drive-over fenders.
Here's that sketch:

As I was generating an order list of materials, I decided to just go ahead and design the whole trailer in Solidworks, so I wouldn't miss anything. This allowed me to figure out how to fit corners, and to cut things to the right size on the first try. In the end, I kept adding and adding to the model as I went, so basically the whole trailer is in there now. It proved invaluable as I went along to be able to try out a few things without actually cutting metal and making scrap...
Here's the model as it exists today. You can see it's not 100%, but was enough to get the trailer to 100% with a minimum of mistakes:

My first order of business was to order about 2400lbs of steel. Two 30' and one 25' I beam for tongue and rails, and lots of 3"x4.1 and 5" channel. Thankfully one of the guys that works in my complex has a gooseneck, and he let me use it to pick up my steel. My trusty 1455 did the unloading, and I stacked it all on the side of the building... This is a 1200lb bundle of channel...

Then it was time to cut the beams to length. The extra 2' was cut off and will be bracing on the tongue, and I carved out a dovetail on each beam and re-welded the top flange.

Then I made a template from 1/8" plywood stapled triple thick for notching the beams with my plasma cutter. I've used this technique several times now, and it works well! (Soak the plywood in water a few seconds before each cut if you have to make a lot of them!)

Test cut, yup, channel fits!

I used 4.5" pipe for the crossmembers to make the trailer torsionally stiffer, without the need to run a "torque tube" down the length of it.
Made another template to cut the 4.5" holes as well, using a 1/8" drill bit for the pivot.

And here's the finished rails.

I'm actually playing catchup with this thread. I've been working hard on the trailer for a month now, and just primed it yesterday. This afternoon, I'm going to hit it with the red, just in time for the weather to turn cold... I'll add more entries over the next few days to chronicle the build!
Hope you enjoy!
