Brake pedal return spring

   / Brake pedal return spring #11  
If you do dig in, would you be so kind as to photograph and tell us of your experience doing it?
 
   / Brake pedal return spring #12  
fatboycowen, for sure. It will probably be at least a week or two, but I'll document as well as I can and post up here.
 
   / Brake pedal return spring #13  
So I got into it today, and I know what the problem is, but not the solution. I'll post the pics and all that fun stuff soon.

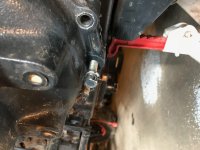
For now I'll just tell you I got the brake housing off and one of my suspicions turned out to be true. The problem (at least on my machine) is the cam lever that goes thru the housing. It is so tight I can barely move it with a wrench and it has not begun to come out after repeated blows with a mallet. I have it sitting with some PB Blaster on it and will try again when I can get back to it.

Everything else looks fine. I measured the brake disk thickness as well as the spacer plate and they are barely worn at all. The balls are all nice and round and move freely in the guide plate. All the gears look perfect and the bearings turn smoothly.

I have a call into the service tech at the local Bobcat dealer and I hope he'll let me pick his brain on Monday. It seems that this could be fixable without buying parts.

The job is not that bad. I spent 3 1/2 hours on it today and I work slow on these things. With a little prep and study before hand, it's a satisfying job.

I've never posted pics here before, so as soon as I figure it all out I'll get them up.
 
   / Brake pedal return spring #14  
Fatboycowen and Grand_Pooba, I'm curious... Are we all having the problem on the left brake?
 
   / Brake pedal return spring #15  
Mine is left
 
   / Brake pedal return spring #16  
I believe I have the problem licked, so here's what I have done and know so far. I'll spread this out over a few posts. Note: after posting I see that my photos are out of order. The parts breakdown was supposed to be first, so scroll down for that, then go thru the rest.

First, a few words on safety. I'm sure you all are choir members, so forgive me for preaching to you, but I have actually seen people stuck under poorly supported work and I feel it is always worth mentioning.

I spent about 3 1/2 hours on the work done here and it was deliberately slow. I turned off the podcast I had on and switched to relaxing music. When jacking and supporting the tractor, please take the time to slow down and really think about your methods. I used two, 2 ton jack stands in positions where they are both taking some weight and left the floor jack in place, also taking weight. Do not put yourself under anything if you don't have to be there, especially if you are yarding on some stubborn bolt. Be safe. Thank you.

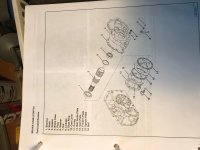
First, here is the parts breakdown, if you don't have the service manual.

IMG_0068.jpg

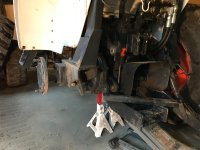
The ROPS has to come off, and I have to work in a low ceiling area of our barn, so I started by taking the upper portion off where it hinges. Then I removed the 3 point hitch on the side I'm working on.

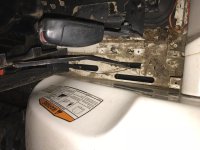
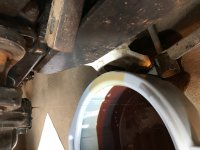
Then I took off the wheel and the fender. There are three bolts hiding under the lever cover to get the fender off. You could get away with the fender on, but it really clears up your work area.

IMG_0069.jpg

IMG_0070.jpg

IMG_0071.jpg

IMG_0073.jpg

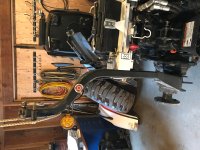
Then I took off the left side of the ROPS.

IMG_0087.jpg
 
   / Brake pedal return spring #17  
I'm so excited to see more.
 
   / Brake pedal return spring #18  
Page two: Let's see if I can do better with the pics this time.

I should have mentioned earlier that when positioning the jack stands, think about leaving some room for the oil pan. The CT225 has about 8 gallons of hydro oil and I have a 5 gallon pan, so I did this in stages. Also, this oil only has about 20 minutes of use so I meticulously cleaned some containers and will reuse it. You'll need to drain from two spots. First get the main drain plug and you'll get 90% of the oil out. Then pull the plug on the inside of the brake housing. You might think there is not much oil left in there, but it still has some head pressure. If your pan in mearly under the plug, the oil will over shoot your pan and you will dump a bit on your previously clean floor. Also, have some kitty litter on hand.

IMG_0074.jpg

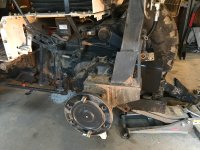
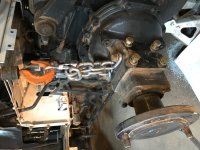
The axle housing is about 70 pounds, so I took this advice from the manual. Use the bolts from the ROPS and support the housing before removing it. It really makes getting it off easy.

IMG_0076.jpg

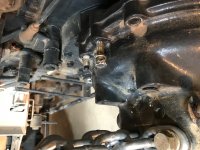
Pull all the bolts, and two nuts, from the axle housing. At the top and bottom you'll find two threaded holes. Clean them out and use two of the housing bolts to separate it from the brake housing.

IMG_0077.jpg

IMG_0078.jpg

IMG_0079.jpg

IMG_0080.jpg
 
   / Brake pedal return spring #19  
Page three:

Set the axle housing to the side (you'll need it later).

Now we've made it to the root of the problem, the brake housing. Inside the axle housing, there are two bolts, one nut and two Allen bolts. I pulled them first, and since they sit in the hydro oil, I cleaned them and wrapped them in a towel for safe keeping.

To the left of that you'll find a series of bolts and one nut (forward of the brake lever). Pull these and remove the brake lever.
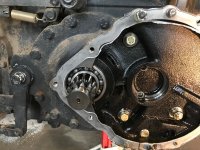
IMG_0082.jpg

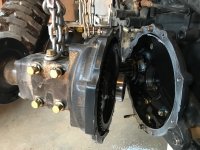
There are no happy separation bolt holes for the brake housing. I used a flat bar in the gap at the rear of the housing to break the seal. Then it was a slow process of coaxing the housing from the transmission. I should note here that the manual shows gaskets between both of the housings. In fact, all they use is gasket eliminator. For reassembly they state you can use any gasket maker of your choice, except RTV.
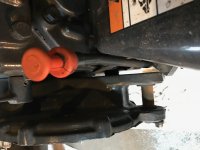
IMG_0083.jpg

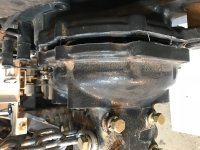
Here is a shot of the inboard side of the brake housing showing the brake itself.
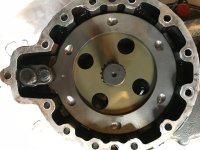
IMG_0084.jpg

On the transmission side is the ball housing. I pulled the ball housing off just to check it out, but it is not part of this issue (at least with my machine). It looked like it just came from the factory, which it should at only 430 hours.
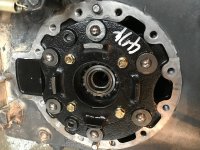
IMG_0085.jpg

It turns out that my problem is the cam lever is corroded into its hole. You can remove the shaft, cam plate, two friction plates and the spacer with the lever still in position. Here is a shot of what you are left with.
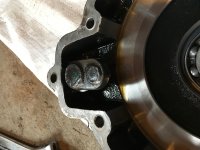
IMG_0086.jpg

The offending part was jammed in so tight, I could barely get it to budge with a wrench and I could not get it out with a mallot. I let it soak for a day with a dose of PB Blaster and came back this afternoon.
 
   / Brake pedal return spring #20  
Page 4? I think...

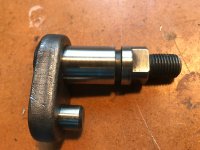
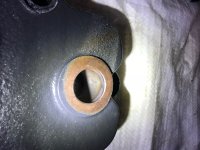
When I got back in the barn today I supported the housing on a couple 2x4s, put the nut back on, and gave it a few whacks with a rubber mallot. Out she came! I was so excited that I forgot to snap a pic before I set to cleaning it up. The outboard portion beyond the O-ring was pretty corroded. I cleaned it up with a Scotch pad, as well as the hole it sits in. Here it is after pulling the ring and cleaning.

IMG_0089.jpg

I did get a shot of the hole before scrubbing it. You can see the last 1/4 inch is a bit ugly.

IMG_0091.jpg

After scrubbing them back to a shine, the cam slides back is smoothly. My plan is to get a new O-ring and reassemble with a dose of lithium grease. I am still going to chat with the service guy at Bobcat on Monday to see if he has anything to add. But I believe this is going to solve it!

I will post again after I get it back together and will include the torque values in case you don't have the service manual. I'm pretty happy with this job. I'll be into it for 6 hours or so of labor and $0! Can't beat that with a stick!
 

Tractor & Equipment Auctions

2012 INTERNATIONAL 4300 26 FT BOX TRUCK (A51219)
2012 INTERNATIONAL...
2016 PETERBILT 587 (A50854)
2016 PETERBILT 587...
Hyster H155XL Forklift (A48837)
Hyster H155XL...
2011 John Deere 844K Articulated Wheel Loader (A50322)
2011 John Deere...
FIATALLIS MOTOGRADER (A50854)
FIATALLIS...
2013 MACK CHU613 (A50854)
2013 MACK CHU613...
 
Top