dfkrug
Super Member
- Joined
- Feb 3, 2004
- Messages
- 7,197
- Location
- Santa Cruz Mtns, CA
- Tractor
- 05 Kioti CK30HST w/ Prairie Dog backhoe, XN08 mini-X
I have been lusting for a 4-in-1 bucket for my Kioti CK30 loader. I had one
on my B21 and I got a few hours using it, so now I must have one for the
long term. I was pleasantly surprised that you can do a lot with this kind
of bucket, even on light tractors. My CK30 is 50% heavier than the B21, so
it should handle the heavier bucket without a problem.
My main usage will be for grading, picking up rocks, and grabbing buckets of
materials (dirt, gravel, rotting leaves, etc). Having the 4-in-1 will allow me
to avoid using my box blade and to leave the backhoe mounted.
In my search for a bucket, I came across the WRLong HydroJaw2, or HJ2-60.
It is very light at about 350#, according to the manufacturer. Unfortunately,
it is about $2500, plus tax and shipping. Ouch. And that does not include
the hydraulic valve, etc. The manufacturer was very helpful, but the only
nearby dealer would not even get back to me with a quotation.
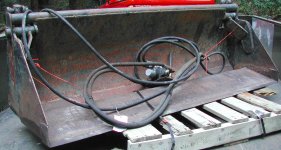
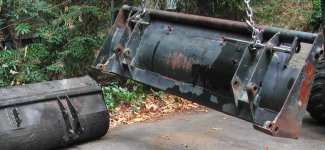
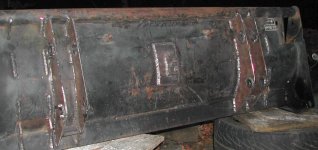
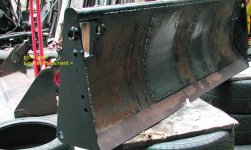
So I went to Ebay, and I at last found a used one (first photo). It was in
PA, but I won it for $500 and had it shipped to the left coast for $400. The
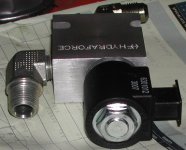
valve it came with is a lever-operated one-spool valve, used downstream of
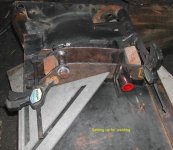
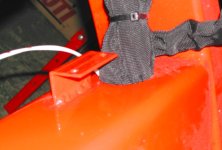
the FEL valve, no doubt. I plan to use a solenoid-operated spool valve.
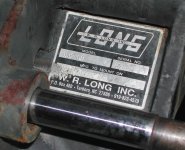
The mfgr plate shows the unit is made to fit a JD 440 loader, and that is
way too wide for my Kioti KL130 FEL. The bkt has seen light use, but it has
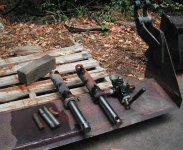
been left outside for a while. It has some rust and is a little too light duty
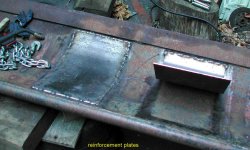
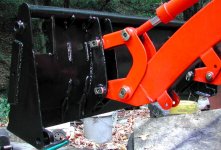
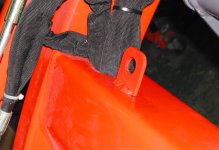
for my taste, so I will rebuild it, as well as adapt it to fit my tractor.
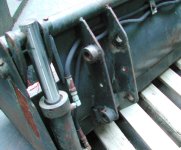
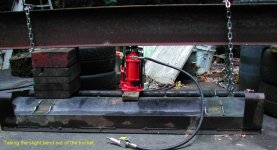
Did I say this was a light duty 4-in-1? Well, the sides are only 3/16", the
lower cylinder pins are 7/8" and NOT greasable, and the lower jaw (dozer half)
has only a 1/8" steel carcass! I weighed it and it is only #326#, only 146#
more than my OEM fixed bucket.
on my B21 and I got a few hours using it, so now I must have one for the
long term. I was pleasantly surprised that you can do a lot with this kind
of bucket, even on light tractors. My CK30 is 50% heavier than the B21, so
it should handle the heavier bucket without a problem.
My main usage will be for grading, picking up rocks, and grabbing buckets of
materials (dirt, gravel, rotting leaves, etc). Having the 4-in-1 will allow me
to avoid using my box blade and to leave the backhoe mounted.
In my search for a bucket, I came across the WRLong HydroJaw2, or HJ2-60.
It is very light at about 350#, according to the manufacturer. Unfortunately,
it is about $2500, plus tax and shipping. Ouch. And that does not include
the hydraulic valve, etc. The manufacturer was very helpful, but the only
nearby dealer would not even get back to me with a quotation.
So I went to Ebay, and I at last found a used one (first photo). It was in
PA, but I won it for $500 and had it shipped to the left coast for $400. The
valve it came with is a lever-operated one-spool valve, used downstream of
the FEL valve, no doubt. I plan to use a solenoid-operated spool valve.
The mfgr plate shows the unit is made to fit a JD 440 loader, and that is
way too wide for my Kioti KL130 FEL. The bkt has seen light use, but it has
been left outside for a while. It has some rust and is a little too light duty
for my taste, so I will rebuild it, as well as adapt it to fit my tractor.
Did I say this was a light duty 4-in-1? Well, the sides are only 3/16", the
lower cylinder pins are 7/8" and NOT greasable, and the lower jaw (dozer half)
has only a 1/8" steel carcass! I weighed it and it is only #326#, only 146#
more than my OEM fixed bucket.