SSQA FEL snowplow build

/ SSQA FEL snowplow build #1  

dstig1

Super Member
Joined
Apr 7, 2010
Messages
5,729
Location
W Wisc
Tractor
Kubota L5240 HSTC, JD X738 Mower, (Kubota L3130 HST - sold)
I decided to put the build all in one place, so it is easier for others to find if they want to reference it later on.

Here's what it cost me. I did well more than was absolutely necessary, but I will keep it for a lifetime, so I prefer to do it right now.


Plow Used175
Cushion valve, hoses, fittings Surplus Ctr165
Angle cylinders - Baileys125
Cutting edge & rear shoes Northern175
SSQA Plate- Lang Equip, Wisc200
Steel85
Sandblast media40
Moldboard - St Croix Fab120
Paint90
Oxygen 2 tanks80
Hardware, parts - Fleet Farm85
Total1340


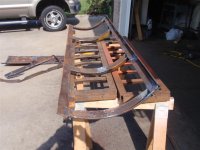
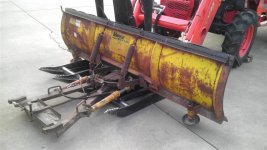
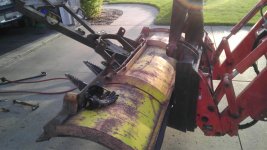
And here was the donor plow. An old rusted Meyers ST90 7.5' plow that came without the hydraulics/pump/etc, which was why it was so cheap.
Plow1 (Small).jpgDisassembly (6) (Small).jpg
 
/ SSQA FEL snowplow build
  • Thread Starter
#2  
Some of the problems:
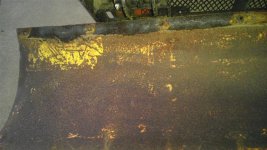
Moldboard was pretty rotted out. I ended up cutting it out and replacing it:

Moldboard rot (Small).jpg

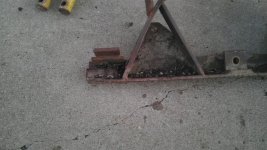
The frame was bent in a few spots. Here is a bad bend in the sector (the end on the left) I had to straighten. It was worse than the pic shows.
Disassembly (7) (Medium).jpg


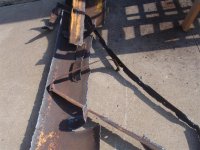
Peeling off the moldboard skin with the torch was nasty work:
Plow_unskinned (1) (Medium).JPGPlow_unskinned (2) (Medium).JPG
 
/ SSQA FEL snowplow build
  • Thread Starter
#3  
I sandblasted everything. That was another learning experience.

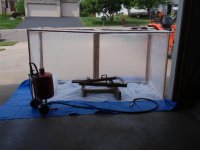
Here is the basic tent I used to help contain the mess.

sandblast-1st (1) (Medium).JPG

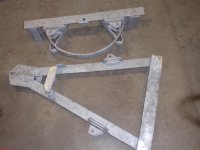
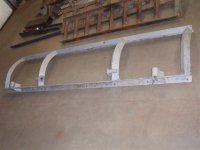
And the sector, A-Frame, and moldboard frame blasted and cleaned up nicely.
sandblast-1st (3) (Medium).JPGmoldboard blasted (Medium).JPG


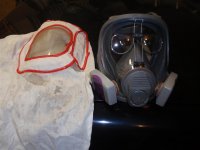
Sandblasting is dangerous work, and you need to protect your lungs properly. Here is the Full face and P100 filters I used for this. Worked great and I could not smell or taste any of it while I had the mask on. The white hood was just the cheapo that came with the sandblaster, but it kept the main grit off of me. I had the respirator on under that.

sandblast-1st (4) (Medium).JPG
 
/ SSQA FEL snowplow build
  • Thread Starter
#4  
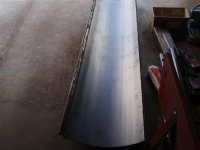
Next up, I needed to get a new skin for the moldboard. I had a local shop do it as they could roll it to fit. I dropped off the frame and let them do it when they had time. It was not much more than it would have cost me for a sheet of 11 ga steel, so it was well worth it. Besides, you ever try bending 11ga steel by hand? Not fun. Here it is lying on the frame before welding. The frame was still warped so it took some serious clamping to get it all together during welding. I just worked from one side (cutting edge side) to the other in stages.

moldboard (1) (Small).JPG

I made some changes to reinforce the sector to eliminate the potential to bend again like it did before. Straightening the bend:

Sector straightened (Medium).JPG

Adding more support. I saw a similar setup in another TBN member's plow, and it looked good to me, so I duplicated.

Sector repairs (Medium).JPG

Here is the mess the PO had done that had failed badly. I should have cut this out before blasting, but no biggie.

sector_mods (2) (Medium).JPG
 
/ SSQA FEL snowplow build
  • Thread Starter
#5  
Designing and building the mount

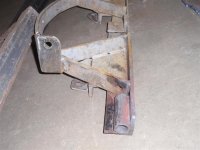
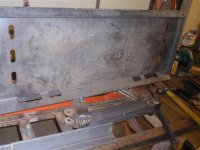
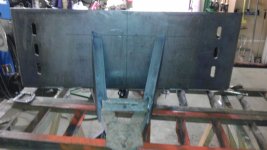
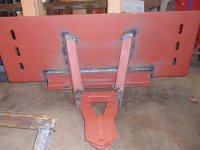
I started with a heavy duty 3/8" solid SSQA plate from ebay. No sense reinventing the wheel, and again, I could buy the steel for this price. I had shortened the A-Frame by about 4-5" and welded a new crosspiece from angle back there, since I had plenty of it. I also added tubes to mount rear skid shoes and did a really awful job of torching out the holes and welding them in :ashamed: Here is the back view with the plate tacked in place that shows all that.

Plow SSQA mount (4) (Medium).JPG

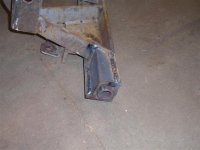
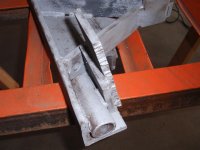
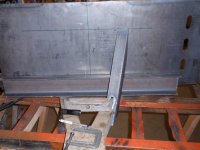
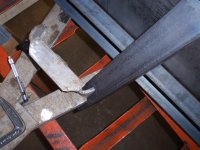
To reinforce the mount on the front I coped in a couple pieces of 3/8" thick 3x3 angle around the stop section of the A-frame. These were very time consuming to fit, but I got them in pretty well. I had to adjust them back at the suggestion of member LD1 so they didn't interfere with the sector movement. (thanks LD1!:thumbsup:)


Plow SSQA mount (2) (Medium).JPG
Plow SSQA mount (3) (Medium).JPG
Plow frame clearances (4) (Medium).jpg
 
/ SSQA FEL snowplow build
  • Thread Starter
#6  
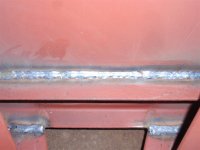
Then I primed it, especially areas I wouldn't be able to get to later, and welded it all up. Not the most horrible welding, but could be plenty better. Need more practice... Given the way it was designed/braced and the welds beveled, I am not worried about strength. Here's a close-up of the good welds. I won't show all the others... :laughing:

Plow mount welded (Large).JPGPlow mount weld (Large).JPG

I didn't take any photos of welding up the moldboard skin, but I fully welded all the seams to keep water out. It doesn't need all that weld for strength, but I wanted to seal it up so it doesn't rust inside the ribs like it did before. Rust just poured out of the ribs once I freed the old skin from it. I'm trying to avoid that. I had to build up weld on the center ribs as the frame was bent enough to not sit flat there. It took me a full day with setup and everything to weld on the moldboard. I'm sure others would be faster, but it was a lot of work. It was probably over 40-50' of weld bead, especially with the extra build up I did for the center ribs.

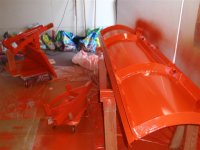
Then it was on to final paint in my makeshift garage paint booth. It is an explosion of Orange!

Snowplow final paint (4) (Medium).JPG
 
/ SSQA FEL snowplow build
  • Thread Starter
#7  
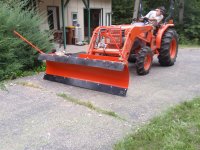
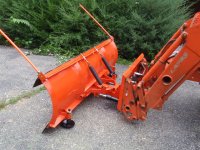
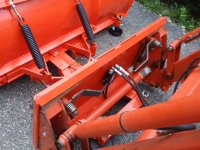
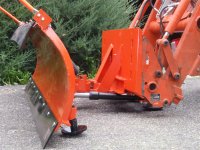
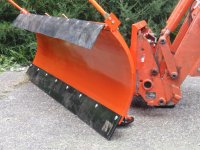
And finally today I got it fully assembled and mounted over at my friend's place (where the tractor lives at the moment). I still need to make the hoses a bit longer as I miscalculated and they can be damaged if someone pushes the plow to full dump, so I will extend those another 2' and add a decal that is on order just for giggles. Other than that, it is ready for snow!

Plow complete (1) (Large).JPG
Plow complete (2) (Large).JPG
Plow complete (3) (Large).JPG
Plow complete (4) (Large).JPG
Plow complete (5) (Large).JPG
Plow complete (6) (Large).JPG

I'll add final pics once I get the decal in place, but that may be a couple weeks or more.
 
/ SSQA FEL snowplow build #8  
Nice thread. The plow looks good on the tractor. What kind of decals are you going to get for it, kubota?
 
/ SSQA FEL snowplow build
  • Thread Starter
#9  
Thanks! Yeah. Getting a kubota sticker off ebay
 
/ SSQA FEL snowplow build #10  
Very nice job on the build. Personally I would have used a chain to keep any excess down pressure off the plow shoes/cutting edge, but your loader mounted shoes are a great alternative. I can't tell front the pics but makes sure your shoes are adjusted so the sector is level when everything is floating so you don't gouge with the corners of the plow when angled.
 
/ SSQA FEL snowplow build #11  
You should get a tag plate and die punch in your own name . date and serial no. 00001 to it and your in business. :drink:
 
/ SSQA FEL snowplow build
  • Thread Starter
#12  
JC Byrd - thanks for the tips. I've seem enough folks on here do the FEL mounted plow this way that I am not too concerned about the shoes. It isn't going to see tons of use either. We don't get a lot of snow, and I'm not plowing commercially or anything. Its just for my driveway and maybe helping a neighbor or two on occasions.

vtsnowedin - :laughing: You will note a lack of close-up photos of the welds. They will hold, for sure, but there is nothing professional looking about them... But thanks for the compliment!
 
/ SSQA FEL snowplow build #13  
vtsnowedin - :laughing: You will note a lack of close-up photos of the welds. They will hold, for sure, but there is nothing professional looking about them... But thanks for the compliment!
You certainly will get better with some more practice. By unit 00006 or 00007 you will be up to the standard of the aftermarket industry. Just look over a few of the discount makes in their showroom and you will see some that may not even hold very long much less look good.
Just thinking that it should have your tag on it not Kubota's or some other name brand that had nothing to due with it other then the paint color. And I imagine John Deere's first 0001 sod buster plow had a few imperfections and plenty of room for improvement. Looking forward to seeing your next project.
 
/ SSQA FEL snowplow build #14  
Just seen this:confused3:

VERY nice how it turned out.

It probabally cost you more than you though going into it, and you did a lot of things that you probabally wouldnt have had to, but it sould last for MANY MANY years now and you can be proud of the work. Worth every penny IMO.

Now you just need to make you own "pro-wings" knockoffs and you be all set:D
 
/ SSQA FEL snowplow build #15  
Nice job!
 
/ SSQA FEL snowplow build
  • Thread Starter
#16  
Thanks guys. Yes it did cost more than expected, but not too much more. I expected it to be in the $1000 or slightly under range. Still ended up cheaper than buying new and was a nice project. The biggest unexpected piece was the new moldboard. I ended up buying 2 new tools for this too - the small sandblaster and the cutting torch/oxygen bottle lease. If you roll those in, the expense was quite a bit higher, but that isn't really fair as I will keep them for years. I have been needing a torch for a long time, but putting it off for space reasons. It was a total necessity for this project, so that finally pushed me over the edge there. It is always funny how the nickles and dimes add up too. Things like small bits of steel, paint (oh yeah - and primer), sand blasting media... There is $100 in paint/primer alone, and that is not the good stuff either! I should have bought the full gallon up front, as I ended up getting 3 qts and that was at 2x the price of a gallon...

Yes I did several more things than were needed, but like you said, LD1, my plan is to keep it for life without having to do more work on it, so it will be worth it in the long run. I had thought about wings, but that is something I can deal with later if, I find it might help. I like the flip out wings on grsthegreat's plow that he bought from QuickAttach, so I may look at copying those down the road.
 
/ SSQA FEL snowplow build #17  
Yes I did several more things than were needed, but like you said, LD1, my plan is to keep it for life without having to do more work on it, so it will be worth it in the long run. I had thought about wings, but that is something I can deal with later if, I find it might help. I like the flip out wings on grsthegreat's plow that he bought from QuickAttach, so I may look at copying those down the road.

I made a set like the pro wings. I think they are called the pw-22. I made them and the mounts for my truck-mount plow. But you can buy them on sale ocasionally for $150 or so. (at least when I made mine 5 years ago.) And honestly, I wouldnt do it again. For what the Pw's cost, it isnt worth it IMO. I have turned down several offers to make them for some of the guys I plow with. I told them I couldnt make them as cheap as PW unless I pay myself like $5/hour
 
/ SSQA FEL snowplow build #18  
Looks great dstig1, I have contemplated this for a while as I can get a very good price on a used plow from a guy I know. I was a little undecided on if I wanted to make it loader mounted or rigid mount on the tractor as I have heard that it puts too much stress on the loader arms, especially when angled. Does anyone else here see that as a huge factor or am I just being paranoid?
 
/ SSQA FEL snowplow build
  • Thread Starter
#19  
Thanks.

Do some searching on your question - lots to read. Many have gone this route before me, so I am not doing anything really new here. The biggest issue people see with FEL snow plows is that they usually stick out so much that it creates a big lever and makes it hard to keep the tractor straight (so I have read...). That is why these custom builds work better, since you bring the plow as close to the tractor as you reasonably can. Less lever that way. I also think a crossover relief valve is a very good idea for protection, but some have gone without.
 
/ SSQA FEL snowplow build #20  
Great job, I am constantly amazed at what some people can build on here. How many hours did it take? The only thing you might want to think about is making some sort of guard for the cylinders because if you do any backblading or non paved surfaces, that could be a problem. I attached a photo from a Hound dog attachment plow to show what I mean.

For those of us who can only build bluebird houses and must purchase our attachments, getting a plow with a single top mounted hydraulic cylinder is a good idea. It keeps it out of the way and keeps the overall length of the plow as short as possible. Plus it has lateral float which I feel is important if you are plowing a crowned road/uneven surface. (I haven't seen that feature designed into any homebuilt plow yet, but I'm sure it will happen!) Again, very nice build.
 

Attachments

  • plow shield.jpg
    plow shield.jpg
    453.2 KB · Views: 573
  • HLA blade.jpg
    HLA blade.jpg
    7.2 KB · Views: 592
Last edited:
 
Top