Nice setup! I like the legs on your carryall; makes it functional on or off the tractor. I just finished reading about your tree scoop in that thread. That might be my next project. I've been thinking about trying to make a scoop that would slide onto the slider rails on my pallet fork carrier but haven't' come up with a solution yet. Probably just have to build the scoop and frame together. I don't foresee needing to transplant a lot of trees but the scoop can also be used as a "poor man's backhoe" for trenching and such.
You are using an out of date browser. It may not display this or other websites correctly.
You should upgrade or use an alternative browser.
You should upgrade or use an alternative browser.
What can $320 and about 10 hours of time get you?
- Thread starter bikerdib
- Start date
- Views: 9035
/ What can $320 and about 10 hours of time get you?
#11
tratliff
Member
Yes the legs are very functional but I am concerned with how far they hang down. I tried my best to make them as short as possible but still be able to connect with my iMatch. Next weekend I'll paint it JD green and post some new pictures. After the build I have determined that this carry all fits in my garage and I can leave my tools loaded for the next time I need to use them. Almost like a tool box for my landscaping tools. No more loading and unloading. It also is about the height of a workbench. I may try to design a top that I can use as a workbench while in the field or in the garage.
Leejohn
Elite Member
crash325 sure like the picture in your profile!!!!
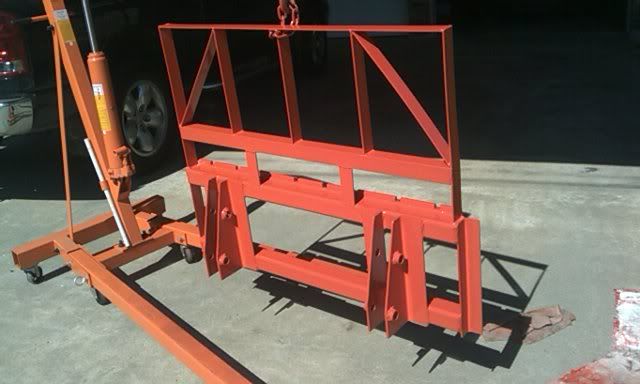
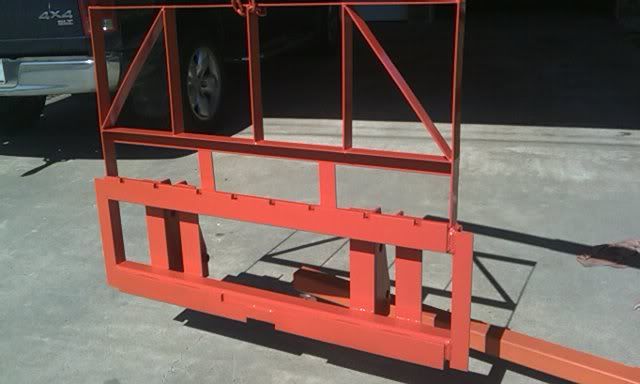
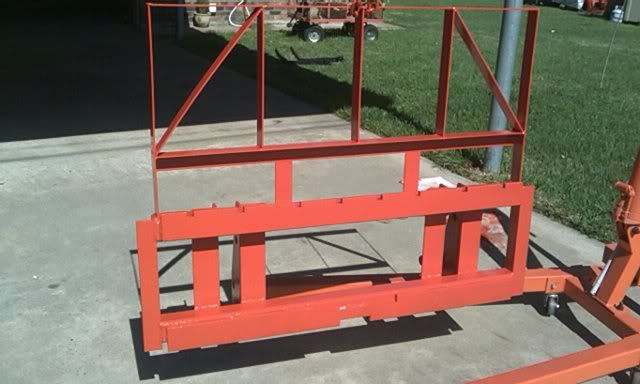
The wind finally calmed down (well sort of) so I put some topcoat on. Sorry about the phone camera quality but I don't even have a good quality camera. Gave my SLR and about $2000 worth of lenses to my buddy to use. You'll notice the bottom slider rail had a wide notch for removing the forks. You could put both of them on or off at the same time. The disadvantage was you couldn't slide them all the way together and lock them in that position. Instead, I cut two extra lock notches in the top rail and a narrow notch in the bottom rail then welded the bottom rail on upside down to the way it was originally intended. Now I can slide the forks together until they almost touch and use them in that position. I also ordered an extra fork so I can have 3 on for brush hauling so I needed to be able to put one close to the middle. I also plan on making some fork extensions out of channel for hauling light brush and such, maybe 6 feet long.
TDVT
Silver Member
Looks very nice!
The multi-fork set-up works great for brush & the high back works well to keep things from spilling over the top. I built a similar set-up with bale spears.
Did you fabricate the pin brackets on the frame? I need to make some for my frame as I'd like to use the frame without the bucket.
My L3400 does not have a QA & I saw the ATI pin-on adapter in another thread but have yet to hear back from ATI, so I may build some myself.
Looks very nice!
The multi-fork set-up works great for brush & the high back works well to keep things from spilling over the top. I built a similar set-up with bale spears.
Did you fabricate the pin brackets on the frame? I need to make some for my frame as I'd like to use the frame without the bucket.
My L3400 does not have a QA & I saw the ATI pin-on adapter in another thread but have yet to hear back from ATI, so I may build some myself.
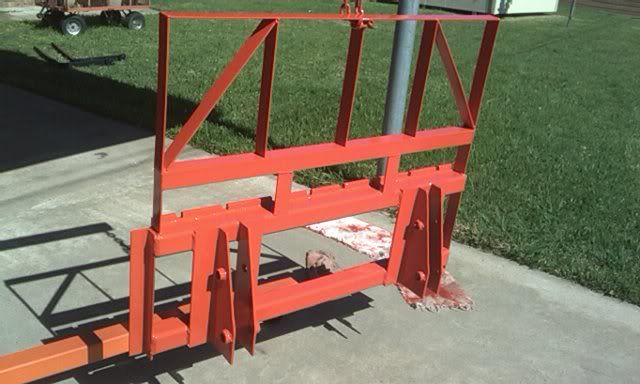
Yep, I used 3 X 5 X 1/4 inch angle. Did lots of measuring and laying out to make sure the holes lined up as close as possible. Center punched the marks, then used a small drill bit in my drill press for a pilot hole to make sure everything stayed lined up. I drilled the holes to 1" then used a die grinder and a 3/4" drum sanding attachment to get the holes to 1 & 1/32" because that's what I measured the pin holes to be on the Kubota bucket. I then cut 8 pieces of 1 inch schedule 80 pipe to 3/4" long. I had to drill the pieces with the 1" drill bit and again use the 3/4" drum sanding attachment in the die grinder. Since I have the Kubota Quick Coupler, I removed it from the FEL and put the pins in place through the 4 pieces of angle before tacking them to the rest of the frame. Then I removed the pins, placed the short pieces of tubing in place and once again pined everything in place before tacking the pieces of tubing to the angle.
I think if I had to do it over again I'd buy a 1 & 1/8" bit to avoid having to enlarge the holes and tubes. I really don't think that extra slack would hurt anything. Then again, it wasn't really that big a deal to enlarge them with the die grinder. I kinda like my fabrications to fit very tightly.
BTW, I'm not sure if you know this or not but the Kubota proprietary Quick Coupler uses the same pins as the pin on mounting. That kept me from having to cut off the ears on the bucket to weld on a Skid Steer type attachment. I assume the ATI adapter does also?
TDVT
Silver Member
Thanks for the info. They really look nicely fabricated. I'm not familiar with the Kubota QA but from what you say, I'm thinking it's very much like the ATI one I saw pics of.
The adapter I'm thinking of making is not a full-on skid-steer, universal style but, like yours, also uses regular the pin brackets on the bucket. Removing those brackets sounds like a nightmare.
It attaches to the loader arms & cylinders on one side, then the outer side hooks the top pin of the bucket & pins in on the bottom. Is yours something similar?
Seems like a good compromise between weight, cost & still being able to drop the bucket for more fork capacity since I don't have the current QA set-up.
I'm not sure about the ATI type you are talking about, the only one I've seen is the Skid Steer type.
Here are some pics I found when I did a search for the Kubota Quick Coupler (not my pics but it will give you an idea of how it works).
The top of the coupler has a saddle that cradles the top pin that stays in the attachment and you put the two bottom pins in to lock it in place.
http://www.tractorbynet.com/forums/kubota-owning-operating/150891-pics-my-la504-loader-quick.html
LostInTheWoods
Platinum Member
Depends on what country you're in.

