Redz
Member
- Joined
- Feb 19, 2019
- Messages
- 39
- Tractor
- Ford 1920
Re-sealing your leaking in-line Zexel / Bosch PFR diesel injection pump
Is your diesel engine leaking fuel from the block mounted æ’¤FR style Bosch/Zexel injection pump ? The problem is that the rubber o-rings have gotten old and brittle and no longer provide a seal. Fuel leaks around the O-rings and gets everywhere and makes a mess. Now that my formerly leaking pump is back in the tractor and has many hours of leak free operation, I feel pretty confident that repair is solid. The procedure below takes about 2-5 hours depending on your experience.
Useful tools:
- dremmel with cutting disc
- punch & hammer
- Metric sockets and open end wrenches
- Needle nose pliers
Parts
From dealer or other reliable source, you will need the following parts
- 2 O-rings for each pump bushing (total 8 for a 4 cylinder engine)
- 1 O-ring for each pump bushing cap (total 4 for a 4 cylinder engine)
- 1 copper washer under spring in the cap (total 4 for a 4 cylinder engine)
- 2 copper washers for Banjo fitting (total 2)
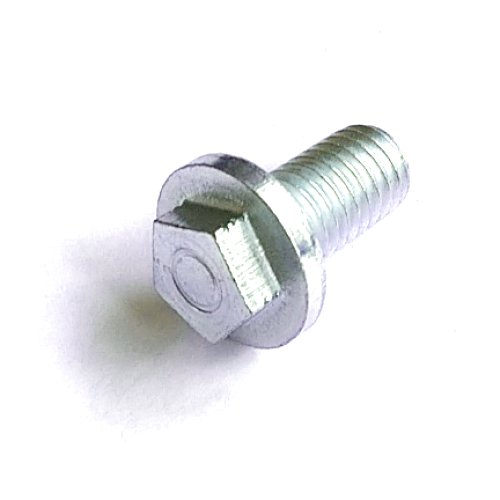
- 2 new, hex head, metric cap screws and washers for each pump bushing , or hex-metric-flanged-cap-screw. (total 8 for a 4 cylinder engine)
Instead of getting parts from the dealer try a diesel shop, these parts can be much less expensive via the non-tractor-dealer supplier: All Zexel/Bosch inline æ’¤FR pumps have part numbers starting with 10413 + the number stamped on the pump. Example: 10413+54020 or 104135-4020 there is a cross reference to a Bosch number that is 10 digits and begins with 9 . Use these Zexel or Bosch numbers to order your OEM o-rings and washers (footnote 1).
Procedure
1. Shut off the fuel supply & remove fuel line from injection pump.
2. Remove hard steel lines between injection pump and fuel injectors (use two wrenches where possible to avoid twisting injectors or injection pump fittings).
3. Remove solenoid on side of the injection pump.
4. Remove nuts and bolts holding down injection pump.
5. Lift the injection pump out from engine block 1/2 way, use needle nose pliers to remove the clip holding the bracket on the pump control rack, then lift and remove the injection pump from engine block. Leave in place or securely store the shims (gasket looking things) that were between the engine block and the pump body. These are used to set the pump timing and are not just gaskets.

6. IMPORTANT: using a dremmel tool or equivalent , permanently mark with a cut or scratch the position of each pump flange relative to the pump body.

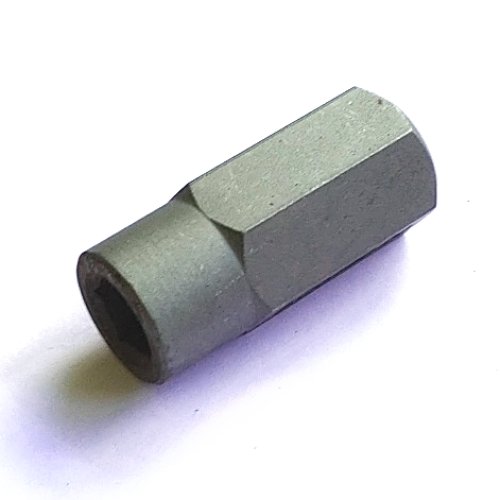
7. Starting at one end of the pump . Use the dremmel tool with cutting disc to cut a notch in the outside edge of the 5-sided, flanged, cap screws holding down each flange. Fit your chisel in the notch and hit in counter-clockwise direction, then remove the cap screw, repeat for the second cap screw and remove the pump flange-bushing (this is the entire assembly with 2 o-rings on the outside that holds small plunger parts inside which pump the fuel ) .
8. With pump flange-bushings out of pump body, be sure not to turn the pump body upside down otherwise the gear or control sleeve will fall out and will need to be lined up again*(footnote 2). One by one remove the cap or top hex fitting of each pump flange-bushing and a) replace the O-ring on cap, above threads b) change out the copper washer inside cap , under the spring, C) replace the hex cap on the pump bushing and finger tighten.

9. On each pump flange-bushing , remove the two, old O-rings, then lightly lube up the new O-rings and slide into the groove on the bushing body. Insert the pump flange-bushing back into its hole in the pump body and GENTLY but firmly push and turn the flange-bushing until it is fully seated, a light coat of lube on o-rings helps. Check that your alignment marks (step 6.) are matched. Insert new hex head metric cap screws into pump body and torque down locking the flange-bushing in the proper position.

10. Tighten hex cap on flange-bushing to proper torque setting. Check that the alignment marks (step 6) match perfectly .
11. Repeat steps 8-10 for each flange-bushing .
12. Test the pump by removing the banjo fitting and filling the pump with mineral oil (aka baby oil) which doesn稚 smell so bad if it squirts on your face or clothing . Holding the filled pump in both hands gently but firmly push the pump base roller against a small block of wood with enough force until the nozzle squirts a drop of oil out the top. You may have to press down multiple times to prime each nozzle. A good strong squirt proves that the pump is probably working just fine. Repeat for each nozzle.


13. Replace banjo fitting with the two new copper washers.

14. Install injection pump body halfway into engine block. Fit the hole in the bracket arm over the control rack stub and carefully replace the retaining clip (don稚 drop it ) . Push the pump all the way into the engine block Torque down bolts.
15. Reattach the fuel line to the banjo fitting on the rear side of the injection pump, leave the air bleeding screw (on top of banjo) open a few turns.
16. Replace the hard, steel fuel lines between injection pump and injectors , use two wrenches where possible to avoid twisting injectors or pump fittings . Leave one steel injector line connection loose at a fuel injector so that the air will bleed out.
17. Turn on the fuel valve , when fuel runs out of banjo close the screw , crank the engine until fuel comes out at open fitting on the injector, close final hard line on fuel injector, start tractor.
18. Throw out those #$#% 5 sided cap screws !
footnote 1 - I first attempted this repair without the OEM o-rings, I used green AC o-rings that I had on hand, they were close in size but not exactly the right size. These o-ring dimensions are measured to the 0.01" hundredths of an inch so getting the right size is pretty important. Anyway , I just did one pump bushing but when I pressed the injector pump bushing into the hole , the lower o-ring moved out of its position and tore. I wasn't aware of this o-ring tear and put everything back together, the result was a) the tractor didn't start b) several gallons of diesel fuel seeped past the damaged o-ring and filled up the crankcase, black oil & fuel leaked out the dipstick tube, got into the injection pump , made a mess. I initially thought the worst had happened but no harm done and the correct size o-rings resolved the issue .

footnote 2 - Out of curiosity I did remove one of the geared control sleeves. It is very important that it be re-inserted in correct alignment with the others. There is a tiny mark on both the gear and the control rack and you could align those tiny marks but I found it easier to visually line up the plunger tops with the other three plungers .

This shows a mark on the control rack, hardly visible, so I lined up the tops of the plunger to be the same as the others. All the plungers rotate in exact unison as the control rack moves


Is your diesel engine leaking fuel from the block mounted æ’¤FR style Bosch/Zexel injection pump ? The problem is that the rubber o-rings have gotten old and brittle and no longer provide a seal. Fuel leaks around the O-rings and gets everywhere and makes a mess. Now that my formerly leaking pump is back in the tractor and has many hours of leak free operation, I feel pretty confident that repair is solid. The procedure below takes about 2-5 hours depending on your experience.
Useful tools:
- dremmel with cutting disc
- punch & hammer
- Metric sockets and open end wrenches
- Needle nose pliers
Parts
From dealer or other reliable source, you will need the following parts
- 2 O-rings for each pump bushing (total 8 for a 4 cylinder engine)
- 1 O-ring for each pump bushing cap (total 4 for a 4 cylinder engine)
- 1 copper washer under spring in the cap (total 4 for a 4 cylinder engine)
- 2 copper washers for Banjo fitting (total 2)
- 2 new, hex head, metric cap screws and washers for each pump bushing , or hex-metric-flanged-cap-screw. (total 8 for a 4 cylinder engine)
Instead of getting parts from the dealer try a diesel shop, these parts can be much less expensive via the non-tractor-dealer supplier: All Zexel/Bosch inline æ’¤FR pumps have part numbers starting with 10413 + the number stamped on the pump. Example: 10413+54020 or 104135-4020 there is a cross reference to a Bosch number that is 10 digits and begins with 9 . Use these Zexel or Bosch numbers to order your OEM o-rings and washers (footnote 1).
Procedure
1. Shut off the fuel supply & remove fuel line from injection pump.
2. Remove hard steel lines between injection pump and fuel injectors (use two wrenches where possible to avoid twisting injectors or injection pump fittings).
3. Remove solenoid on side of the injection pump.
4. Remove nuts and bolts holding down injection pump.
5. Lift the injection pump out from engine block 1/2 way, use needle nose pliers to remove the clip holding the bracket on the pump control rack, then lift and remove the injection pump from engine block. Leave in place or securely store the shims (gasket looking things) that were between the engine block and the pump body. These are used to set the pump timing and are not just gaskets.
6. IMPORTANT: using a dremmel tool or equivalent , permanently mark with a cut or scratch the position of each pump flange relative to the pump body.
7. Starting at one end of the pump . Use the dremmel tool with cutting disc to cut a notch in the outside edge of the 5-sided, flanged, cap screws holding down each flange. Fit your chisel in the notch and hit in counter-clockwise direction, then remove the cap screw, repeat for the second cap screw and remove the pump flange-bushing (this is the entire assembly with 2 o-rings on the outside that holds small plunger parts inside which pump the fuel ) .
8. With pump flange-bushings out of pump body, be sure not to turn the pump body upside down otherwise the gear or control sleeve will fall out and will need to be lined up again*(footnote 2). One by one remove the cap or top hex fitting of each pump flange-bushing and a) replace the O-ring on cap, above threads b) change out the copper washer inside cap , under the spring, C) replace the hex cap on the pump bushing and finger tighten.
9. On each pump flange-bushing , remove the two, old O-rings, then lightly lube up the new O-rings and slide into the groove on the bushing body. Insert the pump flange-bushing back into its hole in the pump body and GENTLY but firmly push and turn the flange-bushing until it is fully seated, a light coat of lube on o-rings helps. Check that your alignment marks (step 6.) are matched. Insert new hex head metric cap screws into pump body and torque down locking the flange-bushing in the proper position.
10. Tighten hex cap on flange-bushing to proper torque setting. Check that the alignment marks (step 6) match perfectly .
11. Repeat steps 8-10 for each flange-bushing .
12. Test the pump by removing the banjo fitting and filling the pump with mineral oil (aka baby oil) which doesn稚 smell so bad if it squirts on your face or clothing . Holding the filled pump in both hands gently but firmly push the pump base roller against a small block of wood with enough force until the nozzle squirts a drop of oil out the top. You may have to press down multiple times to prime each nozzle. A good strong squirt proves that the pump is probably working just fine. Repeat for each nozzle.
13. Replace banjo fitting with the two new copper washers.
14. Install injection pump body halfway into engine block. Fit the hole in the bracket arm over the control rack stub and carefully replace the retaining clip (don稚 drop it ) . Push the pump all the way into the engine block Torque down bolts.
15. Reattach the fuel line to the banjo fitting on the rear side of the injection pump, leave the air bleeding screw (on top of banjo) open a few turns.
16. Replace the hard, steel fuel lines between injection pump and injectors , use two wrenches where possible to avoid twisting injectors or pump fittings . Leave one steel injector line connection loose at a fuel injector so that the air will bleed out.
17. Turn on the fuel valve , when fuel runs out of banjo close the screw , crank the engine until fuel comes out at open fitting on the injector, close final hard line on fuel injector, start tractor.
18. Throw out those #$#% 5 sided cap screws !
footnote 1 - I first attempted this repair without the OEM o-rings, I used green AC o-rings that I had on hand, they were close in size but not exactly the right size. These o-ring dimensions are measured to the 0.01" hundredths of an inch so getting the right size is pretty important. Anyway , I just did one pump bushing but when I pressed the injector pump bushing into the hole , the lower o-ring moved out of its position and tore. I wasn't aware of this o-ring tear and put everything back together, the result was a) the tractor didn't start b) several gallons of diesel fuel seeped past the damaged o-ring and filled up the crankcase, black oil & fuel leaked out the dipstick tube, got into the injection pump , made a mess. I initially thought the worst had happened but no harm done and the correct size o-rings resolved the issue .
footnote 2 - Out of curiosity I did remove one of the geared control sleeves. It is very important that it be re-inserted in correct alignment with the others. There is a tiny mark on both the gear and the control rack and you could align those tiny marks but I found it easier to visually line up the plunger tops with the other three plungers .

This shows a mark on the control rack, hardly visible, so I lined up the tops of the plunger to be the same as the others. All the plungers rotate in exact unison as the control rack moves

Attachments

Last edited: