My Little Green Goblin Garage

   / My Little Green Goblin Garage #1  

hunt4570

Elite Member
Joined
Feb 10, 2015
Messages
4,057
Location
South Carolina
Tractor
Grand L3540 ,724 loader, bucket, grapple and now forks also! And just for OP.. a pool!
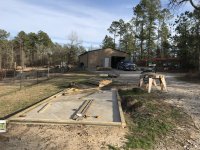
I've posted parts of this over in Tractors and wood but thought I'd try to just post my little project. I've a 34x40 barn that is so full I can hardly do anything out there without moving something or tripping over something and something needed to be done! I have a little concrete pad out here (10x20) that used to be a dog run before I got here, its in a good central location so I thought I'd use that.

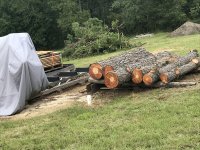
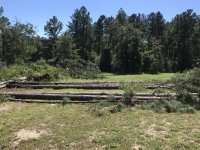
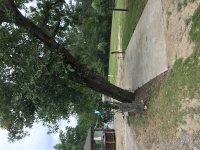
I removed the fence and stuff on the pad and had a couple oddball trees to deal with..
IMG_0965.JPG

IMG_0964.JPG

I had originally thought about building around those trees, doing something funky, but was going to lose to much space in the process.. so, down they came.

Oh, I guess I should explain the Green Goblin Garage name.. I call this my green goblin...
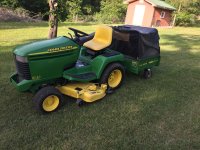
IMG_2239.JPG
 
   / My Little Green Goblin Garage
  • Thread Starter
#2  
So now I need materials to build this little project....

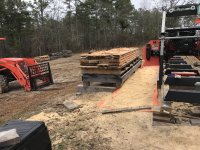
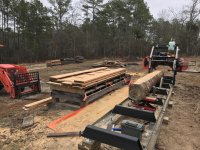
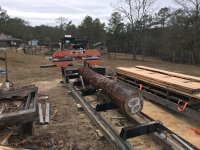
Oh, here we go.. Did I mention I had a little sawmill and a bunch of trees?

IMG_1243.JPG

IMG_1360.JPG

Its just a little manual mill so it'll take a while..

IMG_2041.JPG
IMG_2040.JPG
IMG_2039.JPG
 
   / My Little Green Goblin Garage
  • Thread Starter
#3  
So I have some materials stockpiled, ets get this party started!

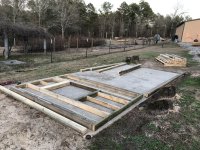
Getting things measured out and getting the plates set up.

IMG_2113.JPG

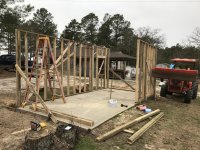
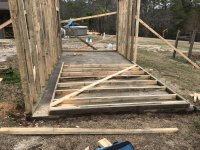
Putting the walls together
IMG_2115.JPG
IMG_2119.JPG

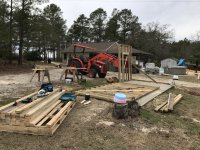
And standing them up. The tractor is not used to stand them up, just keeping them from going over to far. I'm a one man crew so I have to do what I have to do to make things work.

IMG_2122.JPG
 
Last edited:
   / My Little Green Goblin Garage
  • Thread Starter
#4  
Making some progress, things are going ok other than slowly ..

Standing thing up

IMG_2126.JPG

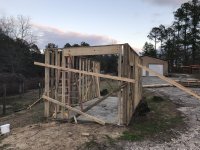
Wind bracing

IMG_2132.JPG

And a little detail

IMG_2133.JPG

And I'm getting there, I designed the building as a drive through.. that will change however.

IMG_2138.JPG
 
   / My Little Green Goblin Garage #5  
So I have some materials stockpiled, ets get this party started!

Getting things measured out and getting the bottom plates set up.

View attachment 656474

Putting the walls together
View attachment 656475
View attachment 656476

And standing them up. The tractor is not used to stand them up, just keeping them from going over to far. I'm a one man crew so I have to do what I have to do to make things work.

View attachment 656477

I see your rolls of Foam sill seal sitting there.....did you forget it under your first partition????;)
I’ll be your TBN code inspector. :D
 
   / My Little Green Goblin Garage
  • Thread Starter
#6  
I see your rolls of Foam sill seal sitting there.....did you forget it under your first partition????;)
I’ll be your TBN code inspector. :D

Good catch, I did stand that first section up without it... then I laid it back down to apply it! :mur:

I really wanted to make sure I put that on. That concrete pad isn't the smoothest thing around. It was poured in 1996 by the owner and his kid (kids name is in corner). its kind of rough but good enough for an equipment garage.
 
   / My Little Green Goblin Garage #7  
Good catch, I did stand that first section up without it... then I laid it back down to apply it! :mur:

I really wanted to make sure I put that on. That concrete pad isn't the smoothest thing around. It was poured in 1996 by the owner and his kid (kids name is in corner). its kind of rough but good enough for an equipment garage.

Just trying to help where I can. :thumbsup:
I’ll lay it under my treated plates, then stand a wall partition on top of the plate and then a washer & bolt.
You can double it up if it’s real rough....,
 
   / My Little Green Goblin Garage
  • Thread Starter
#8  
Just trying to help where I can. :thumbsup:
I’ll lay it under my treated plates, then stand a wall partition on top of the plate and then a washer & bolt.
You can double it up if it’s real rough....,

So then you run a double bottom plate on the whole thing?

And I did double the foam due to the unevenness of the concrete.

And with the existing concrete I pinned the bottom plate, then went back and drilled through the bottom plate into the concrete , then installed concrete expansion wedge anchors and then washers and nuts.
 
   / My Little Green Goblin Garage #9  
So then you run a double bottom plate on the whole thing?

And I did double the foam due to the unevenness of the concrete.

And with the existing concrete I pinned the bottom plate, then went back and drilled through the bottom plate into the concrete , then installed concrete expansion wedge anchors and then washers and nuts.
Yes, I install treated plates over sill sealer first. I take my bottom plate and sit it on top of the bolts. I tap my hammer on top of the plates allowing the bolts to create marks in the wood, then drill a hole where the dents are with a slightly oversized bit so I can fine tune the bottom plate front to back with my laser or string line. Snap chalk lines on the concrete floor can speed up the process and keep the wall plates straight. Im also starting with foundation J bolts dried-into the concrete. It looks like you are installing them after the fact. I cant use expansion bolts because they dont impregnate the concrete deep enough, so we just put them in the wet concrete or while laying the block.
Theres several ways to do it. That one works best for MY needs.
The way you did it works, too! :thumbsup:
 
   / My Little Green Goblin Garage
  • Thread Starter
#10  
Yes, I install treated plates over sill sealer first. I take my bottom plate and sit it on top of the bolts. I tap my hammer on top of the plates allowing the bolts to create marks in the wood, then drill a hole where the dents are with a slightly oversized bit so I can fine tune the bottom plate front to back with my laser or string line. Snap chalk lines on the concrete floor can speed up the process and keep the wall plates straight. Im also starting with foundation J bolts dried-into the concrete. It looks like you are installing them after the fact. I cant use expansion bolts because they dont impregnate the concrete deep enough, so we just put them in the wet concrete or while laying the block.
Theres several ways to do it. That one works best for MY needs.
The way you did it works, too! :thumbsup:

Like I said, I'm working with existing concrete here so no J-bolt option.

If you look at the top picture in the 4th post you can see in the corners and center of the long edges of the concrete , 2 inch pipe that I cut off flush.. left over from the dog run that was there.

I had some messing around to do with that pad to make everything work.
 

Tractor & Equipment Auctions

2017 FREIGHTLINER M2 BOX TRUCK (A51222)
2017 FREIGHTLINER...
2016 Ford F450 (A49461)
2016 Ford F450...
2019 Bobcat T770 Two Speed Compact Track Loader Skid Steer (A50322)
2019 Bobcat T770...
Komatsu PC490LC-11 Hydraulic Excavator (A49346)
Komatsu PC490LC-11...
2014 Audi Q5 AWD SUV (A48082)
2014 Audi Q5 AWD...
2006 GENIE GTH6622 TELESCOPIC FORKLIFT (A51242)
2006 GENIE GTH6622...
 
Top