MatHaas
Silver Member
Mahindra 75B / Bradco 509 Backhoe Spool Valve Seal Leaking & Replacement (how to)
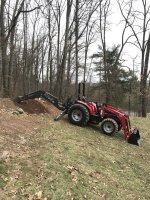
So I picked up a left over 2016 Mahindra 3550 PST a few weeks back.
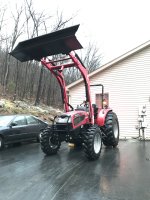
And in the process, I managed to find a used Bradco 509 backhoe (aka a Mahindra 75B) locally for only $3000.
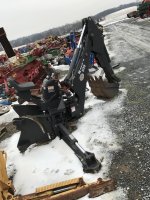
The seller mentioned the backhoe leaked some fluid but I wasn't too concerned about the repair. So once I fabricated the subframe mounting system to fit my 3550, I hooked up the 509 and found the leaks. The spool valves were leaking and possibly one of the upper check plugs or port reliefs.
Here's you can see the spool positioner assemblies (bottom plastic covers) leaking:
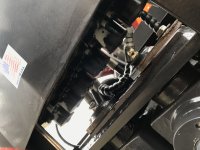
Here's a stock photo of the spool valve assembly:
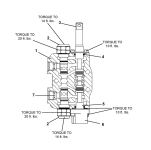
and here is the entire hydraulic valve assembly on the hoe with the cover removed:
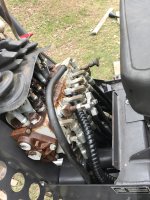
So i started by labeling all of the ports and associated hoses. I labeled 1-7 across the top from left to right. And 8-14 across the bottom.
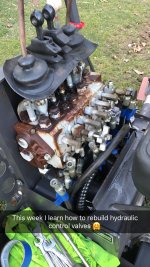
With that done, 3 bolts held the assembly to the frame, which you can see where I put them back in. This thing is HEAVY
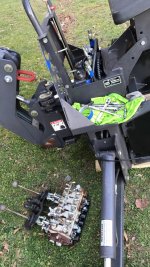
I got it inside on the work bench, removed the first control handle and brackets, removed the four 3/16" allen bolts holding the spool positioner assembly (bottom plastic cover) on and pulled the valves out.
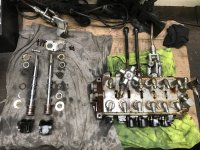
From the bottom - up, You have the spring assembly which is bolted to the spool valve, then a gold cover washer, a silver washer, & then the sealing o'ring. The valve then slides up inside from the bottom. (I put the bottom plastic cover back on then; 10ft lbs) and then you work from the top, with a sealing o'ring, a silver washer, and a gold cover washer. Then the top bracket would be put back on (3/16" allen bolts at 10 ft lbs)
Those brown o'rings are the ones that tear and leak; spool valve seals. 4 out of the 6 lower ones were tore on mine. You can buy the spool seal kit from bradco/paladin PN 45652 for the cheapest online at Ford distributing for $30 plus shipping. It comes with a top and bottom o'ring, silver washer and gold washer. One kit for each spool valve so you're looking at 6 kits total. I wasn't about to pay that.
I used the dial caliper, and measured them at 1" OD, 0.75" ID, 0.125" thick. I also pulled the entire check plugs and/or port reliefs (the large 1.125" socket nut, not the smaller inner one) for each valve assembly (since the one of the top ones was leaking) and measured up the larger outer o'ring also; i forget off hand but pretty sure they were 1" OD, 0.8125" (13/16) ID, 0.9375" (3/32) thick.
I ran to a local hydraulic shop (a common place that has a bunch of assorted o'rings in stock), bought the o'rings (2 o'rings per spool valve and 2 o'rings for top/bottom check plugs/relief ports; for each of the 6 valves). So 24 o'rings total. Costing me $31 out the door. Couldn't beat that.
here you can see a check plug and relief port pulled, noting the spring, ball and other little pin in there.
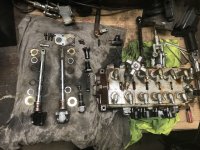
best way to pull these is with the entire assembly vertical and you're pulling the plug/relief up, so everything stays inside and you can see it. And this is the easiest method when reassembling (i used a small slightly magnetic screwdriver to set them back down in and hold it in place with my finger).
Up close pic of the plugs (going back in, they get torqued at 20 ft lbs; they're 1.125" socket)
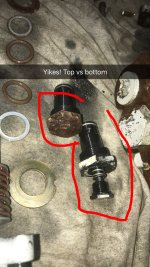
I spent a lot of time with a wire brush and wire wheel on a drill to get all of the rust cleared up, without getting it inside of anything. some scraping with a screwdriver too.
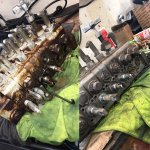
Anyway, i did each valve set one a time. pull out the valve, greased up the new oring, cleaned the old washers (wire wheel), and put it back together. I will note 3-4 of the bottom washers were deformed a bit from the spring action on them. I massaged them back to shape with a hammer and swapped them out with the top washers.
A few hours of cleaning. A few hours of assembly. Lots of hydraulic fluid and grease all over. 24 o'rings. And I had it back together
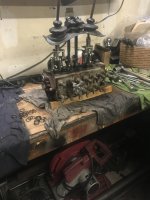
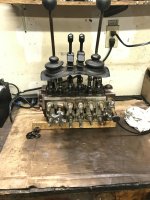
Putting it back in hopefully this weekend and see how it all goes.
There is an inline filter that can be pulled and flushed clean on the hoe too that I plan to do.
All in all, this was a fairly straightforward project. Way cheaper alternative to having someone else do it for you, or buying the seal kits.
Hope it helps someone.
And check out my post in the Build It Yourself forum on how i built my backhoe subframe mount too if you're interested.
http://www.tractorbynet.com/forums/...bradco-509-tractor-sub-frame.html#post5050502
Thanks,
-Haas
So I picked up a left over 2016 Mahindra 3550 PST a few weeks back.

And in the process, I managed to find a used Bradco 509 backhoe (aka a Mahindra 75B) locally for only $3000.

The seller mentioned the backhoe leaked some fluid but I wasn't too concerned about the repair. So once I fabricated the subframe mounting system to fit my 3550, I hooked up the 509 and found the leaks. The spool valves were leaking and possibly one of the upper check plugs or port reliefs.
Here's you can see the spool positioner assemblies (bottom plastic covers) leaking:

Here's a stock photo of the spool valve assembly:

and here is the entire hydraulic valve assembly on the hoe with the cover removed:

So i started by labeling all of the ports and associated hoses. I labeled 1-7 across the top from left to right. And 8-14 across the bottom.

With that done, 3 bolts held the assembly to the frame, which you can see where I put them back in. This thing is HEAVY

I got it inside on the work bench, removed the first control handle and brackets, removed the four 3/16" allen bolts holding the spool positioner assembly (bottom plastic cover) on and pulled the valves out.

From the bottom - up, You have the spring assembly which is bolted to the spool valve, then a gold cover washer, a silver washer, & then the sealing o'ring. The valve then slides up inside from the bottom. (I put the bottom plastic cover back on then; 10ft lbs) and then you work from the top, with a sealing o'ring, a silver washer, and a gold cover washer. Then the top bracket would be put back on (3/16" allen bolts at 10 ft lbs)
Those brown o'rings are the ones that tear and leak; spool valve seals. 4 out of the 6 lower ones were tore on mine. You can buy the spool seal kit from bradco/paladin PN 45652 for the cheapest online at Ford distributing for $30 plus shipping. It comes with a top and bottom o'ring, silver washer and gold washer. One kit for each spool valve so you're looking at 6 kits total. I wasn't about to pay that.
I used the dial caliper, and measured them at 1" OD, 0.75" ID, 0.125" thick. I also pulled the entire check plugs and/or port reliefs (the large 1.125" socket nut, not the smaller inner one) for each valve assembly (since the one of the top ones was leaking) and measured up the larger outer o'ring also; i forget off hand but pretty sure they were 1" OD, 0.8125" (13/16) ID, 0.9375" (3/32) thick.
I ran to a local hydraulic shop (a common place that has a bunch of assorted o'rings in stock), bought the o'rings (2 o'rings per spool valve and 2 o'rings for top/bottom check plugs/relief ports; for each of the 6 valves). So 24 o'rings total. Costing me $31 out the door. Couldn't beat that.
here you can see a check plug and relief port pulled, noting the spring, ball and other little pin in there.

best way to pull these is with the entire assembly vertical and you're pulling the plug/relief up, so everything stays inside and you can see it. And this is the easiest method when reassembling (i used a small slightly magnetic screwdriver to set them back down in and hold it in place with my finger).
Up close pic of the plugs (going back in, they get torqued at 20 ft lbs; they're 1.125" socket)

I spent a lot of time with a wire brush and wire wheel on a drill to get all of the rust cleared up, without getting it inside of anything. some scraping with a screwdriver too.

Anyway, i did each valve set one a time. pull out the valve, greased up the new oring, cleaned the old washers (wire wheel), and put it back together. I will note 3-4 of the bottom washers were deformed a bit from the spring action on them. I massaged them back to shape with a hammer and swapped them out with the top washers.
A few hours of cleaning. A few hours of assembly. Lots of hydraulic fluid and grease all over. 24 o'rings. And I had it back together


Putting it back in hopefully this weekend and see how it all goes.
There is an inline filter that can be pulled and flushed clean on the hoe too that I plan to do.
All in all, this was a fairly straightforward project. Way cheaper alternative to having someone else do it for you, or buying the seal kits.
Hope it helps someone.
And check out my post in the Build It Yourself forum on how i built my backhoe subframe mount too if you're interested.
http://www.tractorbynet.com/forums/...bradco-509-tractor-sub-frame.html#post5050502
Thanks,
-Haas

Last edited:
