MatHaas
Silver Member
Well I wanted to find my ECU just in case I ever needed to trouble shoot wiring. My best guess was that it was somewhere near the steering column since the OBD2 reader was at the bottom left of the column next to the fuse box.
After following the harness and doing some disassembly, I was still unable to find the ECU. So I browsed the parts diagrams on Mahindras site but still couldn't find it.
I again resumed searching and followed the harness under the cockpit floor. Well that's where it needed up being. Never did I think my ECU would be mounted under the floor of my cab/cockpit and on top of the drivetrain.
So I figured I'd share the info just in case anyone ever had sensor or MIL issues and wanted to test the harness.
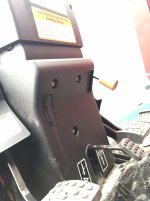
I removed the lower column plastic cover by unscrewing the parking brake knob, and removing the three 10mm bolts. (I'd recommend pulling the upper column cover off too which are Phillips screws but mine were too rusted on one side to successfully get out. I had the forcefully manipulated the plastic trim to get the lower section out with the upper still attached)
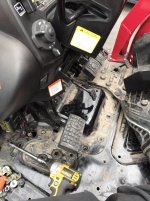
Then I lifted up the rubber floor mat and the small rubber mat under the column. That cover plate is to the ECU.
A slew of 12mm bolts line the perimeter. And an additional bracket/brace is on the front side tying into the vertical part of the fire wall which has studs and two 12mm nuts on that end. Which is a slight pain to access with the hydraulic steering lines and other cables running through the column. Have a magnetic extension tool handy if you drop the nuts.
Then I removed the plate and bingo, there's the ECU. Held down with brackets via two 12mm bolts.
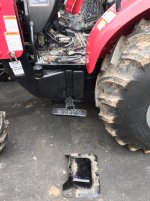
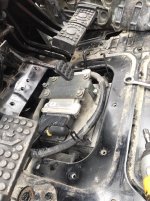
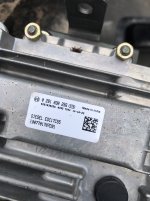
Here's the 3550 ECU and P/N
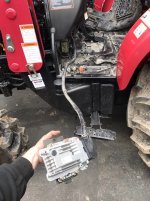
The harness is nice and long if you want to unplug the ECU and bring the harness close to the engine bay or wherever you're trouble shooting.
The Bosch setup is pretty nice. To remove the ECU, pull back the little yellow locking safety tab. Then lift up on the handle to unlatch. Great seals on it, I was impressed.
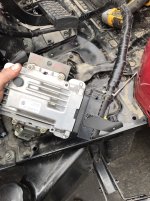
And from there, I tested the continuity to my Camshaft phase sensor harness plug from the ECU plug pins 45-46-47 with a multimeter via resistance test
1 ohm open circuit
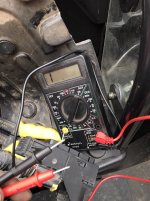
0.0 ohms complete circuit
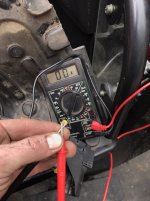
The ECU plug side has very small pin inserts, so I used a small gauge braided wire to plug down in to it and held the multimeter to that.
Hold one probe on the ECU pin side and the other probe on the correct sensor pin side. Should get 0 ohms for a continuous circuit. If it shows 1, then there's a break in the harness somewhere. Just make sure you're doing the correct pins and move between the others if you're getting 1 for everything just to confirm.
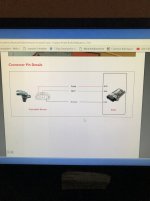
Find the proper codes and pin out and trouble shooting guide reference here
http://kisandost.com/KisanMitraWeb/MarketBulletinView?moduleType=SubjectPartFile&FileName=203
And also in the large diagram in the back of your owners manual, thought font size is near impossible to read accurately haha
Here's the pics I pulled from that manual for this testing

A bit sloppy of a write up and I wasn't great about pics but it's a resource.
-Haas
After following the harness and doing some disassembly, I was still unable to find the ECU. So I browsed the parts diagrams on Mahindras site but still couldn't find it.
I again resumed searching and followed the harness under the cockpit floor. Well that's where it needed up being. Never did I think my ECU would be mounted under the floor of my cab/cockpit and on top of the drivetrain.
So I figured I'd share the info just in case anyone ever had sensor or MIL issues and wanted to test the harness.

I removed the lower column plastic cover by unscrewing the parking brake knob, and removing the three 10mm bolts. (I'd recommend pulling the upper column cover off too which are Phillips screws but mine were too rusted on one side to successfully get out. I had the forcefully manipulated the plastic trim to get the lower section out with the upper still attached)

Then I lifted up the rubber floor mat and the small rubber mat under the column. That cover plate is to the ECU.
A slew of 12mm bolts line the perimeter. And an additional bracket/brace is on the front side tying into the vertical part of the fire wall which has studs and two 12mm nuts on that end. Which is a slight pain to access with the hydraulic steering lines and other cables running through the column. Have a magnetic extension tool handy if you drop the nuts.
Then I removed the plate and bingo, there's the ECU. Held down with brackets via two 12mm bolts.


Here's the 3550 ECU and P/N


The harness is nice and long if you want to unplug the ECU and bring the harness close to the engine bay or wherever you're trouble shooting.
The Bosch setup is pretty nice. To remove the ECU, pull back the little yellow locking safety tab. Then lift up on the handle to unlatch. Great seals on it, I was impressed.

And from there, I tested the continuity to my Camshaft phase sensor harness plug from the ECU plug pins 45-46-47 with a multimeter via resistance test
1 ohm open circuit

0.0 ohms complete circuit

The ECU plug side has very small pin inserts, so I used a small gauge braided wire to plug down in to it and held the multimeter to that.
Hold one probe on the ECU pin side and the other probe on the correct sensor pin side. Should get 0 ohms for a continuous circuit. If it shows 1, then there's a break in the harness somewhere. Just make sure you're doing the correct pins and move between the others if you're getting 1 for everything just to confirm.
Find the proper codes and pin out and trouble shooting guide reference here
http://kisandost.com/KisanMitraWeb/MarketBulletinView?moduleType=SubjectPartFile&FileName=203
And also in the large diagram in the back of your owners manual, thought font size is near impossible to read accurately haha
Here's the pics I pulled from that manual for this testing


A bit sloppy of a write up and I wasn't great about pics but it's a resource.
-Haas