Leveling land for ebb and flood irrigation

   / Leveling land for ebb and flood irrigation #1  

SGBotsford

Bronze Member
Joined
Jul 5, 2009
Messages
57
Location
Near Edmonton, Alberta
Tractor
Deuzt 6250 + Kubota 7100
I'm growing willows in containers for reclamation. At present the pots are on tarps (weed control) and are watered with overhead sprinklers. Water is my limiting factor.

Willows do well with flood irrigation. I'd like to set up a bunch of small ponds, each one about 30-40 feet by whatever width liner I get, support the sides with 2x4 or 2x6. Pond will be filled with a hose, let set for a couple hours, then the leftover water pumped to the next pond, and top up the that pond. This reduces water use, and decreases fungi on the leaves.

But to do this, the pond bottom has to be close to level -- within about half an inch.

Starting from lumpy pasture, what is the easiest way to do this?

At present my idea is this:

* Rototill a patch bigger than the pond by about 2 feet each way.
* Put in my frame sinking the bottom edge a couple inches.
* Verify that the frame top is level.
* Make a hanging screed to level the bottom of the pond. Move extra dirt out as needed.
* Now I have an unconsolidated bottom. Rent a plate tamper and pack the bottom. This will take the bottom down another inch or so.
* Add some of the fill back, rescreed, and repack.
* Repeat until I have a flat, firm bottom.

This sounds an awful lot like work. I will need somewhere between 10 and 40 of these ponds eventually.

Thoughts:

Why not just a bigger pond?

Different stages of willows require a different frequency of watering. When small they may only need to be watered once every two weeks. When larger, every three days.

A 4-5 foot wide pond makes it easy to move plants without wading. 30 feet long with aisles at either end means only a 15 foot walk from the trailer.

This width also reduces the amount of dirt to be moved for terracing. (The area is on about a 3% slope.)
 
   / Leveling land for ebb and flood irrigation #2  
How about getting it fairly close to level with much less work, then adjusting individual pot depth with tapered, stepped, or various sized blocks for shims. For example, a 2x2x12 cut diagonally, three per pot.

Bruce
 
   / Leveling land for ebb and flood irrigation
  • Thread Starter
#3  
These are small pots -- about 6" across x 7 inches high. A 4 x 32 foot pond holds 600 pots. When I'm moving them, I grab 3 in each hand.

Making the pond deeper and building some form of support grid may work, but that would have to be on a 3" grid for reliable support. On our 4x32 pen that would be 12*32 feet of grid.

I'd like the setup to last 5 years. Wood constantly wet lasts only about 2. PT wood will poison the plants.
 
   / Leveling land for ebb and flood irrigation #4  
Does someone in your area have a laser leveling / terracing service that would work for the small areas you are talking about? Trying to eyeball and hold 1/2" slope or less will be a challenge.
 
   / Leveling land for ebb and flood irrigation #5  
I think I would ditch the thought and go drip irrigation to save water and hassle. The outlines method is going to leak a LOT and do very little to help. If that is so concerning and you are using POTs then just run drip lines and stick into the pot, maybe set them into a rain gutter or PVC cut in half with slope to reuse water at end
Otherwise lay out some plastic after first till/level/compacting to form a water tight barrier.

Mark
 
   / Leveling land for ebb and flood irrigation
  • Thread Starter
#6  
This is a one man farm.

I do use dripline with larger pots. But the small pots have to be herded together into a mass for winter anyway (they cool too fast). It's best to keep them that way to start with, and transplant them when they get crowded.
Even with the larger trees, I have close to 10,000 feet of dripline. It takes 5 seconds a dripper to verify that they work. 15 seconds to clean a clogged one.


2015-08-12 at 15-27-31.jpg

First pic are larger trees. They can tolerate winter like that.

Second pic is a block of 300 willows, 7 rows wide by 44 pots long. I want you to imagine stringing 300 drippers through that.
Now imagine weeding it. Imagine checking for clogged drippers. And these are #2 pots -- 8" across. I want to move to #1 pots, 5.5" across. Smaller pot has half the volume, requires twice the watering frequency for the same size plant.


At present I have about 16,000 trees. Anything that takes 30 seconds a tree takes 480,000 seconds -- about 18 days of 8 hour days.
 

Attachments

  • 2015-08-12 at 15-19-00.jpg
    2015-08-12 at 15-19-00.jpg
    917.6 KB · Views: 148
   / Leveling land for ebb and flood irrigation
  • Thread Starter
#7  
Small plots: In effect I need a set of terraces.

That's why I figured on setting the tops of the frames level. THAT much is easy to do. Much the same as leveling concrete forms. I've got a small laser level that I use for setting wall tile. Not bright enough to use in sunlight, but easy enough in twilight.

Hoping that someone here will have a trick.
 
   / Leveling land for ebb and flood irrigation #8  
going to push you over to www.koiphen.com and then go into the "pond construction and filtration"

pipe boot = how to cut a hole in a liner. and shove a piece of pipe through it. and how to deal with pipe clamps so no holes / tears happen. for a water tight seal.
google keywords...
pipe boot site:koiphen.com
then click up on images.

bottom drain = think shower drain, kitchen sink drain, bathroom sink drain, floor drain in a basement, etc...,etc.... there are a lot of DIY notations on koiphen for "DIY bottom drain". a bottom drain will be important to you. when it comes to clean all the CRUD that will build up in the bottom.
google keywords
bottom drain site:koiphen.com
DIY bottom drain site:koiphen.com

stand pipe = take a piece of pipe and barely sand down the outside of it, say 3 to 5 inches from one end. this is to make the pipe slip smoothly down into a fitting and bottom out inside the fitting (don't sand to much off). then take a dremal with a cutting disc. an put a grove around the pipe 1/2" to 2" from end you most likely want 2 groves total. these grove will hold a O-ring, the grove primarily to keep O-ring from slipping off of pipe. get a jar of vasaline of all things and lube down the part you sanded down and the O-ring. and you should get a nice water tight seal that can handle a couple feet or so of water. a "stand pipe" = a ON/OFF valve only. and the pipe must be vertical when it goes into a fitting. ((this is a DIY valve cheap and it works!))
google keywords
stand pipe site:koiphen.com

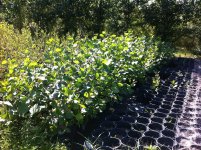
you will have some issues. the most important one. any type of liner = SLICKER THAN SNOT! you will fall flat on your rear! it does not take much, for algae to start growing on liners. and when it does. you end up on hands and knees if not belly rolling across it. when things dry off and dry up. that is one thing. but other wise. WATCH IT! with you not keeping each area flood all the time and only for a couple hours at at time it should not be that big of an issue.

another issue. liners = holes, doesn't matter if it is PVC, EPDM, or like liners. you will be walking into the area a lot, and putting stuff down that might have a sharp edge more so the pots / baskets for all the plants. there are a lot of cheap liners out there. some better than others. i might push you towards EPDM type of liner. due to is more elastic / stretch more. vs say PVC liners that do not stretch as much. also go with a thicker liner if possible costs more. more likely to help things out long term in lasting to minor punctures.

for your sides... taking the dirt out and building a mini hill per say. for sides = BAD IDEA in my opinion. this is for a work area. not something to look at. this goes back to "falling flat on your rear" up above. having nice vertical sides or near vertical sides. can make it much easier getting in / out and safer overall. on the other hand. i will most likely suggest that you get treated lumber and sink them into the ground, with say only 1 to 2" inches sticking above the ground. and perhaps hammering in a bunch of rebar for stakes ever foot or so. going down into the ground = it should help keep the sides from bowing out on you to much. having your sides above ground = a lot more structural support. having sides 1 to 2 inches above ground = keeps run off water from rain from going into area. at same time gives you something to beat the weed eater against.

they sell liners generally by 5' feet width. and by 5' lengths. you can get custom cuts. but.... cost more. with you getting in and out of each area a lot. i might suggest something "narrow" using a 5' width liner. at how ever many feet you want. that way if it comes down to it. you can set your rear on the edge. and lean into the area. without risking walking across a slippery dangerous area, and work off of both sides.

going back to "top of this post of mine" you most likely looking at a "terrace" setup. or a "multi waterfall" stream like setup. were you fill the very top area with water. wait a couple hours. go over and pull a "stand pipe" that was inserted into a bottom drain... all that water empties out of the top unit, and flows down into the next area. wait a couple hours. so on, and so forth. your only issue will be having to pump water from the very bottom "pond per say" all the way back up to the very top unit.

with you driving tractors to vehicles right beside these ponds per say. i would suggest burying the pipe from the very bottom pond to the very top of the pond. directly below all of them. off to one side. that way you are not risking driving a vehicle over the pipe and crushing the pipe.

tools of the trade = "water level"

TIP: shower drains from local hardware stores can make for nice "bottom drains" in ponds that use liners and like. the issue is hunting for correct shower drain were you can easily use a "stand pipe". on koiphen you will find a lot of other ideas for DIY bottom drains / stand pipes.

TIP: you might consider using 8x8x16 inch concrete blocks as sides. there width might be a good thing. the only issue is them sinking over time into the ground.

TIP: if you due end up using 2 by ?? what ever size lumber. get a table saw and cut you some strips of 1x1's or something along them lines. fold the liner edge over the sides. and then place these strips of lumber over the liner. then use some screws and go through the strips, and through liner, into your sides. doing this = a clamp and holds the liner much better. and helps prevent rips of the liner. or portions of the liner ripping and falling back into the area. some folks have doubled or trippled up the liner were they put the strips of lumber. to help create a cushion, and help prevent any sort of splinters that might happen from poking the liner and causing a leak.

TIP: the very bottom pond, you might want to make out of concrete blocks with some re-enforcement in them. and put in a concrete bottom. this is more to deal with all the "mud" and "muck" that is going to come into your system. just from dealing with all the plants. look up "settling tanks" on koiphen basically a settling tank ( SC for short) lets all the muck settle into the bottom of the filter / tank. if you have a backhoe / mini excavator. or something along them lines. being able to let all the water from the ponds drain down into the very bottom pond. were you can get a little bit more carried away with a backhoe bucket. to scoop out the mud. might make your life much easier. at same time the very bottom tank can help reduce all the solids that the pump might pickup and plug up the pump. trying to re-use dirt water that will most likely be coming down from the ponds and trying to put it into irrigation system that is not built for "solids" can quickly clog up the irrigation system and all the little drip nozzles and spray heads. while a settling chamber does not remove all of it. it can reduce a good amount, and might be worth while to you.

google keywords...
settling chamber site:koiphen.com
then click up on images.

there is a lot of folks on koiphen that re-use there fish pond waste (from the filters) to irrigate there lawns / trees / etc... normally this requrires enlarging holes in irrigation lines were water comes out. and using a "trash pump" a trash pump generally will have specs on it that states it can handle solids up to say 1/2" to 1" to say 3" in size without clogging. most of the time you will find a trash pump in local hardware stores in form of a submersible pump. there are a lot of pumps out there. but most of them can not handle solids / mud / muck very well and either the blades will get damaged quickly to they will simply clog up. hence notation of a "trash pump"

you might want to check out various "pre filters" i forget all the key words / DIY builds been a few years. the one's i remember right off = a settling chamber type of filter. and then a second smaller 10 to 55 gallon drum inside of the settling chamber tank. this smaller drum had various material in it. to help screen / filter out large stuff from twigs, to leaves, to fish poo, to other. and pending on filter material put into the smaller drum. much easier to clean and keep it from clogging up with stuff. ""and in that much easier for external pumps to be used"" other words not a submersible pump. with you putting lots of plants in the system.... clogs are going to come up.

TIP: trash pumps generally are not rated to run 24/7 and generally rated for utilty. other words only ran so long before they get a chance to shut off and cool down. the notation above about another filter inside the settling chamber. is more geared to any generic external pump. with more likely a "leaf basket pot" connected in line. so you can use what ever external pump you want to use. there are DIY leaf basket, to manufacture leaf basket pots. you will most likely something little bit bigger. to deal with all the crud that may be coming in. a good fitler setup = more expensive up front, but = lot cheaper long haul. and having to replace pump due to it got clogged up and burned up.

===============
i realize above is a lot about "ponds" but frankly that is what you are wanting and going to be end up using. just for a different thing. there are a lot of folks there on koiphen that have ponds dedicated just to "plants"
 
Last edited:
   / Leveling land for ebb and flood irrigation
  • Thread Starter
#9  
Awesome tips, Ryan.

I wasn't going to recycle the water from the bottom pond back up to the top. I figure by the time it gets to there it will have 2-5 times the amount of dissolved solids in it, and should be discarded. (I figure that about 60% of the fill water will move to the next pond.

Ouch. Just spent some time with a spread sheet. If 40% of the water is used in each pond then the TDS increases by 40%. The solids don't evaporate.

I use black poly tarps (silage tarps) for my sprinkler areas. When they are wet, they are slick. Rubber soled (scuba) boots or water socks or barefoot. Even then, take care. And that's on tarps that aren't wet more than 30% of the time.

Some brands of pots have tiny legs on them to break the air seal that can sometimes form when set on wet plastic. These *can* punch holes in thin (4 mil) plastic. Why I use 6 mil for weed barrier.) Was figuring on putting down a woven poly tarp, the kind used for ditch barriers -- porous, on top of the water proof layer to protect it. This would also make cleaning the ponds easier.

At 4-5 foot width I can reach to the center and never have to walk on it at all. If wider, I could make some form of 'bridge' that went from edge to edge. However the dogs *will* walk in the ponds. And the coyotes. And the sparrows. And.... Main reason I want to protect the bottom. (Hmm. 4x8 sheet of 3/4 plywood. Channels on the ends. fixed castors in the channels. Rolls on the edges of the pond. **** with it. Single scaffold plank)

I do all of my plumbing with black PE pipe and nylon insert fittings. So far no crush problems. A more key feature is to do it in such a way that there is no water in a joint at fall freezeup.

EDPM is too pricey for me at this point. I have a roll of 15 mill LDPE. I will experiment with it making the hole and clamp pipe boot. For my purposes I don't care if the pipe boot leaks slowly. E.g. On a hot day the water level in the pond is dropping 1/8" an hour to transpiration and evaporation. Losing a couple gallons an hour to a leaky pipe boot is trivial. However, there may be merit in mixing bentonite with my backfill.

A second thing to keep in mind: I'm looking for a 5 year life span. This is an initial attempt at this way of doing things.
 
   / Leveling land for ebb and flood irrigation #10  
i like to have a nice clean bottom ponds and aquariums (no rocks, no decrations, etc.. in pond). on the other hand. some folks want rocks in there pond. rocks in the bottom of the pond trap fish waste and can be down right part time job keeping the rocks clean. if the fish poo turns to sewage / decays other words. and stuff gets stirred up, the decaying matter can release some nasty stuff into the water. more so when the water is drained, and the muck / sewage is exposed to air... you get nailed by sewage smell.

with above. you could put in say 1" thick pebble rock bottom (rocks with no sharp edges, generally a river stone look / feel to them) to help protect the bottom. with you only watering for a couple hours and draining... i doubt it would be a huge issue. any organics that do find there way into the rocks. will be constantly be exposed to air. and have a chance to "off gas" on a regular basis. to help keep overall smell down from the simple process of matter decaying. the only issue will come to say 1 to 2 times a year clean out (well for fish ponds anyhow) and getting in there with shovels to large amounts of water and cleaning out the rock. (not a fun job at all, and rather smelly job to boot!)

and with above. trying to get ya to understand of what do you actually want to put in the bottom. any wood placed in the bottom on top of the liner or anything else = trapping muck. for me with fish i don't want trapped muck. for you just dealing with plants? *shrugs* do not have a clue never been a green thumb and doubt i ever will. so perhaps an alternative... put down your "water tight liner" and then place cheap tarp over the liner. perhaps burlap bags, to cheap tarps that come up every now and then at local hardware stores (when they go on sale). to simply 1 to 2 extra scrap peices of liner you will be using to keep things water tight.

something to think about. many water plants for ponds / lakes / streams. grow from a certain depth. and many koi / goldfish ponds can be rather deep. so many folks have used concrete blocks. to pvc plastic pipe to other things as stands to raise the plant pots from the very bottom of the pond. to within so many inches of surface of the pond.

going with above. perhaps putting down 1" to 2" blocks. along the bottom edge corners. and then laying down "rebar mesh" you can pick it up fairly cheaply at most local hardware stores. i am not sure how the metal will react / cause to your plants. but it would act like a "strong mesh bottom" and raise all the pots off the bottom. and when it comes time to clean each pond out. you might be able to just remove the pots and spray down with a garden hose to rinse all the muck that has built up. down to the drain, and down to the next pond.

=============
i would skip the bridge idea. or less you are just going to be tossing money at the project. though by the time you go with a bridge... you are getting away from putting plants in dirt and growing them to aquapondics. err how ever you spell it.

i might actually push you towards pebbles in bottom. that way you are more able to V the bottom of each pond towards a drain. and then level the pebbles out more smoothly for flatness for what ever pots you put in. the V and slanting towards a drain is to help keep water from standing in each pond.

though using a rebar wire mesh and holding it off bottom by 1" or so. might prove rather useful as well. and perhaps easier to keep clean and take care of. and perhaps allow more air into the root mass. vs pots setting directly down on the bottom.

if you go with an extra liner or tarp over the bottom. think about getting something 'slick' when wet so it does not trap as much crud in it. you are not really needing to capture crud, but rather simply needing to protect the liner holding the water in. just be careful when it comes time for clean up. decaying matter create gasses that can build up under a solid liner. and when you pull the plastic back. you might end passing out from the smell.

it sounds like you have a firm grasp of it all. just rambling. perhaps something might shine better than something else.

p.s. sorry for the smell... been there done that... and to point i do not want to deal with sewage smell if i do not have to.
 

Tractor & Equipment Auctions

Skid Steer Gravel Leveler (A50515)
Skid Steer Gravel...
2023 TAKE 3 TRAILER 3 CAR TRAILER (A52141)
2023 TAKE 3...
New Idea 324 2 Row Corn Picker (A50514)
New Idea 324 2 Row...
John Deere MX5 3pt 60" Rotary Mower (A50774)
John Deere MX5 3pt...
2017 Ford F-250 Ext. Cab Pickup Truck (A50323)
2017 Ford F-250...
2011 Chevrolet Malibu Sedan (A50324)
2011 Chevrolet...
 
Top