hailofaguy
Member
I always see people asking about adding LED lights on their equipment so I thought I'd post how I did mine. I originally purchased some lights from my local Wally World and it helped some, but in the end it was not what I needed to help me see when I mow late in the evening.
I added these LED's to my Kubota B3200HSD and here is how I did it. This is temporary until I get my ROP's brackets made, then they will be moved there.
Here is a list of parts I used to complete this project:
Lights
LED Lights: Manufacturer specs, TUFF LED LIGHTS Link (I purchased them directly from amazon.com see next link)
Where I purchased them from: Amazon.com Link
They come in a pack of 4 for $93.00 which I felt was a great deal. I used two of them and put the other two back as backups in case I damage one. If you purchase this make sure the Seller is TuffLEDlights.com and not Mictuning as Tuff LED Lights will not warranty lights purchased through the Seller named Mictuning on amazon. I wanted to make sure I got some that were bright enough so I went with the 4 X 4" Inch Square 27 watt LED Work Lamp Light 1550 Lumen and it seems to be more then enough.
Wiring and Switch
I used a single pole switch kit I purchased from Wal-Mart. Soon I will be upgrading to this kit sold on amazon.com by Tuff LED Lights. Link
Hardware
Zip ties (Black is best as it is normally weather/UV Resistant. Check label)
Black accordion style wire covering.
Electrical Tape
Steps
1. First added two black (ground) wires that run down the inside of the grill from the negative side of the battery down to the front of the tractor (see pic). You could use one wire for this and tie the grounds together, but I didn't do that.
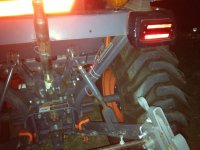
2. I ran the red power wire from the rear of the tractor from a bullet connector (see pic) that is connected to battery power ONLY when the key switch it in the ON position. About 5' of it, under the left side of my seat, underneath the left side of the foot pan along the frame and then up to the rocker switch I installed on the front of the plastic area under the steering wheel.
3.Then from the Rocker switch I ran 1 red wire to the front along the left frame of the tractor to supply power to both lights. I used a female bullet style double connector on this wire.
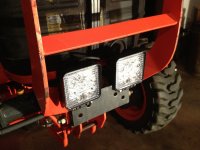
4. I mounted the lights to the front of the tractor (see pics) where you would mount tractor weights (temporarily).
I am truly happy with the amount of light I have now. I highly recommend these lights and will keep the post updated as I change things. Here are some pics. I hope this helps someone and if you have any questions feel free to ask.
Area I attached lights at...
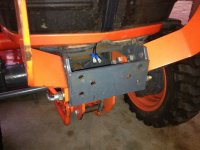
First bracket attached, make sure its tightened good...

First light mounted to bracket...
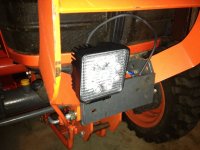
May have to adjust bracket so light doesn't hit this part of the tractor frame...
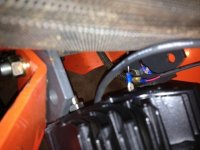
Finishing up the wiring... and both lights mounted...
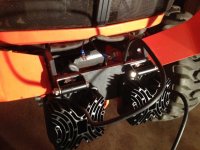
Location of the power wire on the back of the tractor you can use to power lights...
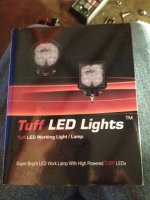
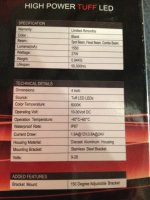
Tuff LED Lights and Specs...
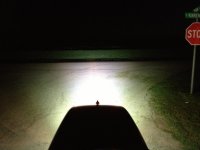
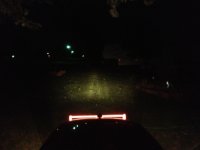
1) Sitting at my street corner with factory lights on... 2) With LED lights on...

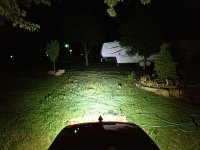
1) Sitting in my front yard with factory lights on... 2) With LED lights on...
I added these LED's to my Kubota B3200HSD and here is how I did it. This is temporary until I get my ROP's brackets made, then they will be moved there.
Here is a list of parts I used to complete this project:
Lights
LED Lights: Manufacturer specs, TUFF LED LIGHTS Link (I purchased them directly from amazon.com see next link)
Where I purchased them from: Amazon.com Link
They come in a pack of 4 for $93.00 which I felt was a great deal. I used two of them and put the other two back as backups in case I damage one. If you purchase this make sure the Seller is TuffLEDlights.com and not Mictuning as Tuff LED Lights will not warranty lights purchased through the Seller named Mictuning on amazon. I wanted to make sure I got some that were bright enough so I went with the 4 X 4" Inch Square 27 watt LED Work Lamp Light 1550 Lumen and it seems to be more then enough.
Wiring and Switch
I used a single pole switch kit I purchased from Wal-Mart. Soon I will be upgrading to this kit sold on amazon.com by Tuff LED Lights. Link
Hardware
Zip ties (Black is best as it is normally weather/UV Resistant. Check label)
Black accordion style wire covering.
Electrical Tape
Steps
1. First added two black (ground) wires that run down the inside of the grill from the negative side of the battery down to the front of the tractor (see pic). You could use one wire for this and tie the grounds together, but I didn't do that.
2. I ran the red power wire from the rear of the tractor from a bullet connector (see pic) that is connected to battery power ONLY when the key switch it in the ON position. About 5' of it, under the left side of my seat, underneath the left side of the foot pan along the frame and then up to the rocker switch I installed on the front of the plastic area under the steering wheel.
3.Then from the Rocker switch I ran 1 red wire to the front along the left frame of the tractor to supply power to both lights. I used a female bullet style double connector on this wire.
4. I mounted the lights to the front of the tractor (see pics) where you would mount tractor weights (temporarily).
I am truly happy with the amount of light I have now. I highly recommend these lights and will keep the post updated as I change things. Here are some pics. I hope this helps someone and if you have any questions feel free to ask.
Area I attached lights at...

First bracket attached, make sure its tightened good...

First light mounted to bracket...

May have to adjust bracket so light doesn't hit this part of the tractor frame...

Finishing up the wiring... and both lights mounted...


Location of the power wire on the back of the tractor you can use to power lights...

Tuff LED Lights and Specs...


1) Sitting at my street corner with factory lights on... 2) With LED lights on...


1) Sitting in my front yard with factory lights on... 2) With LED lights on...


Last edited: