Did a little work with the 2520 yesterday.

   / Did a little work with the 2520 yesterday. #1  

Chris2520

Platinum Member
Joined
Mar 26, 2007
Messages
783
Location
Marietta GA.
Well , I got to break my box blade in and do some loader work the last couple of days. a friend of mine had 5 pines taken down. and he had a 5 foot hump in the yard. and he wanted it flat. So after the excavater came and knocked the trees down and we got all that cleaned up. Me and Johnny D went to work. First i tilted the blade all the way up and put the scarfers in the lowest place. and ripped up all the bazzilion roots left from the trees. Then dug out the big hump in the yard that went all the way from the street to the house. you can tell in the pics where it was. hualed that dirt off in his dump trailer. then i took the boxblade and graded it all out smooth. it turned out pretty nice. ;) Johnny D's got 19 hours on him now...:)
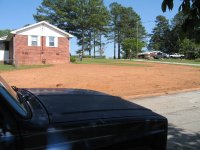
here is a few pics of the yard after we got done. and us loading the tractor to come home. Had to get him home and give him a bath. hes all cleaned up now ready for the next job....:)

as you can see the trailer is to small its not mine. i borrowed it. its only 13 feet. it was made for a bobcat. had to set the bucket on the tool box and tilt the boxblade all the way up , just to get the ramps up. i guess i will haft to by me a 21 footer. so i can hual tractor and attechments at the same time...:rolleyes:
 

Attachments

  • 2007_0518_165647AA.JPG
    2007_0518_165647AA.JPG
    286.6 KB · Views: 469
  • 2007_0518_165658AA.JPG
    2007_0518_165658AA.JPG
    290.6 KB · Views: 395
  • 2007_0518_165722AA.JPG
    2007_0518_165722AA.JPG
    250.7 KB · Views: 393
  • 2007_0518_165810AA.JPG
    2007_0518_165810AA.JPG
    339.6 KB · Views: 349
  • 2007_0518_165821AA.JPG
    2007_0518_165821AA.JPG
    252 KB · Views: 359
  • 2007_0518_165832AA.JPG
    2007_0518_165832AA.JPG
    270.7 KB · Views: 386
   / Did a little work with the 2520 yesterday. #2  
I put my 2520 to work today as well. As a token of appreciation to my wife for letting me upgrade to the 2520, I decided to dig her that pond she’s dreaming about.

I started on Friday evening (5hrs) and finished it today (8 hrs). Here are some pictures on Saturday morning after the first 5 hrs. It was too late to take decent pictures of the final product so I’ll post those tomorrow.

It’s 3 to 3.5 feet deep, about 60 ft long, and maybe 20 ft wide and is now fully shaped like a peanut with a shallow wade-in portion along the eastern end. I don’t intend on putting any sizable fish in it that’ll survive the winter so I didn’t need to go deeper. We’re going to put in a liner in it to retain the water and a water pump to keep the water circulating. We used the fill to raise the surrounding area around the pond. You’ll see the finished pond tomorrow hopefully.


It seems like the 2520 was designed for this kind of job. It’s powerful yet nimble enough to get into the tough, tight corners of the pond. It’s extremely stable over slopes (compared to my previous 2305.. which for the record was still a **** good machine!!) and the high ground clearance made it a snap to travel over all sorts of rough terrain. Eventhough I was up against solid hard pan clay for the lower 3ft of digging, it did an awesome job.

This is an extremely versatile machine. Who’d think that I can dig a hole this deep and finish it off so precise with this machine and then turn around and mow the lawn in the next breath!

Upgrading to the 2520 is the best thing I ever could’ve done to improve my yard maintaining capabilities!!


I got the 2520 on Tuesday this week and it's alreay got 18 hrs on it!


Tomorrow I'm going to pick some boulders out of the neighbors' ditches


GordNovo
 

Attachments

  • 2520 (Large).JPG
    2520 (Large).JPG
    168.3 KB · Views: 377
  • deep (Large).JPG
    deep (Large).JPG
    106.3 KB · Views: 347
  • down (Large).JPG
    down (Large).JPG
    109.9 KB · Views: 347
  • platform (Large).JPG
    platform (Large).JPG
    104.8 KB · Views: 350
  • pond (Large).JPG
    pond (Large).JPG
    200.9 KB · Views: 362
   / Did a little work with the 2520 yesterday.
  • Thread Starter
#3  
GordNovo , That is some good digging. these 2520's are someing to be recond with for sure. that ground looks kinda soft. Do you think a tooth bar would help speed up the digging? I know mine digs harder with tooth bar than just the cutting edge. :) I also see your loader hoes are hanging down where thay connect to the tractor. in the picture i did not see the the support holder that is bolted to the running board. is it there? if not you may want to look at that. you dont want the hoes to hang down. It looks like you and the 2520 are doing a awsome job. your wife will be proud...:) Your digging down so fast. just be careful not to dig yourself in a hole you cant get out.....:D You keep digging like that. you might pop out in China...:)

Chris
 
   / Did a little work with the 2520 yesterday. #4  
Chris Nice job, too bad you didn't get a 'before' photo.


Gord keep digging, looks like you're almost there, it still amazes me what these little tractors can do.
 
   / Did a little work with the 2520 yesterday. #5  
Nice pictures guys! keep em coming:)
 
   / Did a little work with the 2520 yesterday. #6  
I like seeing pictures like this. I think it makes everyone else more willing to try these type of projects. Thanks for posting them.

Cliff
 
   / Did a little work with the 2520 yesterday. #7  
With your box blade on your 2520 do you find you have to get it set just right so the 3ph arms don't rub on the tires? When I hooked up my BB2060 and a cultivator I borrowed I find I have about a half inch of clearance to play with. Though there would be a little more wiggle room.
 
   / Did a little work with the 2520 yesterday. #8  
Chris, you noticed those hoses, huh? I'm gonna talk to my dealer about that. I've got that bolt-on bracket in place along the side on the FEL but nothing below the tractor. I pull them up but they slip down after an hour of FEL work. Kind of anoying actually. I remember my 2305 having a bracket on the underside of the tractor as well, but this one doesn't have one installed. I was expecting my dealer to come by yesterday. I'm taking care of that for sure!

Regarding digging... I did 1/2 the job with the tooth bar but quite honestly I found it dug better in the hard clay without it. Most of my digging was in a downward force while leaning into the hole. I find the straightedge of the bucket did a great job slicing through the clay 9 inches at a time. I'd scoop up what I can, lock the diff and crawl out and dump. I did the clean-up work inside the pond for any material that I couldn't lift out and to give the pond the vertical walls. Not having the toothbar installed was critical to giving my walls their shape. I found it was a lot easier to do the finesse work without the toothbar

By my estimation, we got around 80 yrds of material out of this hole, which I used exclusively to raise the banks around the pond and and the surorunding low-lying areas. I had to ensure that the pond was not on a downward slope from the driveway or the lawn.

Here are some more pictures.

We're lining the west side with bolders (trailer side)..the north side (fence side) with 10 spruce trees on banks and on the east side we're adding another smaller pond with a waterfall feature (which I haven't built yet) with a rock and boulder bed that'll drain into the main basin. On the sound side, the sloped side just to the left of my Barbie bike :) will have about 6" of sand leading to the water and it'll be where we can build sand castles and such.

Here are some pictures...

Oh.. and here's a picture of my new RFM. Everyone was right.. it's much better compared to the belly mower.. better for slopes.. for under trees.. for cornering..better distribution of clippings...In my opinion, it does a nicer job than the 62C ever did in our situation.
 

Attachments

  • slope 2 (Large).JPG
    slope 2 (Large).JPG
    174.1 KB · Views: 259
  • AFTER (Large).JPG
    AFTER (Large).JPG
    126.2 KB · Views: 256
  • AFTER2 (Large).JPG
    AFTER2 (Large).JPG
    204.5 KB · Views: 215
  • AFTER 3 (Large).JPG
    AFTER 3 (Large).JPG
    213.8 KB · Views: 192
  • rfM (Large).JPG
    rfM (Large).JPG
    182.9 KB · Views: 216
  • SLOPE (Large).JPG
    SLOPE (Large).JPG
    160.2 KB · Views: 200
  • deep end (Large).JPG
    deep end (Large).JPG
    180.9 KB · Views: 212
  • deeper end (Large).JPG
    deeper end (Large).JPG
    194.9 KB · Views: 225
   / Did a little work with the 2520 yesterday.
  • Thread Starter
#9  
GordNovo said:
Chris, you noticed those hoses, huh? I'm gonna talk to my dealer about that. I've got that bolt-on bracket in place along the side on the FEL but nothing below the tractor. I pull them up but they slip down after an hour of FEL work. Kind of anoying actually. I remember my 2305 having a bracket on the underside of the tractor as well, but this one doesn't have one installed. I was expecting my dealer to come by yesterday. I'm taking care of that for sure!

Regarding digging... I did 1/2 the job with the tooth bar but quite honestly I found it dug better in the hard clay without it. Most of my digging was in a downward force while leaning into the hole. I find the straightedge of the bucket did a great job slicing through the clay 9 inches at a time. I'd scoop up what I can, lock the diff and crawl out and dump. I did the clean-up work inside the pond for any material that I couldn't lift out and to give the pond the vertical walls. Not having the toothbar installed was critical to giving my walls their shape. I found it was a lot easier to do the finesse work without the toothbar

By my estimation, we got around 80 yrds of material out of this hole, which I used exclusively to raise the banks around the pond and and the surorunding low-lying areas. I had to ensure that the pond was not on a downward slope from the driveway or the lawn.

Here are some more pictures.

We're lining the west side with bolders (trailer side)..the north side (fence side) with 10 spruce trees on banks and on the east side we're adding another smaller pond with a waterfall feature (which I haven't built yet) with a rock and boulder bed that'll drain into the main basin. On the sound side, the sloped side just to the left of my Barbie bike :) will have about 6" of sand leading to the water and it'll be where we can build sand castles and such.

Here are some pictures...

Oh.. and here's a picture of my new RFM. Everyone was right.. it's much better compared to the belly mower.. better for slopes.. for under trees.. for cornering..better distribution of clippings...In my opinion, it does a nicer job than the 62C ever did in our situation.

I never really thought of that. but your right. the tooth bar would be good for hard stuff. but something like damp clay. the cutting edge would work like a knife. and make a better cut.;) looks great. be sure to post pics. once you got water in it. so we can see how it turned out. :)

as for hoes. mine were the same way. kept pulling down. how to fix it is. loosen the hoes at the loader arm. and twist them all strate inside the weave. and tighten. then thay wont pull down. been there done that..;)
 
   / Did a little work with the 2520 yesterday.
  • Thread Starter
#10  
vintagemilano said:
With your box blade on your 2520 do you find you have to get it set just right so the 3ph arms don't rub on the tires? When I hooked up my BB2060 and a cultivator I borrowed I find I have about a half inch of clearance to play with. Though there would be a little more wiggle room.

Yes there is very little room. and its hard to keep check chains tight. I centered mine. and tightened the crap out of the check chains. and then put 2 heavy duty zip ties from the 3 point arm through the link of the check chain turn buckel. now it stays center and tight...;)

Chris..:)
 

Tractor & Equipment Auctions

2021 Case 221F Wheel Loader (RIDE AND DRIVE) (LIKE NEW) (A50775)
2021 Case 221F...
Decorative Metal Butterfly (A55758)
Decorative Metal...
New JMR 66" Skidloader Grapple (A50775)
New JMR 66"...
2015 Hyundai Sonata Hybrid Sedan (A55758)
2015 Hyundai...
2023 54' Hooklift Dumpster 20 Cubic Yard (A55788)
2023 54' Hooklift...
202477 (A54757)
202477 (A54757)
 
Top