Singlecoil
Gold Member
- Joined
- Feb 26, 2006
- Messages
- 371
- Location
- Eatonville, Washington
- Tractor
- Kubota BX-24D Cub Cadet LT42e
I decided to write all of this out and made a .pdf file out of it. If you want to print this, just download the .pdf file and print that. The end result: success and no trips to the hardware store!
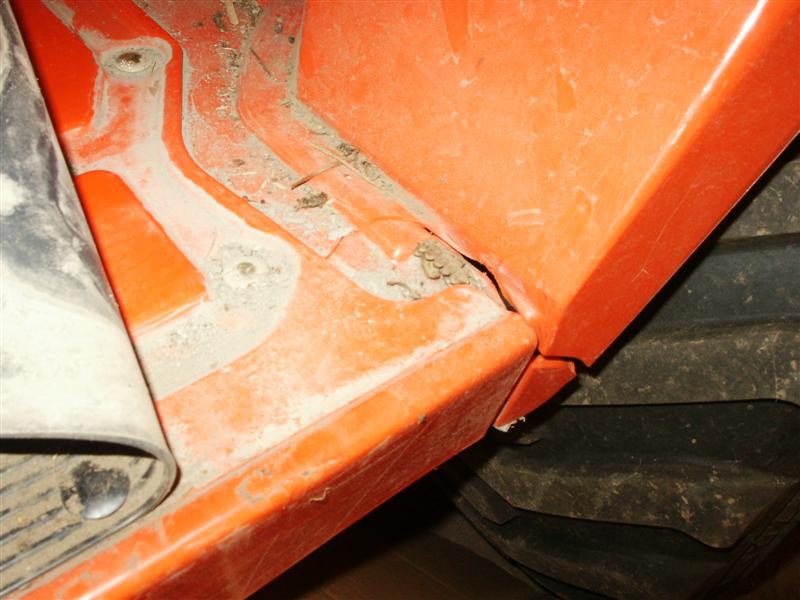
Here is a side-by-side of the old and new BX fenders. You will note the 4 ribs they added on each side for structural support. It also appears that the square bolt holes are now round. One of mine had a hairline crack so that looks like a good upgrade as well.
This photo is of the left side of one, and the right side of the other.
To change out the fender yourself, you will need the following:
10mm wrench and socket
13mm wrench and socket
14mm wrench and socket
17mm wrench and socket
19mm wrench and socket
3 inch extender
5-6 inch extender
Breaker bar
Phillips screwdriver
Needle nose pliers
Bungee cord
This is definitely a job for 2 people. Lifting the ROPS would be a pain by yourself. It probably took us about 3 hours, but I bet I could do it in less than 2 if I had to do it again, which I had better not.
Steps:
1. Using a Phillips screwdriver, remove the taillight covers and set them aside.
2. Using the needlenose, or maybe your fingers, twist the taillight lightbulb sockets 45 degrees and remove out the back. You don’t need to remove the bulbs for this.
3. Reaching behind the taillight, identify the four wires for the ROPS turn signal lights (2 on each side) and unplug the inline plugs (4 of them). Then feed the wires through the top of the fender.
4. Remove the ROPS using a 19mm socket and the breaker bar to loosen, then the socket wrench to remove the 6 nuts. Set the ROPS aside.
5. Remove the seat by folding the seat forward by releasing the aft lever, then use a 14?mm socket and wrench to remove the new (post recall) seat bolt on the driver’s left side. Unplug the seat switches, then slide the seat to the right (if memory serves) to release the seat from the brackets and set it aside.
6. Next you will need to remove the handles. Only the rear bolt on each handle is attached to the frame. Remove both rear handle bolts from under the wheel well using a 14mm socket and an extender. There is a metal bracket on each side that attaches to the respective front bolt on each side. You may need to look underneath and slide it to the side to free the handle from the frame.
7. On the driver’s left side, under the seat is one 13mm bolt holding a wire harness. Remove that.
8. From underneath the tractor, remove the 4 13mm bolts holding the fender to the floorboard.
9. Remove the battery cover.
10. Remove the 2 black plastic pieces at the bottom of the battery compartment that are joined in the middle by 2 brass bolts and 2 10mm bolts on the sides.
11. Remove the 2 front floor bolts to free up the floor.
12. Use a bungee to raise the back of the floor to make the fender easier to remove like in the following picture. (The other two bungees were installed by my 3-year-old so you probably don’t need those)
13. Remove all of the knobs that protrude through the top of the fender, and try to lay them out so you won’t wonder which one goes where later. Then, remove the forward knobs; the 3pt lift height pulls out, the diff lock rubber pad rotates off, but the MMM knob is a total pain. I used a rubber mallet as a lever and a rock as a fulcrum to get it off. The tech I talked to said he bloodies his knuckles every time he has to remove one of those and I believe him. I actually slightly cracked mine getting it off.
14. Continue to lament the fact that your Costco tarp garage blew off the tractor and 30 feet into the bushes (see above) because you failed to adequately anchor it to the ground. This step may be optional for you.
15. Unplug the 2 leads on the 12V accessory socket.
16. Your fender should be free to remove.
17. Swap the handles to the new fender using the 14mm socket and Phillips screwdriver.
18. Swap the brass thingy underneath the 3pt height adjustment lever to the new fender using a 13mm socket.
19. Remove the 12 V accessory socket by filing down the two notches with a file or screwdriver to free it from the old fender. Whatever you do, don’t remove the tiny nut on the backside of the socket. You will seriously regret that. The socket was designed to be inserted but not removed, that’s why you need to file the notches off (2 of them). Then snap it into the new fender.
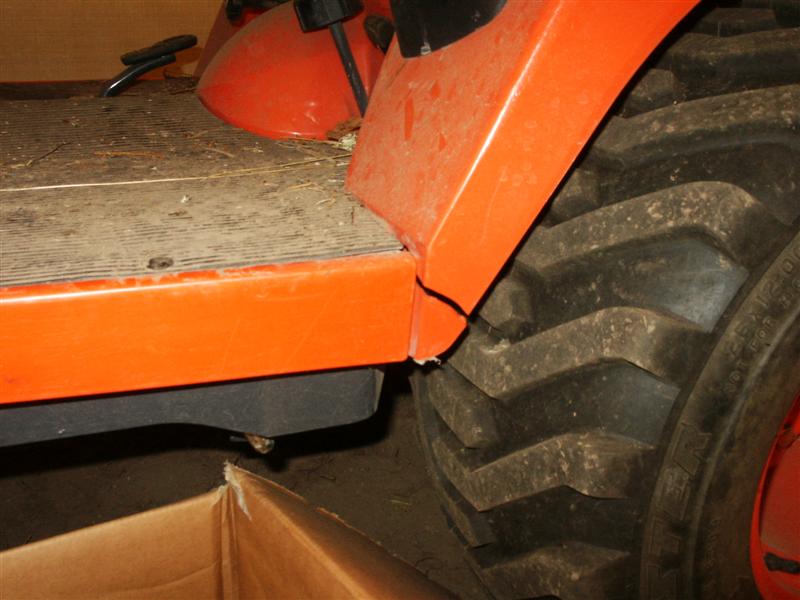
20. When you install the new fender, make sure the fuel line runs underneath the fender spine in the rear. You can see it in the above photo running from the fuel cap, around the back and to the other side.
21. Everything else should be fairly obvious as far as reinstalling. Don’t forget to place the 4WD decals on the new fender (hopefully your dealer ordered them)
Here is a side-by-side of the old and new BX fenders. You will note the 4 ribs they added on each side for structural support. It also appears that the square bolt holes are now round. One of mine had a hairline crack so that looks like a good upgrade as well.
This photo is of the left side of one, and the right side of the other.
To change out the fender yourself, you will need the following:
10mm wrench and socket
13mm wrench and socket
14mm wrench and socket
17mm wrench and socket
19mm wrench and socket
3 inch extender
5-6 inch extender
Breaker bar
Phillips screwdriver
Needle nose pliers
Bungee cord
This is definitely a job for 2 people. Lifting the ROPS would be a pain by yourself. It probably took us about 3 hours, but I bet I could do it in less than 2 if I had to do it again, which I had better not.
Steps:
1. Using a Phillips screwdriver, remove the taillight covers and set them aside.
2. Using the needlenose, or maybe your fingers, twist the taillight lightbulb sockets 45 degrees and remove out the back. You don’t need to remove the bulbs for this.
3. Reaching behind the taillight, identify the four wires for the ROPS turn signal lights (2 on each side) and unplug the inline plugs (4 of them). Then feed the wires through the top of the fender.
4. Remove the ROPS using a 19mm socket and the breaker bar to loosen, then the socket wrench to remove the 6 nuts. Set the ROPS aside.
5. Remove the seat by folding the seat forward by releasing the aft lever, then use a 14?mm socket and wrench to remove the new (post recall) seat bolt on the driver’s left side. Unplug the seat switches, then slide the seat to the right (if memory serves) to release the seat from the brackets and set it aside.
6. Next you will need to remove the handles. Only the rear bolt on each handle is attached to the frame. Remove both rear handle bolts from under the wheel well using a 14mm socket and an extender. There is a metal bracket on each side that attaches to the respective front bolt on each side. You may need to look underneath and slide it to the side to free the handle from the frame.
7. On the driver’s left side, under the seat is one 13mm bolt holding a wire harness. Remove that.
8. From underneath the tractor, remove the 4 13mm bolts holding the fender to the floorboard.
9. Remove the battery cover.
10. Remove the 2 black plastic pieces at the bottom of the battery compartment that are joined in the middle by 2 brass bolts and 2 10mm bolts on the sides.
11. Remove the 2 front floor bolts to free up the floor.
12. Use a bungee to raise the back of the floor to make the fender easier to remove like in the following picture. (The other two bungees were installed by my 3-year-old so you probably don’t need those)
13. Remove all of the knobs that protrude through the top of the fender, and try to lay them out so you won’t wonder which one goes where later. Then, remove the forward knobs; the 3pt lift height pulls out, the diff lock rubber pad rotates off, but the MMM knob is a total pain. I used a rubber mallet as a lever and a rock as a fulcrum to get it off. The tech I talked to said he bloodies his knuckles every time he has to remove one of those and I believe him. I actually slightly cracked mine getting it off.
14. Continue to lament the fact that your Costco tarp garage blew off the tractor and 30 feet into the bushes (see above) because you failed to adequately anchor it to the ground. This step may be optional for you.
15. Unplug the 2 leads on the 12V accessory socket.
16. Your fender should be free to remove.
17. Swap the handles to the new fender using the 14mm socket and Phillips screwdriver.
18. Swap the brass thingy underneath the 3pt height adjustment lever to the new fender using a 13mm socket.
19. Remove the 12 V accessory socket by filing down the two notches with a file or screwdriver to free it from the old fender. Whatever you do, don’t remove the tiny nut on the backside of the socket. You will seriously regret that. The socket was designed to be inserted but not removed, that’s why you need to file the notches off (2 of them). Then snap it into the new fender.
20. When you install the new fender, make sure the fuel line runs underneath the fender spine in the rear. You can see it in the above photo running from the fuel cap, around the back and to the other side.
21. Everything else should be fairly obvious as far as reinstalling. Don’t forget to place the 4WD decals on the new fender (hopefully your dealer ordered them)
")