Michelle K linnane
Gold Member
Well here are a few pics of my new chukar and quail pen. It is based on 8ft 2 X4.
1) Design something easy to build.
Materials used all wood PT For 8 x8 section pens
6@ 20 ス inch 2 X 4
12@ 24 inche 45 % ends
10@ 8 X 2 X 4
1@ 8 X 2 X 6
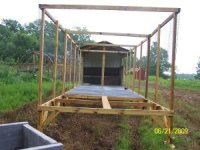
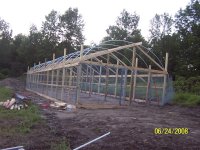
aaaframea.jpg is a picture of the frame.
The floor of the pen is 2 feet off the ground. It is 8 foot high, 8 foot wide, 8 foot long. We built the pens modular style, by my barn to make it easy for electric and air compressor.
2) how do I move it once it is built?
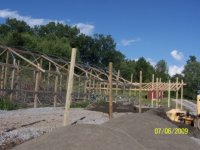
I bought scheduled 80 pipe 6 inches to go over my tractor folks to move everything with. I have included the measurements. Once we had design it took two hours to build each section. We have built 5 sections. We wired the bottom of the pens with 1 ス wire as chukars and quail have small feet and it helps keeping anything from getting the pen.
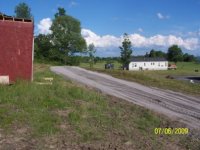
3) Site prep for pens
I prepared the site for pens by mowing and then spraying weed killer to get all grass down this also helps with predators.
4) Wire I used and why?
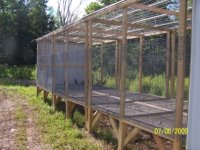
The sides are a welded wire 1inch by ス 4 foot up. We will over lapped the wire on the out side of the pen as I had a roll 1 inch by 2 inch decided not to cut it just overlap. I am waiting for more 1 ス wire to come in so we can finish.
5) What to use on top?
I order 2 inch netting for the top and will use some metal pipe I have maybe to keep netting tight I have made up my mind yet about that. We have tinned two parts to give the birds cover and a catch area.
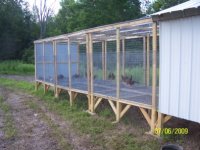
One part is completed isolated so I can have two different age groups of birds. In the big pen. I will tin the very end to provide a wind break. To help the wind from hitting the birds so hard, also we may tin part way up. But I will decide that later. But here is what we have done so far.
6) how to tie everything together
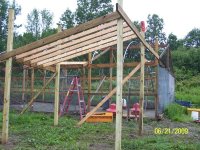
Once pens were built we moved them but placed wire on bottom first to keep from racking too much. The next step was to level pens, and lagged together. As you can see from photos we started to wire pen in but ran out one long piece. Will get more detailed photos of supports once it drys out and also after we install dead men on the walk way.
Picture 0621pic3a.jpg
Door does not appear to straight as we still have finished racking everything and also we
Plan tinning this part. But this is what we have done so far. Will post more when wire is in.
Michelle
1) Design something easy to build.
Materials used all wood PT For 8 x8 section pens
6@ 20 ス inch 2 X 4
12@ 24 inche 45 % ends
10@ 8 X 2 X 4
1@ 8 X 2 X 6
aaaframea.jpg is a picture of the frame.
The floor of the pen is 2 feet off the ground. It is 8 foot high, 8 foot wide, 8 foot long. We built the pens modular style, by my barn to make it easy for electric and air compressor.
2) how do I move it once it is built?
I bought scheduled 80 pipe 6 inches to go over my tractor folks to move everything with. I have included the measurements. Once we had design it took two hours to build each section. We have built 5 sections. We wired the bottom of the pens with 1 ス wire as chukars and quail have small feet and it helps keeping anything from getting the pen.
3) Site prep for pens
I prepared the site for pens by mowing and then spraying weed killer to get all grass down this also helps with predators.
4) Wire I used and why?
The sides are a welded wire 1inch by ス 4 foot up. We will over lapped the wire on the out side of the pen as I had a roll 1 inch by 2 inch decided not to cut it just overlap. I am waiting for more 1 ス wire to come in so we can finish.
5) What to use on top?
I order 2 inch netting for the top and will use some metal pipe I have maybe to keep netting tight I have made up my mind yet about that. We have tinned two parts to give the birds cover and a catch area.
One part is completed isolated so I can have two different age groups of birds. In the big pen. I will tin the very end to provide a wind break. To help the wind from hitting the birds so hard, also we may tin part way up. But I will decide that later. But here is what we have done so far.
6) how to tie everything together
Once pens were built we moved them but placed wire on bottom first to keep from racking too much. The next step was to level pens, and lagged together. As you can see from photos we started to wire pen in but ran out one long piece. Will get more detailed photos of supports once it drys out and also after we install dead men on the walk way.
Picture 0621pic3a.jpg
Door does not appear to straight as we still have finished racking everything and also we
Plan tinning this part. But this is what we have done so far. Will post more when wire is in.
Michelle