KY Gun Geek
Silver Member
- Joined
- Apr 3, 2012
- Messages
- 114
- Location
- Lexington, KY
- Tractor
- JD 5105, JD 5055D, 2 JD 5085M's, JD 5085E, JD 5093E, JD 5115M
Working on repowering a JD 757 zero turn mower and had a little issue with the charging light:
http://www.tractorbynet.com/forums/john-deere-lawn-garden/354342-757-repower-charging-light.html
Got a few requests for more info, so I figured I start this thread.
The 757 (and other models, I think) are notorious for blowing heads. I have 2 of these things, and have already blown one set each, and at the end of last fall blew them both again. one has about 950 hrs, one has 1200 hours. I'm getting 500 - 600 hrs on each head. This is a known issue, but JD and Kawaski seem to be pointing fingers. A company called Repower Specialists offers a kit so you can swap the engine and get away from the problem:
John Deere 757 Replacement Engines - Repower Specialists
I ordered the kit and am working on the install.
The kit comes with:
1) New engine (Honda GX690),
2) A plate to adapt mounting holes and adjust height in 757 chassis
3) New throttle and choke cables
4) Hardware
5) Cheap test light (really? You actually need a multimeter meter to do this right)
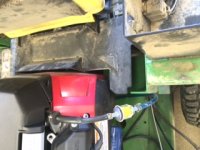
There are instructions, but they are pretty minimal. I didn't really need step by step, but a few tips would have been nice. Back and forth placement of motor is critical, and some pointers would have saved me from several repositionings - it is hard to know where the seat and back cover will hit and it is a tight fit.
As of this writing, I have the motor installed & running, and have done some test mowing. Remaining is some shroud cutting, and tidying up. I have been very slow and careful, and so far I have about 12 hours invested with another 4 to go. This includes fixing a few other things on the mower that are best done when you have stuff apart - i.e. belts. I think you could do this in one really tough day, or maybe the better part of 2 days.
Problems (i.e. things I think Repower could have done better on)
1) Mounting plate design/machining
The plate is very solid and clearly done with care. There are 4 tapped holes that must line up with the holes in the mower chassis. Mine was off by about 1/32 of an inch. Not a big deal if you have easy access - lift the plate a little, wiggle the bolt a little, but a couple of the holes have other components very close on the under side. I ended up reaming out the chassis just a little, and still had to have some one else work the plate while I worked the bolt to get it started. Sloppier holes and nuts would have been a much easier install.
2) Throttle cable
You get a new cable because the old ones aren't long enough. Well, problem is that you can't actually mount the new throttle cable because you can't take the knob off the lever to get it through the slot. You can't take the mount/lever assembly apart because it is press riveted in. I ended up drilling out the rivet so I could slip the lever in from the top and the mounting bracket in from the bottom. The OEM JD part has a bolt pivot point which I used in the one I drilled out. Yes, this took a bunch of time.
3) Charging light - see the other thread. I still don't have a good answer for this.
Things you will probably have to deal with (i.e. just the way it is)
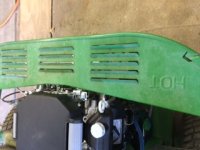
1) Cutting rear cover. This could possibly be avoided with a rework of the exhaust. However, Honda sells 2 or 3 styles OEM (amazon and eBay shopping). I'm sure they would make a special for repower, but I'm sure it would add cost.
2) Cutting the seat bracket. No way to get out of this I don't think. Things are tight.
Special tools/skills
1) Understand how to use a multimeter to measure voltage, and resistance
You will need to find wires that do particular things (12v when starting, 12 v in start and run position, and no connection running - ground when off). My mower had all of these, but finding them takes more than a test light. Well, I guess you could if you were really good, but use a multimeter.
2) Grinder/cutoff wheel/saw
You are going to have to cut some pretty hefty sheet metal. You will need the tools and skills (can you make a presentable cut with a grinder or sawzall?)
Things I'm working on now and will report back
1) Final positioning of mower
2) Cutting back cover
3) Final wire runs, and tie down.
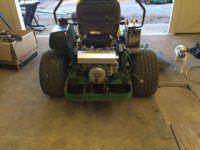
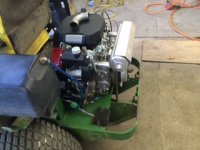
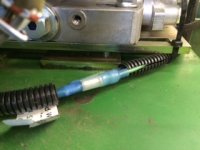
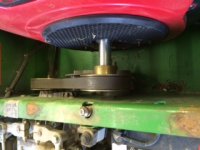
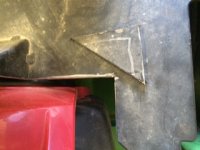
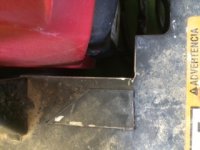
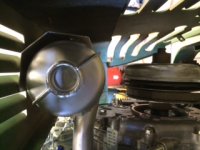
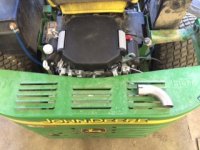
Pics below!
Will report back in a bit on how it runs. The test mow seemed good. Grass is green here, so mowing starts...
http://www.tractorbynet.com/forums/john-deere-lawn-garden/354342-757-repower-charging-light.html
Got a few requests for more info, so I figured I start this thread.
The 757 (and other models, I think) are notorious for blowing heads. I have 2 of these things, and have already blown one set each, and at the end of last fall blew them both again. one has about 950 hrs, one has 1200 hours. I'm getting 500 - 600 hrs on each head.
John Deere 757 Replacement Engines - Repower Specialists
I ordered the kit and am working on the install.
The kit comes with:
1) New engine (Honda GX690),
2) A plate to adapt mounting holes and adjust height in 757 chassis
3) New throttle and choke cables
4) Hardware
5) Cheap test light (really? You actually need a multimeter meter to do this right)
There are instructions, but they are pretty minimal. I didn't really need step by step, but a few tips would have been nice. Back and forth placement of motor is critical, and some pointers would have saved me from several repositionings - it is hard to know where the seat and back cover will hit and it is a tight fit.
As of this writing, I have the motor installed & running, and have done some test mowing. Remaining is some shroud cutting, and tidying up. I have been very slow and careful, and so far I have about 12 hours invested with another 4 to go. This includes fixing a few other things on the mower that are best done when you have stuff apart - i.e. belts. I think you could do this in one really tough day, or maybe the better part of 2 days.
Problems (i.e. things I think Repower could have done better on)
1) Mounting plate design/machining
The plate is very solid and clearly done with care. There are 4 tapped holes that must line up with the holes in the mower chassis. Mine was off by about 1/32 of an inch. Not a big deal if you have easy access - lift the plate a little, wiggle the bolt a little, but a couple of the holes have other components very close on the under side. I ended up reaming out the chassis just a little, and still had to have some one else work the plate while I worked the bolt to get it started. Sloppier holes and nuts would have been a much easier install.
2) Throttle cable
You get a new cable because the old ones aren't long enough. Well, problem is that you can't actually mount the new throttle cable because you can't take the knob off the lever to get it through the slot. You can't take the mount/lever assembly apart because it is press riveted in. I ended up drilling out the rivet so I could slip the lever in from the top and the mounting bracket in from the bottom. The OEM JD part has a bolt pivot point which I used in the one I drilled out. Yes, this took a bunch of time.
3) Charging light - see the other thread. I still don't have a good answer for this.
Things you will probably have to deal with (i.e. just the way it is)
1) Cutting rear cover. This could possibly be avoided with a rework of the exhaust. However, Honda sells 2 or 3 styles OEM (amazon and eBay shopping). I'm sure they would make a special for repower, but I'm sure it would add cost.
2) Cutting the seat bracket. No way to get out of this I don't think. Things are tight.
Special tools/skills
1) Understand how to use a multimeter to measure voltage, and resistance
You will need to find wires that do particular things (12v when starting, 12 v in start and run position, and no connection running - ground when off). My mower had all of these, but finding them takes more than a test light. Well, I guess you could if you were really good, but use a multimeter.
2) Grinder/cutoff wheel/saw
You are going to have to cut some pretty hefty sheet metal. You will need the tools and skills (can you make a presentable cut with a grinder or sawzall?)
Things I'm working on now and will report back
1) Final positioning of mower
2) Cutting back cover
3) Final wire runs, and tie down.
Pics below!
Will report back in a bit on how it runs. The test mow seemed good. Grass is green here, so mowing starts...
