Sniggle
Silver Member
- Joined
- Jan 27, 2008
- Messages
- 233
- Location
- Jefferson County, WV
- Tractor
- 2003 Kubota B7800 (new to me @ 435 hours
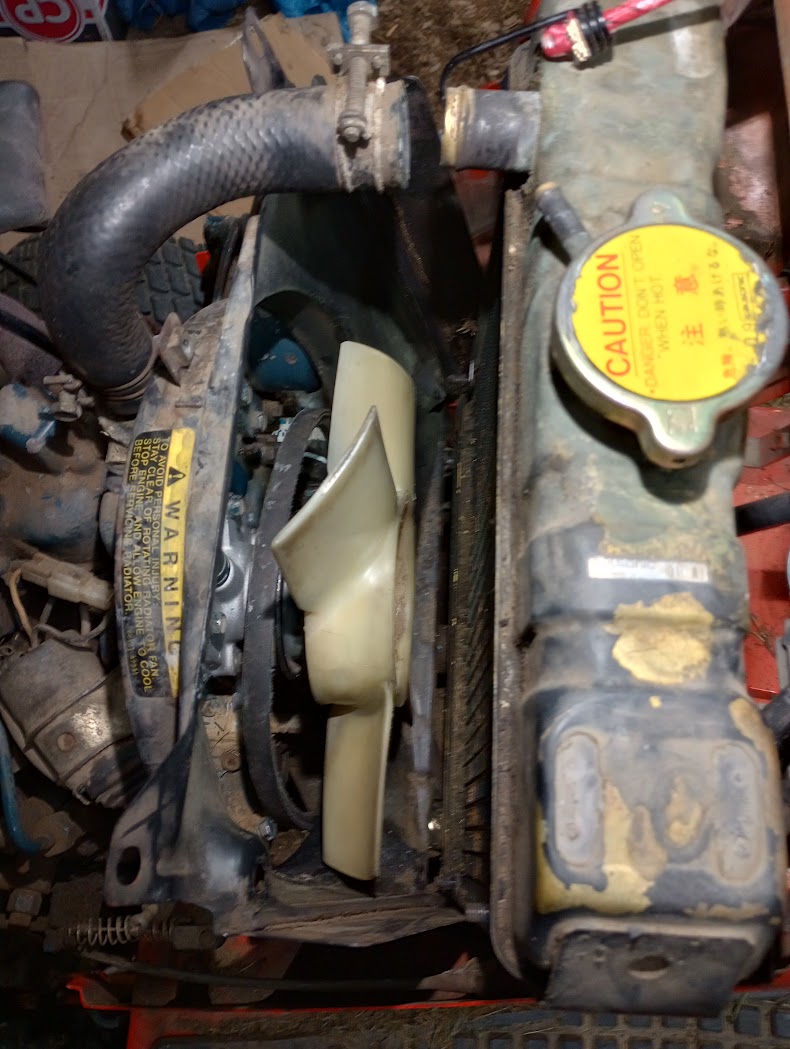
Yesterday (and the day before actually) I replaced the radiator on my G1900. It has started to leak, an although it still worked, the radiator fluid would get the screen wet and then all the grass would stick to it and the radiator itself, causing constant air flow issues.
Parts cost was about $480 delivered to include the radiator assembly, news support rubber cushions and new top rubber cushions.
It took me about 2.5 hours to get the old one out and about 2 hours to get the new one in, working slowly.
The radiator is only attached by 2 bolts at the bottom of the units, attaching it to the frame with a rubber cushion between the radiator and the frame. Each of the bolts has a cotter pin through the top to keep the bolts from backing out (I learned about them after some frustration).
The job can be done without removing the motor, as I did, but it takes some trial and error to find out how to access the bolts with the wrench. You will need to remove the end of the drive shaft from the motor mount to get the room you need to access the bolts.
The cowling at the front of the radiator needs to be removed from the radiator and placed first before assembly and disassembly.
The one thing I have as of yet been unable to do is replace the cotter pin on the left hand bolt. I just can not get my hand or any tool in the small space with the cotter pin to try and find the hole, and there is no way to even see the top of the bolt. I tried for about 30 minutes, and gave up for now. I may try again in a week, and I will watch to ensure that the bolt does not back out.
Although I kinda enjoyed the challenge, for someone not terribly mechanically inclined trying to access the under side of the tractor with limited tools was difficult. I appreciate that my wife knew me well enough to leave me alone as I struggled with the beast")
Parts cost was about $480 delivered to include the radiator assembly, news support rubber cushions and new top rubber cushions.
It took me about 2.5 hours to get the old one out and about 2 hours to get the new one in, working slowly.
The radiator is only attached by 2 bolts at the bottom of the units, attaching it to the frame with a rubber cushion between the radiator and the frame. Each of the bolts has a cotter pin through the top to keep the bolts from backing out (I learned about them after some frustration).
The job can be done without removing the motor, as I did, but it takes some trial and error to find out how to access the bolts with the wrench. You will need to remove the end of the drive shaft from the motor mount to get the room you need to access the bolts.
The cowling at the front of the radiator needs to be removed from the radiator and placed first before assembly and disassembly.
The one thing I have as of yet been unable to do is replace the cotter pin on the left hand bolt. I just can not get my hand or any tool in the small space with the cotter pin to try and find the hole, and there is no way to even see the top of the bolt. I tried for about 30 minutes, and gave up for now. I may try again in a week, and I will watch to ensure that the bolt does not back out.
Although I kinda enjoyed the challenge, for someone not terribly mechanically inclined trying to access the under side of the tractor with limited tools was difficult. I appreciate that my wife knew me well enough to leave me alone as I struggled with the beast