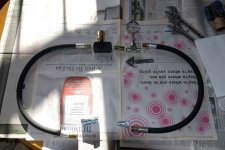
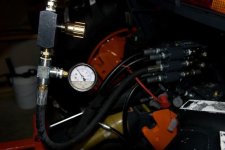
Today's project was more an exercise in tuning the tractor to it's full potential. In particular, I found that the hydraulic pressure was pretty significantly below spec, measuring around 2400 PSI when it should be 2700 +/-70 PSI. To measure everything, a gauge was needed so I made up this test fixture. It's modeled after one I borrowed from someone.
This first picture shows the parts all laid out, but not assembled. It's set up so it can be placed in line with the backhoe, or dead-ended off any hydraulic outlet. There is also a flow restrictor so a hydraulic load can be applied including completely shutting off the flow. Total parts cost was $100 from NorthernTool, $40 of which was the flow restrictor and could be ommitted. The simplest form would just be a coupler nipple and a gauge and would cost maybe $30.
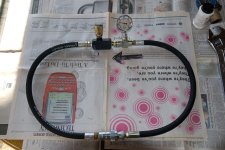
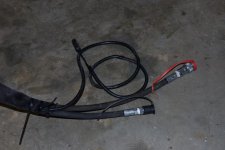
Here it is assembled and ready to go. I actually discovered a problem - the gauge doesn't seem to work properly. You can see in the picture that it's reading about 500 PSI sitting on the table. With a load applied, it's response is extremely sluggish and slowly builds up. I ended up swapping it out for another gauge that I had removed from my old
B2910.
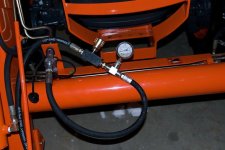
The stock Grand L series has a single pressure relief valve in the loader valve that protects the whole system. It adjusted by adding or removing shims inside the valve. I've got the optional 3rd function on the loader, and it gets plumbed into the system AHEAD of the loader valve, so it has to have it's own relief valve. Adjusting the pressure has to be done in two steps, one for each of the relief valves.
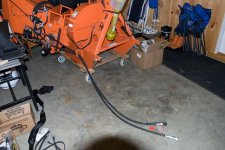
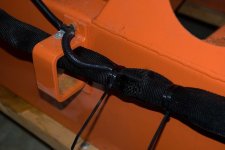
You need to start with the first one in the series of flow, and it should be set slightly higher than the next. That means starting with the 3rd function. To measure the pressure, I hooked up my new gauge to the 3rd function outlet on the loader. In this case the gauge is dead-ended and the restrictor valve is closed all the way. Activating the remote causes the pressure to build up and trigger the relief valve.
The pressure was about 2500 PSI, so I adjusted it up to a bit over 2700 PSI to place it at the high end of the allowable range. Adjustment is much easier on the 3rd function since it has a screw adjuster and lock nut. It's the thing sticking out between the hoses.
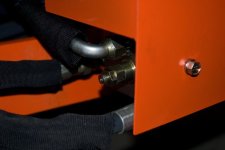
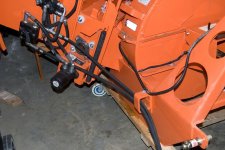
Next is the main relief valve in the loader valve. To measure it, the gauge can be hooked up to anything downstream of the loader. I picked one of the rear remotes, again with a dead-end configuration. Activating the remote causes the pressure to build up and trigger the relief valve.

This time the pressure was only reading about 2400 PSI, which is a good bit low. To adjust it you need to remove the plug on the bottom of the loader valve and add shims under the spring. Unfortunately the port dribbles oil the whole time the plug is removed, so have a container of some sort ready to catch it. In the time I took to add the shims and get it back together, which included a trip to my workbench with the plug, spring, and valve body, I only lost about a pint of fluid, so the dribble isn't a big deal, just a source of a mess if you aren't ready for it. With shims added, I'm getting about 2600 PSI which is still a bit low, so I'll have to get another shim or two and take another run at it another day. I'd like to see it at 2700 PSI


")
