Building our retirement home

   / Building our retirement home #111  
It may have been mentioned before, but there are many Home Design computer programs out there that let you design and modify your plans to suit yourself - I was able to print my plans and have them approved (they could be put together as a full sized plan) The materials provider used their engineer / architect to design and manufacture my trusses (both floor and roof) from my plan. You (or others reading the thread) might want to look at software to design your home - those plans could save an engineer or architect time and you money.

 
   / Building our retirement home
  • Thread Starter
#112  
Alright, it's been a few days since I last updated. Made an overnight run to north of Chicago to pick up some furniture - about 1350 miles round-trip. The house is nowhere close - but we're going to have furniture! LOL

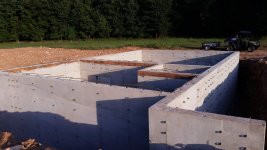
The basement walls have been poured, so it's good to see something finally taking shape. The forms will stay up at least 24 hours.

20150806_100510.jpg 20150806_095556.jpg
 
   / Building our retirement home
  • Thread Starter
#113  
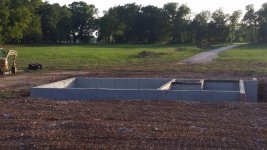
The forms were removed and now I can finally get a feel for what the basement will look like. It's approximately 1000 sq ft, including a game room, storage closet, bath w/shower and a safe/media room.

The L-shaped area is the media room and bath. It will have a 36" steel security door. The small enclosed square will be the storage closet - only 6' x 6' - but it will house the sump pumps and serve as food storage. The media room and bath will have a concrete cap.

That is my handy dandy Cub Cadet in the background.

20150809_191751.jpg 20150809_191851.jpg
 
   / Building our retirement home
  • Thread Starter
#114  
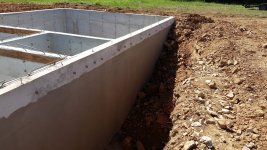
Two coats of water-proofing were applied. The external perimeter drain was put in place and back-fill has begun. Next step will be preparing to pour the floor, which will probably happen along with the house footings.

20150812_105650.jpg 20150812_105741.jpg

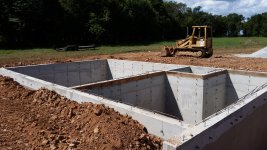
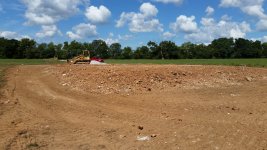
In this final pic, you can see a lot of the basement diggings have been used to raise the pad site.

20150812_110005.jpg
 
Last edited:
   / Building our retirement home #115  
I hope you have good weather and take a lot of pictures during the building of your retirement home. One thing though I don't think I would have today that I have in my retirement home now if building today and that is a basement. The legs just aren't what they used to be. But that is if building again in my area. If building in you area, I would probably have a safe room in the basement. :laughing: The wind just doesn't like Oklahoma and is always trying to blow it somewhere else.
 
   / Building our retirement home
  • Thread Starter
#116  
One thing though I don't think I would have today that I have in my retirement home now if building today and that is a basement.

We're designing this home for our future needs. The stairwell into the basement has been made 5' wide, to facilitate the later installation of a lift.

BTW ... I have no idea why the pics in my last post appear as links and not thumbnails :confused3:
 
   / Building our retirement home #117  
Wish they had vibrated my foundation/basement walls as well as yours! Mine are quite a bit more "holey". I think the concrete mix was also a bit too dry, but maybe that means it's stronger.

- Jay
 
   / Building our retirement home #118  
The forms were removed and now I can finally get a feel for what the basement will look like. It's approximately 1000 sq ft, including a game room, storage closet, bath w/shower and a safe/media room.

The L-shaped area is the media room and bath. It will have a 36" steel security door. The small enclosed square will be the storage closet - only 6' x 6' - but it will house the sump pumps and serve as food storage. The media room and bath will have a concrete cap.

That is my handy dandy Cub Cadet in the background.

View attachment 437447 View attachment 437448

Coming along nicely. I look forward to seeing the framing started.
 
   / Building our retirement home
  • Thread Starter
#119  
Coming along nicely. I look forward to seeing the framing started.

ME TOO!!!

We've really been stuck on selecting our windows. The framer is going to expect dimensions in just a few days and we have yet to settle on the source. We're waiting on, what we hope, will be the proposal that works for us. We're not a fan of the typical vinyl windows on the market, instead wanting oak - or at least wood-clad oak. With luck we'll hear something tomorrow.
 
   / Building our retirement home #120  
I will say this, sticking the stone veneer on looks pretty easy but I imagine you need the right touch with the mortar mix. We had a few stones get knocked off during construction when the electricians were drilling/cutting to mount fixtures, and those I stuck back on with construction adhesive (worked fantastic). Makes me think you could do the whole thing that way if it was a "dry stack" style without any mortar or grout between stones. If I ever do driveway columns to match our home, I figured I'd build the column with concrete block, then glue on the veneer with construction adhesive.

When I install fake stone, I like to use tile thinset mortar. It's more money, but the result is far superior. It sticks great and holds forever. I even use a half inch tile trowel for applying the thinset to the back of the stones. I've found that doing one stone at a time, and chimpping away at the corners of them to get them to fit works the best or me. I also use a diamond blade in my cordless saw and cut the backside of them. The blade only goes half way through, so when I break it off with my hammer, it looks natural. My favorite hammer to use on fake stone is my welding slag hammer.
 

Tractor & Equipment Auctions

1972 Ford F600 Grain Truck (A51039)
1972 Ford F600...
2021 New Holland P2350 Air Cart  New, Tow-Between, Intellirate Control, Dual Tires (A51039)
2021 New Holland...
PLEASE CHECK BACK!!! ITEMS BEING ADDED DAILY!!!! (A50774)
PLEASE CHECK...
Craftsman YTS 3000 42in. Riding Mower (A49346)
Craftsman YTS 3000...
2018 John Deere S780 Combine (A50657)
2018 John Deere...
2022 GTS FS35-G2 Flex Draper Header (A50657)
2022 GTS FS35-G2...
 
Top